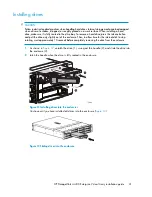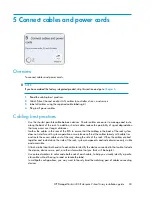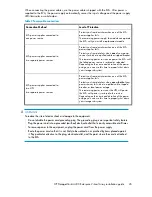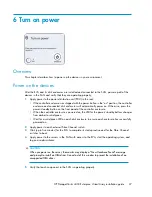
When connecting the power cables, use the power cables shipped with the EVA. After power is
supplied to the EVA, the power supply automatically senses the input voltage and the power supply
LED illuminates as solid amber.
Table 3 Power cable connections
Level of Protection
Connection Method
Protects you from downtime when one of the EVA
power supplies fails.
The remaining power supply/fan module can operate
the EVA until you install a replacement module.
EVA power supplies connected to:
one power source
Protects you from downtime when one of the EVA
power supplies fails.
Protects you from data loss when
one
of your power
sources fails, due to a pulled cable or tripped breaker.
The remaining power source can power the EVA until
the failed power source is restored or relocated.
Depending on the cause and duration of the power
outage, you can use this time to properly shut down
your storage sub-system.
EVA power supplies connected to:
two separate power sources
Protects you from downtime when one of the EVA
power supplies fails.
Protects you from data loss when
one
or
both
of your
power sources fails, due to a pulled cable, tripped
breaker, or local power outage.
The remaining power source or the UPS will power
the EVA until power is restored to the source.
Depending on the cause and duration of the power
outage, you can use this time to properly shut down
your storage sub-system.
EVA power supplies connected to:
two UPS
two separate power sources
WARNING!
To reduce the risk of electric shock or damage to the equipment:
•
Do not disable the power cord grounding plug. The grounding plug is an important safety feature.
•
Plug the power cord into a grounded (earthed) electrical outlet that is easily accessible at all times.
•
To remove power to the equipment, unplug the power cord from the power supply.
•
Route the power cord so that it is not likely to be walked on or pinched by items placed against
it. Pay particular attention to the plug, electrical outlet, and the point where the cord is attached
to the EVA.
HP StorageWorks 4400 Enterprise Virtual Array installation guide
35
Summary of Contents for StorageWorks 4400
Page 16: ...Figure 4 Installation checklist cont d About this guide 16 ...
Page 20: ...Review and confirm your plans 20 ...
Page 24: ...Remove product from packaging 24 ...
Page 36: ...Connect cables and power cords 36 ...
Page 48: ...Configuring management servers using HP SmartStart EVA Storage 48 ...
Page 50: ...Configuring application servers for Windows using HP SmartStart EVA Storage 50 ...
Page 78: ...Configuring non Windows application servers 78 ...

