Rapid Eye™ Hybrid LT DVR Installation Guide
Document 800-07766V4 Rev A
57
01/2013
Note
ACUIX IP PTZ cameras connect and configure differently from analog PTZ
cameras. This section focuses on analog PTZ cameras. ACUIX IP PTZ
cameras do not connect physically to the rear panel of the Rapid Eye DVR.
Instead, video, data and PTZ controls are communicated to the Rapid Eye
Hybrid LT unit through the network connection. See the documentation
included with your ACUIX IP PTZ camera for more information.
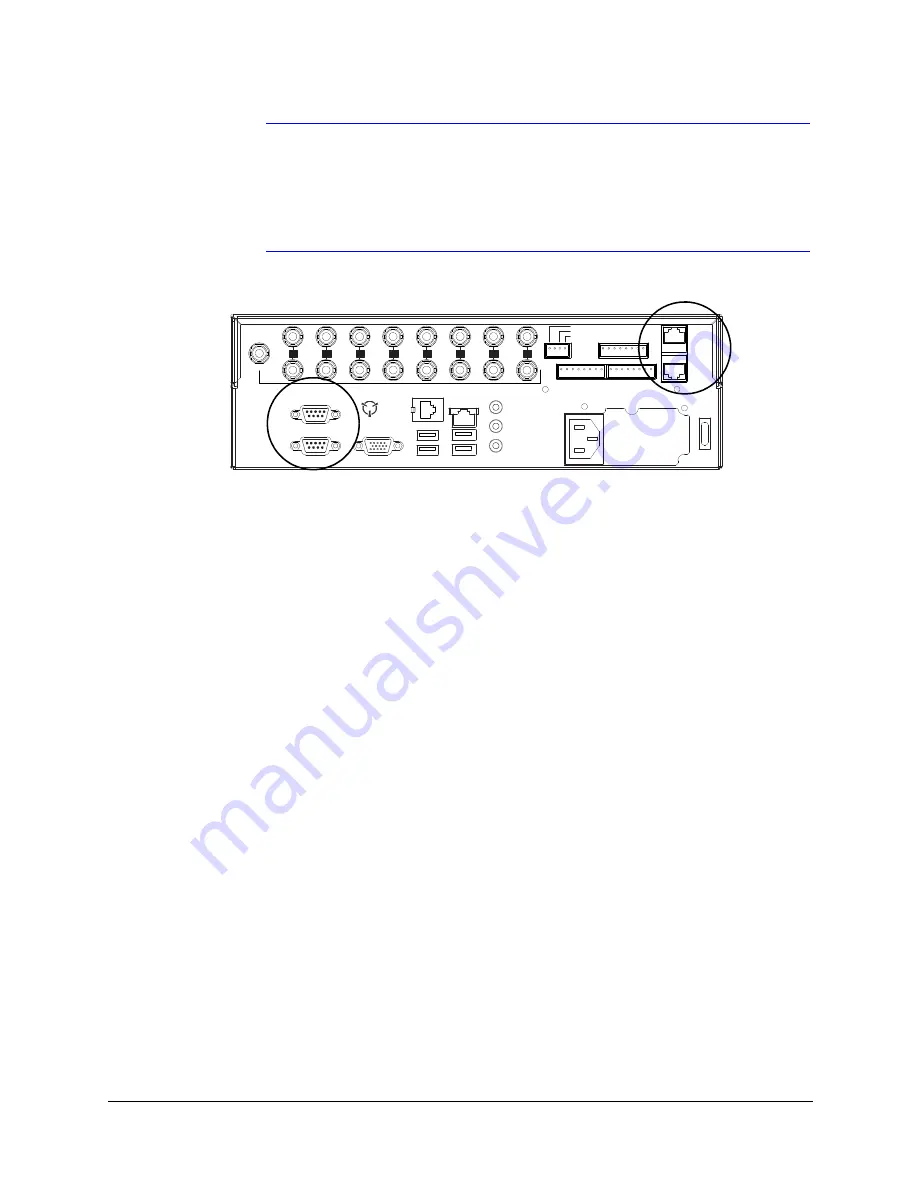
Figure 5-3
Serial Ports 1 to 4
ACUIX Analog PTZ Cameras
An analog ACUIX™ PTZ camera dome with Intellibus™ can be connected to a Rapid Eye
Hybrid LT DVR and configured using Rapid Eye View software.
1. Set ACUIX cameras to their Intellibus mode (Intellibus-PTZ).
2. Set DIP switch 5-8 to ON, on each ACUIX camera. Set the Camera Address using
rotary switches (SW1 to SW4) on the PCB at the base of the dome. Do not use the
same Camera Address on two or more domes connected to the same bus.
3. Connect the ACUIX cameras to a port on the Rapid Eye Hybrid LT DVR.
4. Notify the System Administrator of the number of the port used on the Rapid Eye LT
DVR and the Camera Address used for each ACUIX camera.
Many PTZ Domes on One Serial Communications Line
You can connect up to 8 domes on one communication line connected to the Rapid Eye
Hybrid LT DVR. Terminate the communication input(s) of the last dome in the chain. Leave
other domes un-terminated.
HD6/KD6/KD6i Domes
The HD6 / KD6 / KD6i domes cannot share the same serial communications line with other
makes and models of domes.
SERIAL PORT 2
SERIAL PORT 1
VGA
TELCO
USB
USB
LAN
IN
OUT
NOT
USED
1
2
3
4
5
6
7
8
SPOT
MONITOR
VIDEO
INPUTS
COMMON
SYS FAIL
SYS GOOD
F
AULT
RELAY
28V, 3A
MAX
1 G
G
G
G
2
3
4
CONTROL
OUTPUTS
SERIAL
PORT 3
SERIAL
PORT 4
1 G
G
G
G
2
3
4
5 G
G
G
G
6
7
8
ALARM
INPUTS
ON/OFF
POWER
115-230V~
50/60 Hz
5-3A
Serial Ports 3
and 4: RS485
ports (8-pin)
for
and for serial
Serial Ports 1 and 2:
RS232 ports (9-pin)
Summary of Contents for Rapid Eye Hybrid LT
Page 2: ......
Page 3: ...Installation Guide ...
Page 8: ...8 Contents ...
Page 10: ...10 Figures ...
Page 12: ...12 Tables ...
Page 24: ...24 Introduction ...
Page 66: ...66 Site Hardware ...
Page 70: ...70 Frequently Asked Questions ...
Page 84: ...84 ...
Page 85: ......


