06-1491-00-12.fm
145
Attachments and Options
Cleaning the dirt hopper and circulating water system
1. Lock the dirt hopper with the transport protection device, see page 130.
Drive the vehicle to a suitable cleaning place and empty it.
2. Half raise the dirt hopper and open the lock
of the sump flap
(hopper floor). Then bring the dirt hopper into its end position.
3. Clean the dirt hopper from the inside with a water hose or a high-pres-
sure cleaner. Pay special attention to the lateral filter sieve
Fig. 142-A
and the filter sieve
in the lid.
The dirt hopper can also be cleaned through the side doors
.
The suction fan of the dirt hopper must be switched off so that the doors
can be opened!
Clean with the auxiliary tool as required or remove the contaminated fil-
ter sieve.
4. When the dirt hopper is raised, the valve of the settling tank
Fig. 142-C
opens. Clean the settling tank and flush the circulating water system
thoroughly with water.
5. Half lower the dirt hopper and close the sump flap lock.
6. Lower the dirt hopper fully with the joystick
run until clear water emerges at the suction mouth.
7. Fill the dirt hopper with circulating water, see page 129.
Draining the fresh water
1. Lock the dirt hopper with the transport protection device, see page 130.
Drive the vehicle to a suitable cleaning place.
2. Unscrew the drain screws
Fig. 143-A
on both sides of the fresh water
tank
Fig. 143-43
and empty the tank. Use a new seal when screwing in.
3. Also empty the sieve filter,
Fig. 139-A
.
Draining the circulating water
1. Lock the dirt hopper with the transport protection device, see page 130.
Drive the vehicle to a suitable cleaning place.
2. Unlock the transport protection device.
3. Lower the sweeping unit with the joystick
circulating water.
Optionally with circulating water drain, see page 135.
C
B
A
Fig. 142:
E
D
Note
At temperatures below 0 degrees (risk of frost) drain the water
out from all water-conducting components.
Fig. 143:
A
Note
At temperatures below 0 degrees (risk of frost) drain the water
out from all water-conducting components.
Summary of Contents for Citymaster 1600
Page 22: ...22 01 1491 00 12 fm Safety Instructions G A B D E F Fig 3 C F C E C D G A B A...
Page 26: ...26 02 1491 00 11 fm Operation Fig 5 25 23 16 18 17 19 22 21 20 24 26 27...
Page 30: ...30 02 1491 00 11 fm Operation Fig 7 62 63 61 67 55 50 51 54 53 52 58 57 59 60 65 64 66 68 56...
Page 32: ...32 02 1491 00 11 fm Operation Fig 8 75 69 78 73 72 79 80 81 82 83 74 77 70 71 76 84...
Page 85: ...04 1491 00 11 fm 85 Technical Data 4 Technical Data Fig 80 3830 1600 941 1210 975 1964...
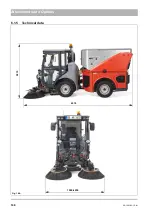
Page 146: ...146 06 1491 00 12 fm Attachments and Options 6 1 5 Technical data Fig 144 2215 4510 1580 2250...
Page 220: ...220 06 1491 00 12 fm Attachments and Options...


