Summary of Contents for LABELROBO LCX603

Page 1: ...LCX603 UM 651 01 9370 603 SETUP MANUAL Installing manual for service person MANUAL NO LCX603 UM 651 LABELROBO ...

Page 2: ......

Page 3: ...LCX603 UM 651 9370 iii HISTORY OF REVISIONS No Date issued Description of revision Page Edition 1 12 3 27 First Printing All 01 2 3 4 5 6 7 8 9 10 11 12 13 14 15 16 17 18 19 20 21 22 ...

Page 4: ...ries 2 9 2 5 Confirming the power supply and the LAN cable 2 10 2 6 Parts Names and Functions 2 11 2 7 The Flowchart of Setup 2 15 2 8 Connecting the AC power cable 2 16 2 9 Installing the Cutter Pen 2 17 2 9 1 Preparing the Cutter Pen 2 17 2 9 2 Installing the cutter pen to the LCX603 2 19 2 9 3 How to use the control panel 2 20 2 10 Turning on the power 2 22 2 11 Installing the media to the medi...

Page 5: ... Distance Adjustment 2 63 2 19 Adjusting the print head position 2 68 2 20 Installing the Separator 2 75 2 21 Cross cutter setting 2 80 2 22 Installing the laminate 2 82 2 23 Setting the Anti Wrinkle Line 2 87 2 24 Setting the Registration Mark Type 2 89 2 25 Setting the Unit Length 2 91 2 26 Setting the Frame Cut 2 92 3 Installing the Printer Driver 3 1 3 1 When send the print data via the USB 3 ...

Page 6: ...CX603 to your customers s site When installing the LCX603 on a table please use a durable solid table with a surface larger than 1000 mm 400 mm Leave sufficient space for operations in front of and behind the printer 500mm 50mm 1000mm 500mm Notes for installation of the LCX603 When setting up on a desk or work table make sure there are two people to carry out the task Do not use the handle in the ...

Page 7: ...A Resin Resin ink ribbon printing test for the head 2 Blue ribbon 1 roll Ink ribbon RP120 R R4A Resin Resin ink ribbon printing test for the head 3 Red ribbon 1 roll Ink ribbon WD120 B R4A Semi Resin Semi Resin ink ribbon printing test for the head 1 Black ribbon 1 roll Ink ribbon WD120 BL R4A Semi Resin Semi Resin ink ribbon printing test for the head 2 Blue ribbon 1 roll Ink ribbon WD120 R R4A S...

Page 8: ...e LCX603 before setting the LCX603 1 Label Printer Part Names 2 The functions of the control panel lamps and keys 3 How to install the cutting tool 4 How to adjust the blade length 5 How to install the ink ribbons 6 How to install the media 7 How to install the laminate 8 About compatibility of ink ribbon and the material 9 How to adjust the printing density 10 How to adjust the cutting condition ...

Page 9: ...to take out the LCX603 from the packing box When unpacking the LCX603 from woody box make sure there are two people to carry out the task How to take out the LCX603 from the packing box 1 Remove the self tapping screws which are marking by the red circle holding the top panel Remove the self tapping screws which are marking by the red circle Self tapping screw Self tapping screw ...

Page 10: ...LCX603 UM 651 9370 2 2 2 Setup 2 Detach the top panel from the box 3 Take out the accessory box from the packing box of LCX603 Accessory box ...

Page 11: ...ping screws which are marking by the red circle holding the bottom part of outer panels Self tapping screw Self tapping screw Self tapping screw Self tapping screw 5 Lift up the outer panels and then detach the outer panels from the bottom of packing box ...

Page 12: ...m of packing box When carrying the LCX603 make sure there are two people to carry out the task When carrying the LCX603 have the bottom part of the LCX603 Do not use the handle in the media stocker section when lift up the LCX603 otherwise the LCX603 will break Handle ...

Page 13: ...m 400 mm 3 Install in a flat location 4 The weight of LCX603 is about 80 kg the table must be strong enough to put the LCX603 5 Have the bottom part of the LCX603 and then put the LCX603 on the table Notes for installation of the LCX603 When setting up on a desk or work table make sure there are two people to carry out the task When carrying the LCX603 have the bottom part of the LCX603 Do not use...

Page 14: ...rials from the LCX603 before turning on the power of LCX603 1 Remove the PP band holding the separator arm 2 Remove the filament tapes holding the pen block 3 Remove the filament tapes holding the press lever and the cam lever 4 Remove the packing materials from the bottom of the pen block ...

Page 15: ...tup 5 Remove the packing materials from under the push roller 6 Remove the filament tape holding the media stocker 7 Remove the filament tape holding the label tray 8 Remove the filament tape holding the front ribbon stocker door ...

Page 16: ... 2 8 2 Setup 9 Open the front door and then remove filament tapes holding the three ribbon levers and the ribbon stocker lever 10 Open the ribbon stocker door and then remove filament tapes holding the three print heads ...

Page 17: ...plunger PHP32 CB09N HS 1 ps Dancer roller 1 2 2 pcs Ink ribbon flange 12 pcs Ink ribbon Black Semi RESIN 1 Set Winding up form tube Uses for a separator and laminate winder bobbins 4 pcs Cleaning stick 1 Set Media stocker flange Long shaft 1 Set Laminate stocker flange Short shaft 1 Set Separator winder bobbin Separator flange collar Large white gear 1 Set Laminate stocker flange Small black gear ...

Page 18: ...2 Setup 2 5 Confirming the power supply and the LAN cable 1 Confirm the specified AC power is supplied on the AC power outlet Do not connect the AC power cable yet 2 Prepare the LAN cable if the LCX603 connect by the LAN cable ...

Page 19: ...hed Separator winder bobbin Rolls up detached unnecessary media Press lever Opens and closes the press roller when the media is set Laminate bar Used when laminate is set Laminate winder bobbin Rolls up the laminate backing sheet Laminate stocker Sets the laminate Feed roller Feeds the media Press roller Thrusts the media into the feed roller Dancer roller 1 2 Used when setting feeding media Cutte...

Page 20: ...Ribbon stocker Unit that sets the ribbon cassette Media stocker Unit that sets the media USB interface Connector used when connecting this device via USB I F Network interface Connector used when connecting this device via network I F Power switch Switch for turning the power on off AC line inlet Connector that connects the power cord Emergency Stop Switch Press to stop the unit Please use this in...

Page 21: ...for turning power on again Be sure to confirm that the power switch is in the Off O position When the power switch is in the Off position you can turn it On by turning the emergency stop switch clockwise until you hear the click and the switch pops up 1 2 After confirming safety turn the unit s power switch to the On position When turning the power on for the first time after implementing the emer...

Page 22: ... the media is detached Front cover Cover for the ribbon stocker section Cutter Unit Cutting mat Grit roller Push roller Cam lever Tool carriage Tool holder Cutting mat Moves the top of the cutter blades and prevents blade abrasion Grit roller Feeds media and can move from side to side Push roller Thrusts the media into the grit roller Tool carriage Section that moves the cutter forward or backward...

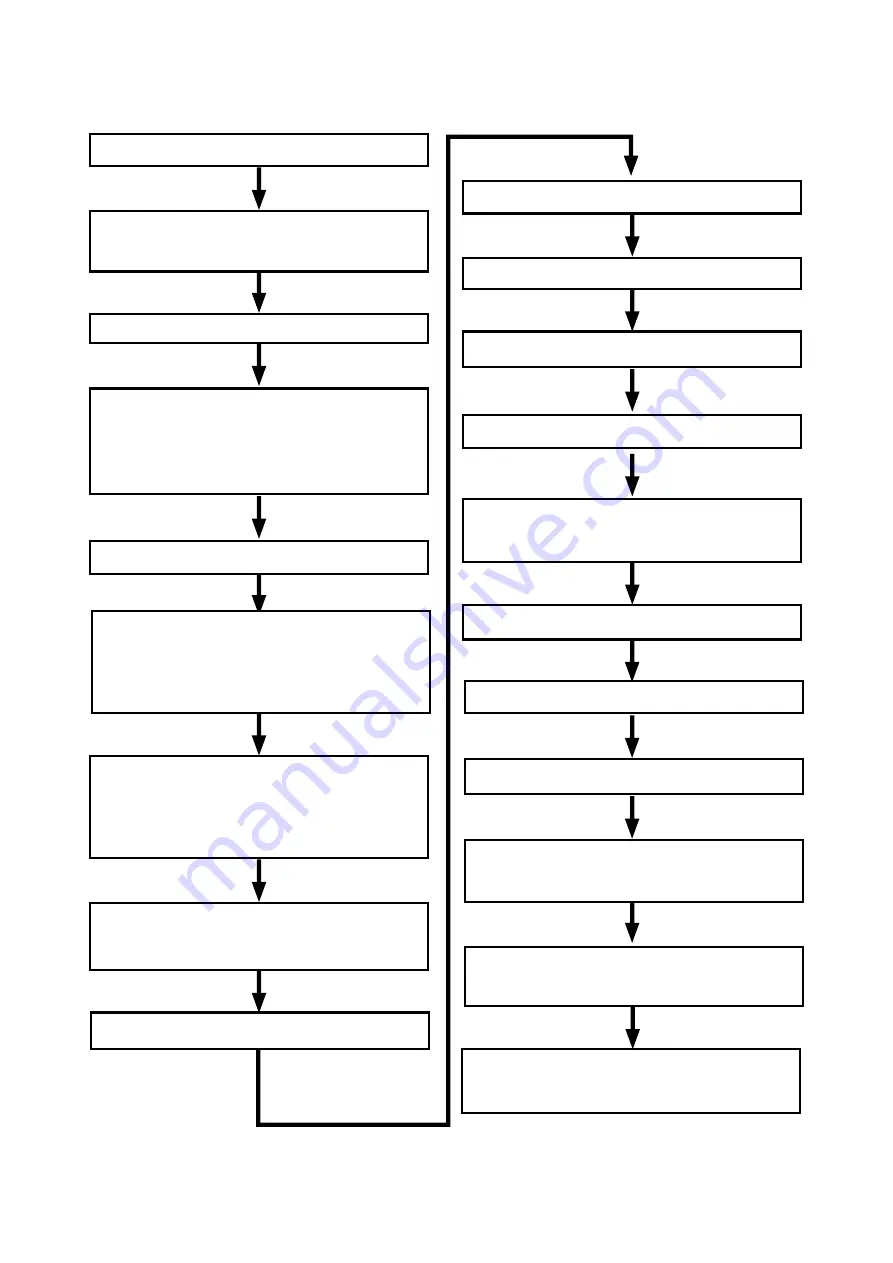
Page 23: ...k Ribbon 2 20 Installing the Separator 2 14 Adjusting the density 2 15 Test Printing and Density Adjustment Output the data to the LCX603 Install the printer driver Explain the operation of LCX603 2 9 1 Preparing the Cutter Pen 2 16 Adjusting the blade length and the tool condition 2 17 Adjusting printing and cutting position 2 24 Setting the Registration Mark Type 2 25 Setting the Unit Length 2 2...

Page 24: ...ns how to turn on the power But do not turn the power on until the label materials have been set 1 Make sure the power switch is in the Off O position 2 Connect one end of the attached power cables to the AC line inlet and the other end to an AC power outlet of the rated supply voltage ...

Page 25: ... LCX603 Model Name Shape Diameter Utilized Plunger Use Features CB09UA 0 9 mm PHP32 CB09N HS Standard cutter for cutting colored film The below cut is appropriate for media with a thickness under 0 25 mm Possible Cutting Length App 4000 m Cutter Pen Part Names The cutter blade is set and used in the cutter plunger Set and use the blades in the suitable cutter plunger Cutter Blade Plunger Plunger c...

Page 26: ...several times and set the most appropriate blade length The blade length varies depending on when the laminate is used not used The blade length is different when the media is laminated or not laminated The blade length should be adjusted after the media was set to the LCX603 B A The cutter blade moves 0 1 mm with one scale unit Blade extends The blade length is adjusted by turning the blade lengt...

Page 27: ...des take full care not to cut your hands When pushing up the tool holder take full care not to injure your fingers on the cutter blades 1 Loosen the tool holder screw 2 While pushing up the tool holder fully insert the cutter pen section until it bumps into the top side of the tool holder Set the bracket to hold tool to cover the flange section of the cutter pen Flange Bracket to hold tool Flange ...

Page 28: ...tem in the menu screen LOCAL Switch between the READY screen and menu screen If pushed during an operation the operation will terminate after one page has completed on the cutting side upon pushing the key and the display will return to the READY screen TOOL COND Switch to the Cutting Conditions Menu in the READY screen CROSSCUT Crosscut media horizontal cutting in the READY screen FEED Send label...

Page 29: ...ition number Printer Menu Screen C O P Y D A T A C L E A R C O N D I T I O N 1 4 P R I N T S E T T I N G P R I N T T E S T P A T T E R N H E A D A D J U S T M E N T 2 4 P R I N T E D L E N G T H R E G I S T R A I O N M A R K U N I T L E N G T H F U N C T I O N S E T T I N G 3 4 The sign which is displayed on the right hand edge of the Menu indicates that the item has subordinate items in the menu ...

Page 30: ...tall the media to the LCX603 If the media is installed the following message will display after showing the version Confirm Combination H3 Semi R H2 RESIN H1 RESIN YES ENTER NO ESC 3 Confirm the combination of ink ribbons that are installing to the LCX603 Press the ENTER Key if the combination is correct After initialization was finished following menu is displayed READY CONDITION 01 Press the ESC...

Page 31: ... match to the media width The prepared media is FNS Mat N50 1310B Set the flange position to 130 mm width 2 Unlock the flange lock plate and then slide the left flange to fit to media width Step 1 Step 2 Step 3 Press the PUSH part of the flange Slide up the flange lock plate Slide the flange to fit to the media width 3 Set the left flange to the 130 mm width position Media width mm 130 70 110 4 Lo...

Page 32: ...the picture below Confirm the rolling direction of media is same as shown in the picture below when the media is installing Confirm there are no gaps between the core of media and the media flange when inserting the flange to the core of media 6 Detach the media stocker from the LCX603 ...

Page 33: ... media width However be sure not to go over the tip of the media Set the media tip to be at this position Step 1 Step 3 Step 2 Gear Position Scale Position scale 8 Install the media stocker to the LCX603 With the exception of replacing media do not pull out the media stocker If the media stocker is pulled out when it is set the media may loosen and printer banding might occur ...

Page 34: ...he LCX603 Media Route The media is loaded as shown in the picture below Feed Roller Laminate gude bar Media exit Press Roller Dancer roller 2 Dancer roller 1 Cutter unit Media stocker How to load the media to the LCX603 1 Take out the Media assist from the accessory box and then set the Media Assist to the LCX603 Use the Media assist when loading the media to the LCX603 otherwise media jams 2 Open...

Page 35: ... open the ribbon stocker door Step 1 Step 2 Ribbon Stocker door Lock lever 5 Pull up the ribbon stocker lock lever as shown in the picture below and then draw out the ribbon stocker station from the LCX603 Step 1 Step 2 Ribbon stocker lock lever 6 Take out the ribbon stocker when the ribbon stocker is mounted on the ribbon stocker station ...

Page 36: ... The pins must be properly fitted to here Media assist 8 Gently push the ribbon stocker lock lever to install the media assist to the LCX603 until hear click sound Push the ribbon stocker lock lever and secure the lever so that the ribbon stocker station is firmly fastened in the slot Step 1 Step 2 Ribbon stocker lock lever Keep the ribbon stocker door open Click 9 Keep the ribbon stocker door ope...

Page 37: ...r arm Press roller lever Separator suppression unit Step 1 Step 2 Step 3 Step 4 Refer to the below diagram for when the press roller lever cam lever separator and separator suppression unit are set closed and when they are open Release Cam lever Press roller lever Separator suppression unit Open condition Open condition Close condition Close condition ...

Page 38: ...lled to the media stocker correctly Install the media to the media stocker correctly L01 No Media Set the Media into stocker Then press FEED key 12 When the following message is displayed insert the media straight through the space between the feed roller and press roller Step 1 2 and then set the press roller lever Step 3 L02 Pass the media throgh press roller and close the lever Then press FEED ...

Page 39: ...nd the separator arm as shown in the picture below step 2 The media should be passed the media feed route The following messages are displayed when the FEED Key is pressed L03 Press FEED key for feeding and setting the media L03 Press ENTER key when finished setting the media Step 1 Pull up the media from here The media should pass under the two cross bar here Step 2 Feed the media until here ...

Page 40: ... through the media into the cutter unit Step 2 Pass through the media into the separator suppression unit Step 3 Pass through the media into the cross cutter section Step 1 Step 2 Cutter unit Pull out the media from here Step3 16 The media should pass through route shown in the picture below ...

Page 41: ...just the exit pinch rollers position Step 3 The exit pinch rollers should be positioned to both edges of media While it is straight close the separator suppression unit Step 4 Step1 Exit pinch roller Step 4 Step 3 Step 2 Separator suppression unit The exit pinch rollers should be positioned to both edges of media Position scale 18 Close the separator arm while pulling the media Separator arm ...

Page 42: ...media Press the ENTER Key after media is installed to the LCX603 L03 Press FEED key for feeding and setting the media L03 Press ENTER key when finished setting the media 22 The following message is displayed Press the ENTER Key this is confirming the separator was set Press the ENTER Key even if the separator was not set L04 Confirm Was the winder bobbin set YES ENTER Above menu will not be displa...

Page 43: ...he ENTER Key until the dancer rollers are installed to the LCX603 L04 Confirm Was the dancer roller set Initialize will start YES ENTER 25 Install dancer roller 1 to the LCX603 as shown in the picture below Insert both sides of the dancer roller into the slot that accepts it Install dancer roller 1 to the side with the red mark Dancer roller 1 Has a red ring mark on both side Red mark There are tw...

Page 44: ...LCX603 UM 651 9370 2 36 2 Setup 26 Confirm the separator arm is closed Separator arm 27 Install dancer roller 1 to the LCX603 as shown in the picture below Dancer roller 2 ...

Page 45: ...or press F4 to continue The laminate will be set later press F4 Key this time When the separator function OFF and the separator bobbin is installed W19 Media winder Remove winder bobbin and press ENTER or press F4 to continue The separator will be set later press F4 Key this time When the laminate function OFF and the laminate bobbin not installed W10 laminate is ins talled Remove it Then press EN...

Page 46: ...LCX603 UM 651 9370 2 38 2 Setup 31 Remove the media assist from the LCX603 and then install the ink ribbon to the LCX603 Media assist ...

Page 47: ... the LCX603 1 Take out the ribbon stocker and the ribbon cassettes from the accessory box Don t drop the ribbon cassettes when the ribbon stocker is taking out from the accessory box 2 Install the ribbon stocker to the LCX603 as shown in the picture below The pins must be properly fitted to here Ribbon stocker ...

Page 48: ...Install the black ink ribbon to the top cassette Head 3 The black ink ribbon must install to the head 3 cassette Ribbon 3 Head 3 Ribbon 2 Head 2 Ribbon 1 Head 1 Ribbon head lever When printing set the ribbon lever to the set position When the media is feeding or the replacing ribbons set the ribbon lever to the release position Ribbon lever set position Ribbon lever Ribbon lever release position ...

Page 49: ... Step 1 While pressing the stopper lever of center back pull the ribbon cassette gently Step 2 The head pressure selector plate for the RESIN and the Semi RESIN ink ribbons There are two types of ink ribbons RESIN and Semi RESIN RESIN Resin type RP120 Semi RESIN Wax type WD120 The head pressure selector plate position have to be selected by the ink ribbon type RESIN Semi R RESIN Semi R Step 1 Pres...

Page 50: ...sing the stopper slide the head pressure selector plate up While pressing the stopper slide the head pressure selector plate down Confirm the print head pressure selector plate position when the ink ribbon was replaced 6 Take out the RESIN ink ribbon and the ribbon flanges from the accessory box 7 Install the ink ribbon flange to the ink ribbon 8 Set the ink ribbon flange to the ink ribbon as show...

Page 51: ...when setting it Push until there is a clicking sound Set the cutout section of the ink ribbon bobbin into the position shown in the below picture Printed side Set the cutout part of bobbin to this side Not yet printed side During set up be careful not to confuse the sending side with the wind up side When set in the ribbon stocker make the area coming toward the upper side the wind up side Take ca...

Page 52: ... up the ribbon if it is slack Rewind until the transparent film is no longer visible Make sure there are no wrinkles in the ink ribbon Missing text occurs when there are wrinkles 14 Set the ribbon cassette in the ribbon stocker 15 Set other ink ribbon of heads in the same procedure Set non black ink ribbons in ribbon 1 Head 1 and ribbon 2 Head 2 Confirm the black ink ribbon is set for ribbon 3 Hea...

Page 53: ...asten the lever so that it is secured in the slot Step 2 and close the ribbon stocker door Step 3 Step 1 Step 3 Step 2 Lever 17 Lock the ribbon stocker door as shown in the picture below Lock lever Setting the ink ribbon is now complete 18 Set the ribbon lever to set position Set the ribbon lever when printing 19 After finishing setting the ink ribbons adjust the density setting to match with the ...

Page 54: ... WD120 B R4A WD120 R R4A WD120 G R4A 2 WD120 BL R4A RP120 B R4A RP120 BL R4A RP120 R R4A RP120 Y R4A RP120 W R4A 3 Media type Media Name Setting Range Guide value of density Setting Range Guide value of density A B C D A B C D FNS Silver base FNS Mat N25 1310B R4 24 to 36 30 24 30 24 42 to 48 45 42 45 42 FNS Mat N50 1310B R4 24 to 36 30 24 30 24 42 to 48 45 42 45 42 FNS Mat S50 1310B R4 24 to 36 3...

Page 55: ... quality YUPO FR5311 85 1310 R4A Printable printing quality is not so good Printable printing quality is not so good FR6311 80 1310 R4A Printable printing quality is not so good Printable printing quality is not so good Gross Paper GrossPW 1310B R4 2 Printable printing quality is not so good Not printable NP COAT Paper NP COAT PW 1310B R4 Printable printing quality is not so good Not printable 1 T...

Page 56: ...s the F1 Key PRINT SETTING the following menu is displayed PRINT DENSITY PAGE PRINT MODE ANTI WRINKLE LINES 7 Press the F1 Key PRINT DENSITY the following menu is displayed CONSTRUCTION MEDIA DENSITY HEAD3 DENSITY HEAD2 DENSITY HEAD1 8 Press the F1 Key CONSTRUCTION MEDIA the following menu is displayed Select the media type FNSmat N50 with the POSITION keys MEDIA TYPE FNSmat N50 SELECT YES ENTER N...

Page 57: ...lect the DENSITY 42 with the POSITION keys HEAD3 DENSITY 42 SELECT YES ENTER NO ESC 12 Press the ENTER key after DENSITY is selected the following menu is displayed CONSTRUCTION MEDIA DENSITY HEAD3 DENSITY HEAD2 DENSITY HEAD1 13 Select the ink ribbon type and the printing density for the head 1 and head 2 by same procedure of the print head 3 density setting 14 Press the LOCAL Key the menu returns...

Page 58: ... pattern Y X Feeding direction Head 3 Ribbon 3 Head 1 Ribbon 1 Head 1 Ribbon 1 Head 2 Ribbon 2 Head 2 Ribbon 2 Head 3 Ribbon 3 How to print the test printing pattern 1 Press the LOCAL Key the following menu is displayed PRINTER MENU CUTTER MENU OUTPUT ALL 2 Press the F1 Key PRINT MENU the following menu is displayed COPY DATA CLEAR CONDITION 1 4 3 Press the NEXT Key until the following menu is dis...

Page 59: ...e ribbon breaks The wrinkle appears after the ink ribbon is installed print the test pattern several times until the wrinkle disappears from the printing result How to adjust the printing density 1 Press the LOCAL Key the following menu is displayed PRINTER MENU CUTTER MENU OUTPUT ALL 2 Press the F1 Key PRINT MENU the following menu is displayed COPY DATA CLEAR CONDITION 1 4 3 Press the NEXT Key u...

Page 60: ... density is adjusted the display returns to the previous screen Press the ESC key to return to the previous screen Press the LOCAL key to return to READY status Adjust the printing density from the printing result of test pattern for all print head If a printing result seems to rub gradually increase the printing density If the ribbon sticks to a head the wrinkle is appeared decrease the printing ...

Page 61: ...h the cleaning stick as shown in the picture below Open the print head area Cleaning stick Heating element area of print head Since there is the possibility of damaging the head if you rub it forcefully or wipe it with a cloth that has not been specified wipe it only with a cleaning stick When particularly dirty apply a little IPA Isopropyl Alcohol 90 purity or greater and rub it gently So as to n...

Page 62: ...oller with the cleaning stick as shown in the picture below Since there is the possibility of damaging the platen roller if you rub it forcefully or wipe it with a cloth that has not been specified wipe it only with a cleaning stick When particularly dirty apply a little ethanol or IPA Isopropyl Alcohol and rub it gently Cleaning stick Platen Roller ...

Page 63: ... marks in the backing sheet If the backing sheet has been completely cut increase the blade length if it is too short and there are remaining cuts in the film Film Backing sheet Film thickness Ideal blade length The blade length is adjusted by turning the blade length adjustment knob Turn the blade clockwise to lengthen the blade turn counterclockwise to retract The blade extends ap 0 1 mm for eve...

Page 64: ...peed to have a good cutting quality Acceleration The acceleration affects to quality of cutting Decrease the acceleration to have a good cutting quality How to adjust the tool condition 1 The media of FNS Mat N50 1310B is installing to the LCX603 Set the 0 for blade offset the 14 for cutting pressure the 15 for cutting speed and the 1 for acceleration 2 Press the TOOL COND Key in READY status the ...

Page 65: ...dition was set and then confirm the cutting quality Confirm the media is cut enough Confirm the corner is cutting correctly Adjust the tool condition if the cutting quality is bad until the cutting quality becomes better How to perform the test cutting 1 Press the TOOL COND Key in READY status the following menu is displayed TOOL CONDITIONS TEST CUT CUTTING WIDTH 2 Press the F2 Key TEST CUT the fo...

Page 66: ...g sheet has been fully cut the cutting force is too high or the blade length is too long In cases where cutting traces are not present in the backing sheet the cutting force is too low or the blade length is too short Peel the triangular section and the remaining thinly cut traces in the backing sheet will be just the right cutting force In cases where the backing sheet has been fully cut the cutt...

Page 67: ...tration mark Start mark Page 1 Page 5 Cut cross Three registration marks are printed in one page How to adjust the printing and the cutting position The 5 page of adjustment patterns will be printed and then the LCX603 will scan the start mark and the registration marks The LCX603 cuts the cross on the printed cross pattern according by the registration marks Then adjust the position between the p...

Page 68: ...NTER key and then the 5 pages of crosses for the adjustment reading are printed Feeding direction Printed cross Ribbon 3 Registration marks Start mark Page 5 Page 1 7 The LCX603 scans the Start Mark and Registration Mark then cut the adjustment cross on the first age with the cutter pen set in the tool carriage Feeding direction Printed cross Page 5 Page 1 8 After the cut the following is displaye...

Page 69: ... become a negative value 10 Press the F2 key X POSITION ADJ and enter the correction value for direction x X POSITION ADJUST 0 0 mm ADJUST YES ENTER NO ESC Change the numerical value 1 5 to 1 5 with the POSITION keys and input the correction value Press the ENTER Key to store the value The menu is returned to the previous screen POSITION ADJUSTMENT X POSITION ADJ Y POSITION ADJ CUT CONFIRMATION 11...

Page 70: ... 2nd page by the cutter Feeding direction Page 5 Page 1 Page 2 Confirm the variance on the page 2 X amount of variance Correction input Y X amount of variance Correction input X 15 After the cut the following is displayed POSITION ADJUSTMENT X POSITION ADJ Y POSITION ADJ CUT CONFIRMATION 16 Confirm the result of the 2nd page If there is gap between the printed cross and the cut cross then repeat t...

Page 71: ...er the correction value Also printing the distance removed data in the direction of the media feed when setting the distance adjustment value refer to the User Pattern Correction printed below The 130 mm width media have to be installed when performing the distance adjustment And the ink ribbons have to be installed for all print heads Adjustment Pattern Instructions Y X First page Second page Y X...

Page 72: ...ng menu is displayed PRINT SETTING PRINT TEST PATTERN HEAD ADJUSTMENT 2 4 PRINTED LENGTH 4 Press the F3 Key HEAD ADJUSTMENT the following menu is displayed ADJ PATTERN PRINT DISTANCE ADJ HEAD 1 POS ADJ HEAD 2 POS ADJ 5 Press the F1 key ADJ PATTERN PRINT the following menu is displayed PRINT ADJUSTMENT PATTERN YES ENTER NO ESC 6 Press the ENTER key Yes and print the adjustment pattern After printin...

Page 73: ...f the LCX603 10 Measure the first page of X distance between crosses printed with Head 3 ribbon 3 and enter the correction value Y X Printed with head 3 Feeding direction Correction value 190 0 mm measured value Printed with head 2 Wrinkle prevention lines Measure the length measured value For example in the above illustration the correction value becomes negative when correction value 190 0 mm me...

Page 74: ...INTED LENGTH 14 Press the F3 Key HEAD ADJUSTMENT the following menu is displayed ADJ PATTERN PRINT DISTANCE ADJ HEAD 1 POS ADJ HEAD 2 POS ADJ 15 Press the F2 Key DISTANCE ADJ the following menu is displayed DISTANCE ADJ 190 0mm 0 0 mm ADJUST YES ENTER NO ESC Input the numerical value 1 5 to 1 5 with the POSITION keys and input the correction value 16 Press the ENTER Key the following menu is displ...

Page 75: ...ONDITION 01 20 Release the ribbon lever Ribbon lever 21 When the ribbon lever released the following message will be displayed Confirm Combination H3 Semi R H2 RESIN H1 RESIN YES ENTER NO ESC 22 Press the FEED Key until the printed media comes out from the exit area of the LCX603 23 Measure the first page of X distance between crosses printed with Head 3 ribbon 3 and confirm the distance x was adj...

Page 76: ...ut the correction value for Head 1 Position Adjustment Measure the second layer and input the correction value for Head 2 Position Adjustment The 130 mm width media have to be installed when performing the print heads position adjustment And the ink ribbons have to be installed for all print heads Adjustment Pattern Instructions Y X First page Second page Y X Printed with head 3 Printed with head ...

Page 77: ... 3 Press the F1 Key PRINT MENU the following menu is displayed COPY DATA CLEAR CONDITION 1 4 4 Press the NEXT Key until the following menu is displayed PRINT SETTING PRINT TEST PATTERN HEAD ADJUSTMENT 2 4 PRINTED LENGTH 5 Press the F3 Key HEAD ADJUSTMENT the following menu is displayed ADJ PATTERN PRINT DISTANCE ADJ HEAD 1 POS ADJ HEAD 2 POS ADJ 6 Press the F1 key ADJ PATTERN PRINT the following m...

Page 78: ...just the print head 3 and the print head 1 horizontal position Measure the amount of variance between the cross mark and the vertical line in the first page This value is used to adjust the print head 3 and the print head 1 vertical position Feeding direction Y X First page Measure the amount of variance between the cross mark and the horizontal line Measure the amount of variance between the cros...

Page 79: ...variance between the cross mark and the horizontal line Measure the amount of variance between the cross mark and the vertical line Printed with head 3 Printed with head 1 Y X Amount of variance Correction X Amount of variance Correction Y 10 Input the amount of variance correction for the X and Y for the head 2 and the head 1 11 Press the LOCAL Key in READY status the following menu is displayed ...

Page 80: ...1 5 with the POSITION keys and input the correction value Press the ENTER Key to store the value The menu is returned to the previous screen HEAD2 POSITION ADJ HEAD2 X HEAD2 Y 17 Press the F4 Key HEAD2 Y to input the head 2 of amount of variance correction for the Y The following menu is displayed HEAD2 Y 0 0 mm ADJUST YES ENTER NO ESC Input the numerical value 1 5 to 1 5 with the POSITION keys an...

Page 81: ...the previous screen HEAD1 POSITION ADJ HEAD1 X HEAD1 Y 21 Press the F4 Key HEAD1 Y to input the head 1 of amount of variance correction for the Y The following menu is displayed HEAD1 Y 0 0 mm ADJUST YES ENTER NO ESC Input the numerical value 1 5 to 1 5 with the POSITION keys and input the correction value Press the ENTER Key to store the value The menu is returned to the previous screen HEAD1 POS...

Page 82: ... the ENTER key Yes and print the adjustment pattern After printing the menu returns to the READY status READY CONDITION 01 25 Confirm the amount of variance for each print heads Readjust the head position if there is amount of variance still ...

Page 83: ...MENU OUTPUT ALL 2 Press the F1 Key PRINT MENU the following menu is displayed COPY DATA CLEAR CONDITION 1 4 3 Press the NEXT Key until the following menu is displayed REGISTRATION MARK UNIT LENGTH FUNCTION SETTING 3 4 4 Press the F3 Key FUNCTION SETTING the following menu is displayed LAMINATE SEPARATOR CROSS CUT FRAME CUT 5 Press the F2 Key SEPARATOR the following menu is displayed SEPARATOR SETT...

Page 84: ...2 Dancer roller 2 Separator arm Step 2 Step 1 2 Take out the flange the separator bobbin shaft and bobbin from the accessory box The separator bobbin shaft has larger white gear than the laminate bobbin shaft Install the bobbin and the flange to the separator bobbin shaft as shown in the picture below 3 Install the separator bobbin shaft to the separator unit as shown in the picture below ...

Page 85: ...or suppression unit Step 6 Separator suppression unit Pull the media out from here Separator arm Cut the adhesive section only at approximately 100 mm from the posterior end of the media Backing sheet Step 3 Step 2 Pull the adhesive section only out from here Step 4 Detach the sdhesive section only Step 6 Step 5 Step 1 Pull the backing media only out from here 5 Put the adhesive part of media to t...

Page 86: ...t the backing part of media Step 2 Close the separator suppression unit Separator suppression unit 7 Close the separator arm while pulling the backing part of media as shown in the picture below And then wind the separator bobbin manually to avoid the adhesive part of media to touch to the white exit pinch rollers Step 1 Pull out the backing part of media Step 2 Close the separator arm Step 3 Wind...

Page 87: ...LCX603 UM 651 9370 2 79 2 Setup 8 Install the dancer roller to the LCX603 Dancer roller 2 9 Open the cam lever and then close the cam lever to initialize the position of the dancer roller 2 Cam lever ...

Page 88: ... if the glue of media attaches to the blade Do not cut anything other than the backing sheet The lifespan of a crosscut cutter blade is approximately 10 000 times How to set the cross cutter function 1 Press the LOCAL Key in READY status the following menu is displayed PRINTER MENU CUTTER MENU OUTPUT ALL 2 Press the F1 Key PRINT MENU the following menu is displayed COPY DATA CLEAR CONDITION 1 4 3 ...

Page 89: ...etup 6 Select ON by using the POSITION Key CROSS CUT SETTING ON SELECT YES ENTER NO ESC 7 Press the ENTER Key to store the setting and the menu returns to the previous menu 8 Press the LOCAL Key the menu returns to the READY menu ...

Page 90: ...ER MENU OUTPUT ALL 2 Press the F1 Key PRINT MENU the following menu is displayed COPY DATA CLEAR CONDITION 1 4 3 Press the NEXT Key until the following menu is displayed REGISTRATION MARK UNIT LENGTH FUNCTION SETTING 3 4 4 Press the F3 Key FUNCTION SETTING the following menu is displayed LAMINATE SEPARATOR CROSS CUT FRAME CUT 5 Press the F1 Key LAMINATE the following menu is displayed LAMINATE SET...

Page 91: ...minate width The prepared laminate is PET16 1110R4A Set the flange position to 110 mm width 3 Unlock the flange lock plate and then slide the left flange to fit to laminate width Step 1 Step 2 Step 3 Press the PUSH part of the flange Slide up the flange lock plate Slide the flange to fit to the media width 4 Set the left flange to the 110 mm width position Laminate width mm 110 50 90 5 Lock in the...

Page 92: ...core of laminate and the laminate flange when inserting the flange to the core of laminate 7 Take out the flange the laminate rewind bobbin shaft and bobbin from the accessory box The laminate rewind bobbin shaft has small black gear than the separator bobbin shaft Install the bobbin and the flange to the laminate bobbin shaft as shown in the picture below 8 Install the laminate rewind bobbin and ...

Page 93: ...minate tension bar to the media Step 1 Fold back the backing sheet side from the laminate tension bar and attach to the laminate winder bobbin with tape Step 2 Laminate tension bar Laminate bar Laminate Laminete backing sheet Step 2 Attach the laminate backig sheet to the rewind bobbin using the tape Step 1 Put the adhesive part of laminate onto the media If the laminate backing sheet is overly sa...

Page 94: ...ES ENTER NO ESC 13 Press the FEED key and always make sure there are no wrinkles when feeding the media and that the backing sheet is wound in the winder bobbin when the laminate is fed When the below message is displayed release the ribbon lever W04 Loading checl Ribbon lever is set Can not feed YES ENTER 14 Readjust the cutter blade length and the cutting force after the laminate is installed ...

Page 95: ...e this has an effect on the printing result In a case such as this set to ON When not necessary use this anti wrinkle lines set this setting to OFF If printing good balance of printing data Feeding direction Anti wrinkle lines How to set the anti wrinkle lines function 1 Press the LOCAL Key in READY status the following menu is displayed PRINTER MENU CUTTER MENU OUTPUT ALL 2 Press the F1 Key PRINT...

Page 96: ...nu is displayed ANTI WRINKLE LINES ON SELECT YES ENTER NO ESC 6 Select ON by using the POSITION Key ANTI WRINKLE LINES ON SELECT YES ENTER NO ESC 7 Press the ENTER Key to store the setting and the menu returns to the previous menu 8 Press the LOCAL Key the menu returns to the READY menu ...

Page 97: ...g is set to 1POINT but the position adjustment accuracy is inferior compared to 3POINT Select 3POINT when an accurate position adjustment is necessary Feeding direction 1 Point Feeding direction 3 Points Origin registration mark Not used in reading correction Origin registration mark Y axis registration mark X axis registration mark Y X Y X How to set the registration mark setting Confirm the regi...

Page 98: ...layed REGISTRATION MARK TYPE 3POINT SELECT YES ENTER NO ESC 5 Select 3POINT by using the POSITION Key REGISTRATION MARK TYPE 3POINT SELECT YES ENTER NO ESC 6 Press the ENTER Key to store the setting and the menu returns to the previous menu 7 Press the LOCAL Key the menu returns to the READY menu ...

Page 99: ...onfirm the unit length is set to mm this time Confirm the registration mark setting is set to the 3 points this time 1 Press the LOCAL Key in READY status the following menu is displayed PRINTER MENU CUTTER MENU OUTPUT ALL 2 Press the F1 Key PRINT MENU the following menu is displayed COPY DATA CLEAR CONDITION 1 4 3 Press the NEXT Key until the following menu is displayed REGISTRATION MARK UNIT LEN...

Page 100: ...et and remove excess residue in the separator unit Horizontal cutting afterward will become smooth as a result Feeding direction Start mark Frame cut In sequence number creation application software etc there is a function that lays out sequence numbers or bar codes in the sheet by designing single layer labels However they are conversely not able to indicate a cutting line for outline cutting As ...

Page 101: ...AMINATE SEPARATOR CROSS CUT FRAME CUT 5 Press the F4 Key FRAME CUT the following menu is displayed FRAME CUT SETTING OFF SELECT YES ENTER NO ESC 6 Select OFF by using the POSITION Key FRAME CUT SETTING OFF SELECT YES ENTER NO ESC 7 Press the ENTER Key to store the setting and the menu returns to the previous menu 8 Press the LOCAL Key the menu returns to the READY menu Installing printer driver at...

Page 102: ...onal limitations of this device In addition display screens from Windows 7 will be used to explain the menu Close any virus detection programs or system resident programs that are running When installing it is necessary to log in as an administrator group member 3 1 When send the print data via the USB How to install the printer driver for USB 1 Confirm the USB cable is not connected to the PC and...

Page 103: ... 1 Select Run MultiSetup exe from the Windows AutoPlay selection menu When software AutoPlay is not setting in Windows 7 1 Select the CD ROM drive from the computer click the right button of mouse then select Open as shown in the picture below 2 Double click the MultiSetup exe to run the MultiSetup exe ...

Page 104: ...taller Start menu will appear 4 Click Install LCX603 Software the following menu is displayed 5 Follow the instructions shown in the menu and then click OK button 6 Confirm the LCX603 is not connected to PC via the USB and then click Next button 7 Click Next button ...

Page 105: ...inter driver is copied to the PC 10 The following menu is displayed after copying is finished 11 Click on the checkbox entitled Always trust software from Graphtec Corporation to place a checkmark inside it 12 Click the Install button to install the USB driver 13 Click the OK button and then connect the LCX603 and the PC via the USB cable ...

Page 106: ...the LCX603 15 The device driver will be installed 16 The following menu is displayed after the device driver was installed 17 Installation of a USB driver is an end now If the installation is successful Graphtec LCX603 will display within Start Devices and Printers using Windows 7 ...

Page 107: ...llowing menu is displayed when the media is installed Confirm Combination H3 xxxxxx H2 xxxxxx H1 xxxxxx xxxxxxxxx YES ENTER 3 Press the ENTER Key DHCP Setting Set the DHCP setting to OFF And have a IP address for the LCX603 The IP address should be assigned by the administrator of network The LCX603 will be disconnected from the network when the DHCP server was released the IP address for device b...

Page 108: ...ning the setting from ON to OFF or from OFF to ON PRINTER IS RESET YES ENTER NO ESC Press the ENTER key to reset Resetting will take time when DHCP is set to ON Press the ESC key to return to the previous screen Press the LOCAL key to return to READY status IP Address Setting The IP address cannot input when the DHCP setting is set to ON Set the DHCP setting to OFF before the IP address is input 1...

Page 109: ...he previous screen Press the LOCAL key to return to READY status The below message will display when DHCP is ON After confirming press the escape key to return to full screen IP ADDRESS xxx xxx xxx xxx RETURN ESC Subnet mask input display The subnet mask cannot input when the DHCP setting is set to ON Set the DHCP setting to OFF before the subnet mask is input 16 Press the LOCAL Key in READY statu...

Page 110: ...ress the ESC key to return to the previous screen Press the LOCAL key to return to READY status Gateway input display The gateway cannot input when the DHCP setting is set to ON Set the DHCP setting to OFF before the gateway is input 22 Press the LOCAL Key in READY status the following menu is displayed PRINTER MENU CUTTER MENU OUTPUT ALL 23 Press the F1 Key PRINT MENU the following menu is displa...

Page 111: ... the MAC address The LCX603 displays the MAC address on the LCD 28 Press the LOCAL Key in READY status the following menu is displayed PRINTER MENU CUTTER MENU OUTPUT ALL 29 Press the F1 Key PRINT MENU the following menu is displayed COPY DATA CLEAR CONDITION 1 4 30 Press the NEXT Key until the following menu is displayed LAN SETTING MAC ADDRESS 4 4 31 Press the F2 Key MAC ADDRESS the following me...

Page 112: ...rive of your computer The User Account Control screen of the software appears Click Yes 34 The installer Start menu will appear 35 Press the Install LCX603 Software to start to install the printer driver When software AutoPlay is setting in Windows 7 Select Run MultiSetup exe from the Windows AutoPlay selection menu ...

Page 113: ...oftware AutoPlay is not setting in Windows 7 Select the CD ROM drive from the computer click the right button of mouse then select Open as shown in the picture below Double click the MultiSetup exe to run the MultiSetup exe 36 The installer Start menu will appear ...

Page 114: ...the following menu is displayed 38 Follow the instructions shown in the menu and then click OK button 39 Confirm the LCX603 is not connected to PC via the LAN and then click Next button 40 Click Next button 41 Select the Standard TCP IP from the pull down menu and then click the NEXT button ...

Page 115: ...t the IP Address which was set at step 14 Then click NEXT button XXX XXX XXX XXX 44 When the installation has finished the following menu is displayed Click on the OK button If the installation is successful Graphtec LCX603 will display within Start Devices and Printers using Windows 7 ...

Page 116: ...er Driver 3 3 Printer Driver Operation This is a description with regard to the printer driver use when printing label data created in the application software etc The display screens are different in each application software Open the Print window ...

Page 117: ...Specify within application Size LCX603 MAX is 100 mm x 200 mm Free Size can be set within the LCX603 MAX settings Please set the plotting area above 40 mm The name of the user defined size can be changed and the settings can be recorded Set the paper width by the following formula If media width is other than 130 mm width Paper width Media width 30 mm Example Media width 120 mm 120 mm 30 mm 90 mm ...

Page 118: ...nstalling the Printer Driver Restore Defaults Resets the settings to their original values The minimum size of the media feed direction of the LCX603 main unit is 65 mm Even if a value lower than 65 mm is set output will be 65 mm ...

Page 119: ... Selection among Heads 1 3 can be made but even if Head 3 is not selected it is used in the cut mark printing so please set black ribbon in Head 3 Select Cutline Specifies the color of the line data which carries out the label s half cutting The cutline recognized by the driver is the color specified here and is only the thinnest line that can be set in the application The exact wording differs ac...

Page 120: ...r ellipse data is output in fine lines the cutter vibrates due to the blade tip control which may cause distortion in the cut If this happens by increasing the value here the cutline will become smooth and the cutting speed will be improved Vectorize Raster Lines Depending on the application the line processing method is different and the cutline extraction may not be possible Using this function ...

Page 121: ...Length Specifies the minimum length of the cutlines to be output The driver ignores lines which are shorter than this length and does not output them The settings range is 0 1 mm 5 0 mm Treat as same line if gap is Specifies the dot gap which is acceptable as same line data Depending on the application used gaps can occur in an output raster line making it difficult to determine whether the segmen...

Page 122: ...ata currently being output perform the switch once all data has been output Please use caution since changing the resolution during data output consumes non print media Transfer Data Type Specify the type of data to be transferred from either PCX or RAW Typically please use PCX Dithering None Coarse or Fine can be selected Typically use None Restore Defaults Resets the settings to their original v...

Reviews: