LCX603-UM-651-9370
2-20
2 Setup
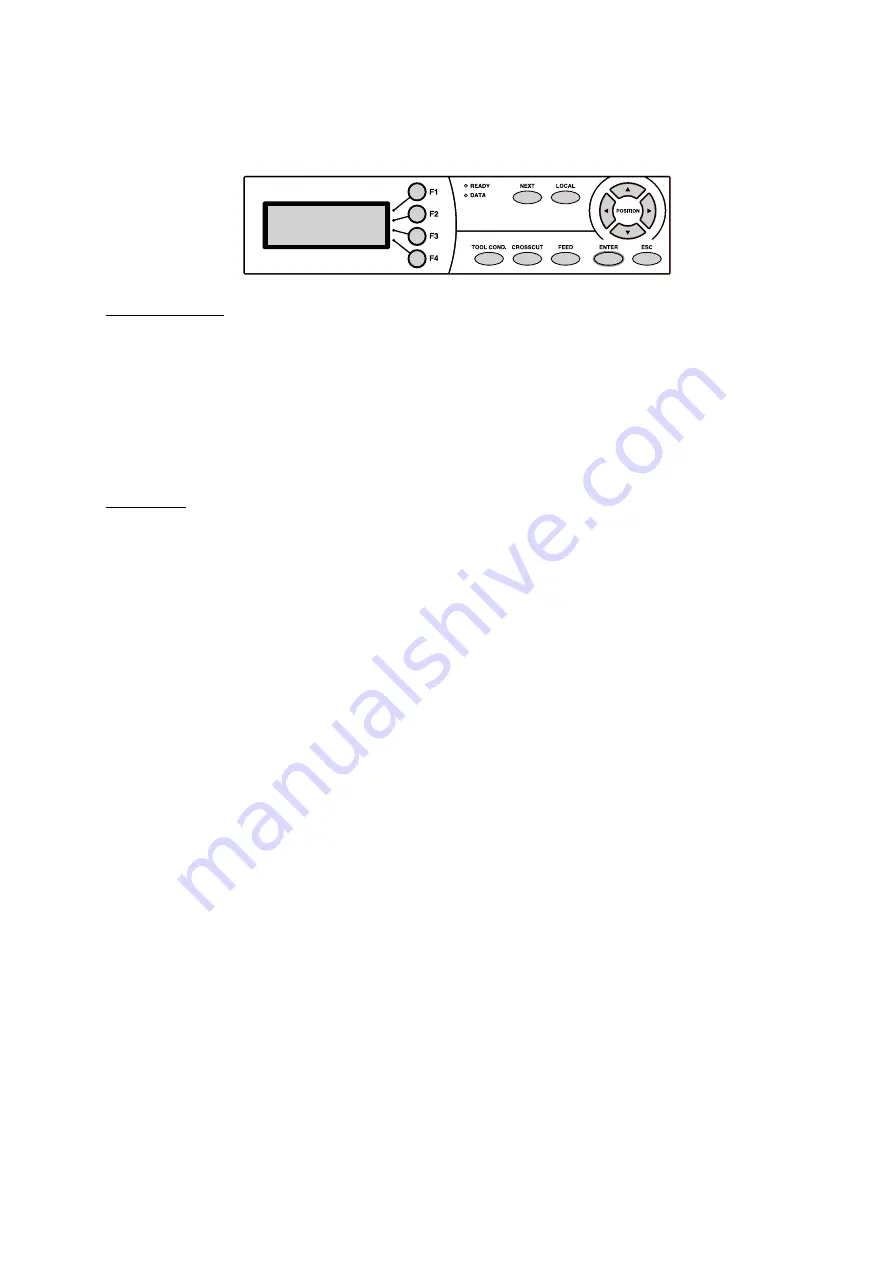
2.9.3 How to use the control panel
The functions of the control panel lamps and keys are explained.
Do not turn the power on until the label materials have been set.
Indicator Lamps
READY
...........................................The READY lamp lights (green) while the label printer is on.
If the LOCAL key is pressed, the green lamp goes off when the menu
screen appears.
DATA
..............................................The DATA lamp flashes (red) when the label printer receives data. The
red lamp lights when data is saved in the internal memory. When data
has been cleared (or there is no data), the red lamp goes off.
Panel Keys
F1, F2, F3, F4 (FUNCTION)
...........Select the desired sub-menu in a menu screen and move to the next
setting screen.
NEXT
..............................................Switch to the next item in the menu screen.
LOCAL
...........................................Switch between the READY screen and menu screen.
If pushed during an operation, the operation will terminate after one
page has completed on the cutting side upon pushing the key, and the
display will return to the READY screen.
TOOL COND
..................................Switch to the Cutting Conditions Menu in the READY screen.
CROSSCUT
...................................Crosscut media (horizontal cutting) in the READY screen.
FEED
..............................................Send label materials (media) while the key is being pushed.
Send label materials close to the press roller with one push of the key
only when the label materials are set. (Source feed)
↑, ↓, ←, →(Arrow keys)
.................Adjust various settings, select numerical value changes, move the
cursor, and change positions.
ENTER
...........................................After setting a function or condition at the control panel, press the
[ENTER] key to register your setting.
ESC
................................................Cancel setting change and return to the previous screen in the menu.
Return to the previous screen in the menu.
Summary of Contents for LABELROBO LCX603
Page 2: ......


