390
Reload multiple files
A reload function is also available. This will only import presets, songs and samples that has been
exported from LD3, or that has been renamed to to fit the LD3 export standard –samples must be
named: A0001.WAV, A0002.WAV…..A0220.WAV, B0001.WAV, B0002.WAV…..B0256.WAV,
presets and songs must be named: A01.XDP, A02.XDP….A64.XDP, B01.XDP, B02.XDP…..P64.XDP .
This function will import presets and songs to the same locations as they were originally stored to.
Reload will also import samples to the exact same location, as they were placed when exporting.
This will make sure, that samples used in your presets, will always be placed in the right locations.
Sample locations that are already occupied, will be skipped by Reload, so make sure to erase
sample bank A and B, if you want a complete reload.
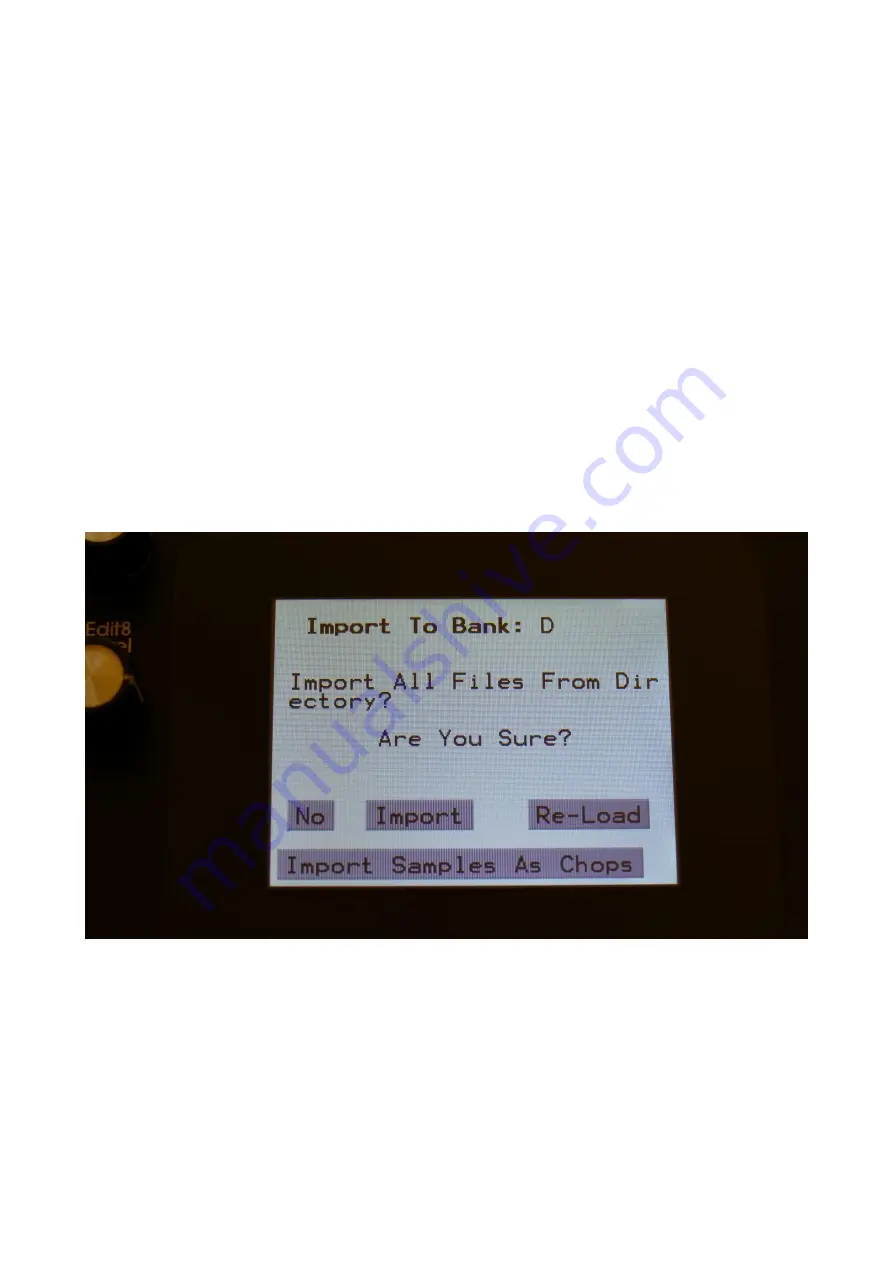
To Reload multiple files, select a directory, by touching it. Touch the ”Import” button. LD3 will now
ask:
Touch ”Re-Load” to continue, or ”No” to exit.
If you touched Re-Load, LD3 will now import all samples, presets and songs, that the selected
directory holds, and that are correctly named. It will though not import files from any sub-
directories.
Summary of Contents for Little deFormer 3
Page 1: ...1 Gotharman s Little deFormer 3 Granular Workstation User Manual V10 26 ...
Page 8: ...8 I hope that you will deform some great tracks ...
Page 18: ...18 ...
Page 19: ...19 Turn it on Push the I on the power switch Your LD3 should now turn on ...
Page 39: ...39 Exit Exits from any page ...
Page 41: ...41 ...
Page 50: ...50 Accessing The Synth Part Pages From the Preset Song Select screen Touch the EDIT field ...
Page 125: ...125 3xBPF Mix between LPF BPF HPF and 3x BPF ...
Page 205: ...205 Fade When this parameter is turned up each grain will fade in and out to minimize clicks ...
Page 224: ...224 Entering the Sequencer From the Preset Select Screen touch the EDIT field ...
Page 225: ...225 Touch SEQ on the navigation bar in the top of the screen ...
Page 255: ...255 On this page touch TRIG ...
Page 259: ...259 You should now enter this page Touch the REC touch button ...
Page 263: ...263 You should now have entered this page Touch NOTE TRACK 1 16 to enter the note track page ...
Page 265: ...265 Touch MAIN ...
Page 287: ...287 More preset parameters Setup From the Preset Select page touch the Edit field ...
Page 288: ...288 On the navigation bar at the top of the screen touch MOR ...
Page 305: ...305 Parameter snap mode will now be turned on To turn it off touch it again ...
Page 320: ...320 On the navigation bar at the top of the screen touch MOR ...
Page 345: ...345 When you are finished recording your sample touch the STOP button ...
Page 358: ...358 LD3 will now show When it has found some chop points it will return to the Chop page ...
Page 360: ...360 Touch the sample slot 1 name to open the sample select page ...
Page 361: ...361 Select the sampling touch OK and touch the OSC touchbutton ...
Page 365: ...365 To delete the sample touch Yes If you regret touch No to return to the Sample Edit page ...
Page 400: ...400 11 Touch the UPD button ...
Page 403: ...403 Programming processor counter in the bottom counts up ...
Page 418: ...418 Remove the 4 screws in the corners of the left end panel using the Phillips screwdriver ...
Page 419: ...419 Take the left end panel a bit out ...
Page 421: ...421 Take the right end panel a bit out ...
Page 422: ...422 Remove the plastic frame from the left end panel ...
Page 428: ...428 The screw and the washers that is holding the filterboard in place ...
Page 436: ...436 Remove the 4 screws in the corners of the left end panel using the Phillips screwdriver ...
Page 437: ...437 Take the left end panel a bit out ...
Page 439: ...439 Take the right end panel a bit out ...
Page 440: ...440 Remove the plastic frame from the left end panel ...
Page 443: ...443 Flip LD3 around so that the front panel is facing downwards ...
Page 446: ...446 Near the connector to the knob board are the third connector needed for the analog board ...
Page 447: ...447 The analog board itself ...
Page 448: ...448 When turned upside down the 3 connectors that needs to connect to the LD3 mainboard shows ...
Page 451: ...451 Check an extra time that the connectors fits THIS IS VERY IMPORTANT ...
Page 452: ...452 It should now look like this ...
Page 454: ...454 Tighten the screw using the Allen screwdriver ...
Page 455: ...455 Locate the cable on the left end panel that is connected to audio in out 3 4 ...
Page 456: ...456 Connect this to the angled connector on the analog board as shown on the picture ...
Page 459: ...459 Turn LD3 over so the front panel is facing upwards again ...
Page 461: ...461 Written by Flemming Christensen Gotharman 2019 ...


