5-3
Chapter 5 Initial Settings
Administrator Setup
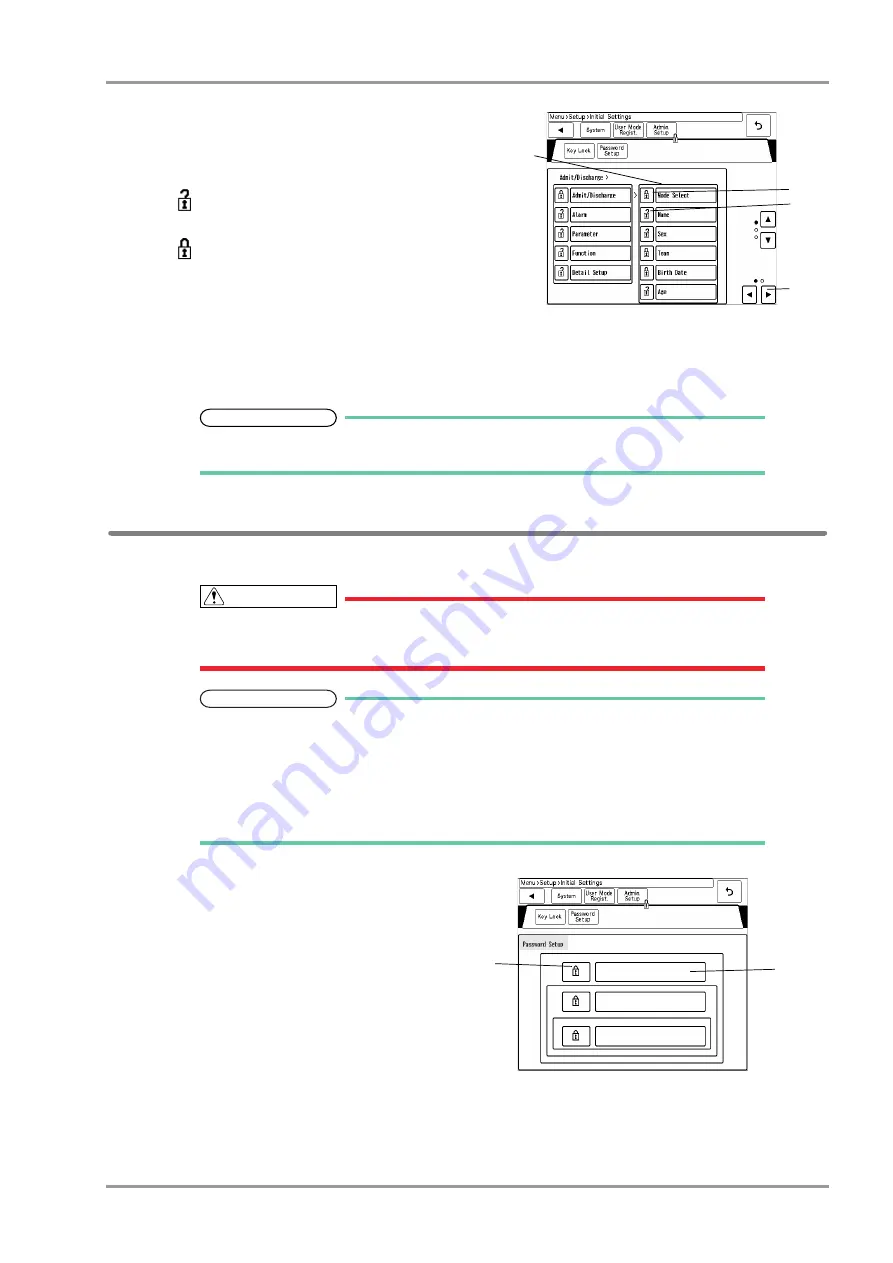
The "Key Lock" menu will be displayed.
The items that can be protected by password will be
displayed in a tree format.
1 The lower level items will be displayed.
2
This indicates unlocked item. It is displayed in
white.
3
This indicates locked item. To change the setting,
an authorized password is required.
There are 3 levels of password which are distinguished
by the color of the icon.
The level is in the order of red>yellow>green. For
example, the following operation is possible.
Red: Manager > Yellow: Administrator > Green: User
4 The page will switch.
REFERENCE
Maximum of 3 types of password can be set for the administrator which can individually lock
the setting with each password.
Password Setup
This section explains how to change the password and how to enter the administrator name.
CAUTION
Do not forget the password.
The password should be strictly controlled.
NOTE
The default passwords are set as follows.
Red Key: 11111111
Yellow Key: 22222222
Green Key: 33333333
Before using the equipment, make sure to change the password.
For details of the password, refer to your nearest service representative.
1
Press the [Menu], [Setup], [Initial Settings],
[Admin. Setup] keys.
2
Enter the password.
3
Press the [Password Setup] key.
The password setup window will be displayed.
4
3
2
1
5
4
Summary of Contents for Dynascope 8000 Series
Page 1: ......
Page 2: ......
Page 8: ...Contents ...
Page 14: ...Contents ...
Page 16: ...ii Safety About the Safety Precautions DSA 81 AC Unit HR 800 Recorder Unit ...
Page 40: ...1 2 Chapter 1 Installation of the Unit Contents ...
Page 52: ...2 2 Chapter 2 Network System Construction Contents ...
Page 62: ...3 2 Chapter 3 Using the External Media Contents ...
Page 68: ...3 6 Chapter 3 Using the External Media Formatting the Full Disclosure Waveform Card ...
Page 70: ...4 2 Chapter 4 Connection to the External Devices Contents ...
Page 86: ...5 2 Chapter 5 Initial Settings Contents ...
Page 112: ...6 2 Chapter 6 Setup Item Default Value Contents ...
Page 128: ...7 2 Chapter 7 Replacement Parts Contents ...
Page 132: ...8 2 Chapter 8 Cleaning Disinfecting Storing Contents ...
Page 138: ...8 6 Chapter 8 Cleaning Disinfecting Storing Cleaning the Equipment and Sensors ...
Page 140: ...9 2 Chapter 9 Maintenance Check Contents ...
Page 153: ......
Page 154: ......


