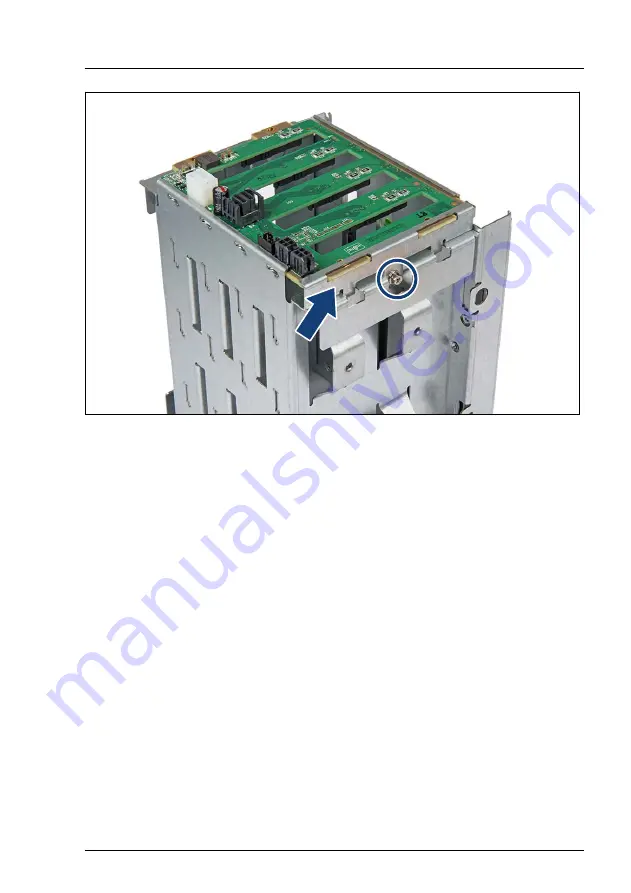
Figure 162: Installing the HDD backplane (B)
▶
Place the bracket (see arrow) and fasten it with one screw (see circle).
▶
Fasten the HDD backplane with two screws (see
▶
Install the 4x 3.5-inch HDD extension box, see
HDD extension box" on page 257
.
Concluding steps
▶
▶
Install all HDDs into their original bays in the HDD extension box, see
"Installing 3.5-inch HDD modules" on page 185
▶
"Connecting the power cord" on page 79
▶
"Switching on the server" on page 81
Hard disk drive (HDD) / solid state disk (SSD)
TX1330 M4
Upgrade and Maintenance Manual
267
Summary of Contents for PRIMERGY TX1330 M4
Page 18: ...Content Upgrade and Maintenance Manual TX1330 M4 ...
Page 276: ...Hard disk drive HDD solid state disk SSD 276 Upgrade and Maintenance Manual TX1330 M4 ...
Page 286: ...Fans 286 Upgrade and Maintenance Manual TX1330 M4 ...
Page 330: ...Expansion cards and backup units 330 Upgrade and Maintenance Manual TX1330 M4 ...
Page 340: ...Main memory 340 Upgrade and Maintenance Manual TX1330 M4 ...
Page 402: ...Accessible drives 402 Upgrade and Maintenance Manual TX1330 M4 ...
Page 474: ...Converting a floorstand model to a rack model 474 Upgrade and Maintenance Manual TX1330 M4 ...
Page 486: ...Cabling 486 Upgrade and Maintenance Manual TX1330 M4 ...
Page 518: ...Appendix A 518 Upgrade and Maintenance Manual TX1330 M4 ...
Page 560: ...List of all used screws for PRIMERGY Servers Assembled in Germany and Japan February 2019 ...


