Printer Connection and Software Installation
74
Network Connection (DocuPrint M215 fw Only)
To connect the printer to a network:
1
Ensure that the printer, computer and any other connected devices have been turned off and all
cables have been disconnected.
2
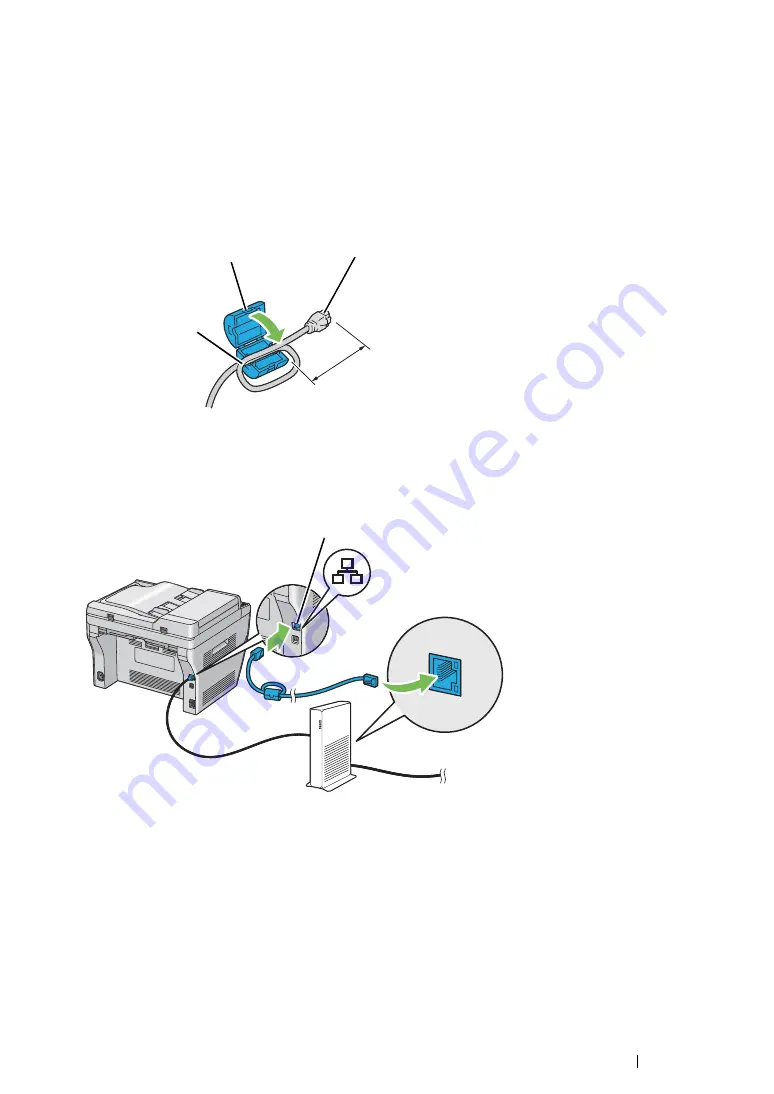
Twist the Ethernet cable around the ferrite core shipped with the printer as shown in the figure,
and then close the ferrite core.
IMPORTANT:
•
Do not twist the Ethernet cable too tightly. The Ethernet cable may be cut off.
3
Connect the Ethernet cable to the Ethernet port at the rear of the printer, and to a LAN drop or
hub.
NOTE:
•
Connect the Ethernet cable, only if you need to setup a wired connection.
See also:
• "Configuring Wireless Settings (DocuPrint M215 fw Only)" on page 90
Connector to be connected into
the Ethernet port of the printer
Approx. 7 cm
Ferrite core
(gray)
Wind once
Ethernet port
Summary of Contents for DocuPrint M215 fw
Page 1: ...User Guide DocuPrint M215 b M215 fw...
Page 9: ...Contents 8...
Page 31: ...Product Features 30...
Page 41: ...Specifications 40...
Page 57: ...Basic Operation 56...
Page 69: ...Printer Management Software 68...
Page 147: ...Printer Connection and Software Installation 146...
Page 203: ...Printing Basics 202...
Page 258: ...257 Scanning 5 Select any unused number and click Add...
Page 273: ...Scanning 272...
Page 383: ...Using the Operator Panel Menus and Keypad 382...
Page 441: ...Troubleshooting 440...
Page 445: ...Maintenance 444 5 Close the document cover...
Page 450: ...449 Maintenance 6 Place the toner cartridge slowly on the sheets of paper spread in step 3...
Page 467: ...Maintenance 466...
Page 471: ...Contacting Fuji Xerox 470...


