Service - Manual
Catalogue number
.
008 921 86
12/2012
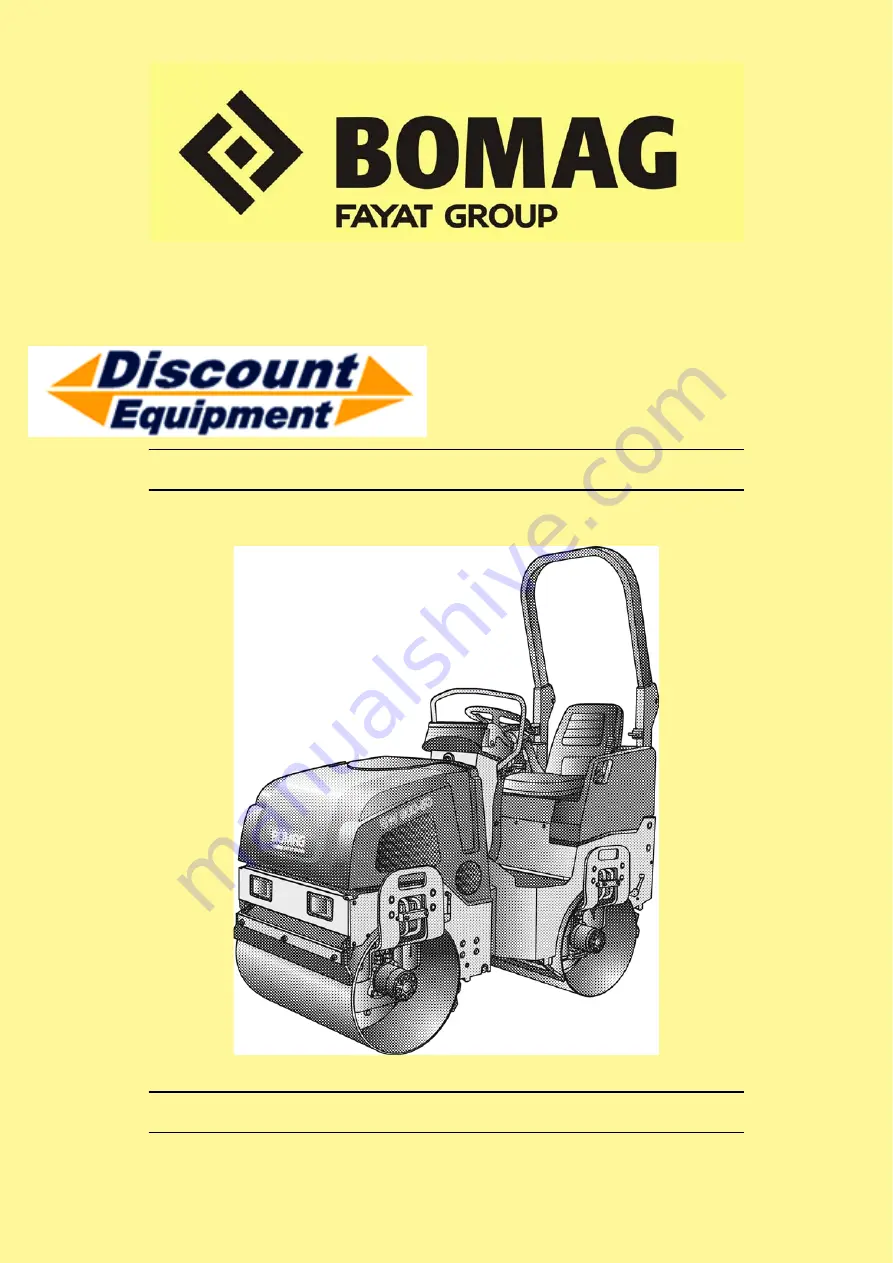
BW 900-50
S/N 861 834 07 .... >
Tandem Vibratory Roller
www.discount-equipment.com
Go to
Discount-Equipment.com
to
order your parts
Page 1: ...rvice Manual Catalogue number 008 921 86 12 2012 BW 900 50 S N 861 834 07 Tandem Vibratory Roller www discount equipment com G o t o D i s c o u n t E q u i p m e n t c o m t o o r d e r y o u r p a r t s ...
Page 2: ...ne needs We sell worldwide for the brands Genie Terex JLG MultiQuip Mikasa Essick Whiteman Mayco Toro Stone Diamond Products Generac Magnum Airman Haulotte Barreto Power Blanket Nifty Lift Atlas Copco Chicago Pneumatic Allmand Miller Curber Skyjack Lull Skytrak Tsurumi Husquvarna Target Stow Wacker Sakai Mi T M Sullair Basic Dynapac MBW Weber Bartell Bennar Newman Haulotte Ditch Runner Menegotti M...
Page 3: ...G o t o D i s c o u n t E q u i p m e n t c o m t o o r d e r y o u r p a r t s ...
Page 4: ... 6 2 Checking the engine oil level 52 6 3 Changing engine oil and oil filter 52 6 4 Change the fuel pre filter 53 6 5 Cleaning the cooling air intake openings 54 6 6 Check clean the air filter replace if necessary 54 6 7 Clean check the spark plugs replace if necessary 56 6 8 Checking adjusting the valve clearance 57 6 9 Check adjust the idle speed 58 6 10 Checking fuel lines and clamps 58 6 11 En...
Page 5: ... steering circuit 105 Flushing and bleeding 107 9 1 Special tools for flushing 108 9 2 Flushing general 113 9 3 Flushing schematic for travel system 115 9 4 Flushing the travel system 116 9 5 Bleeding the travel circuit 120 Drum 123 10 1 Special tools 124 10 2 Repair overview vibrating drum 126 10 3 Removing and installing the vibrating drum 128 10 4 Dismantling the vibrating drum 130 10 5 Asembli...
Page 6: ...BOMAG 5 008 921 86 1 General G o t o D i s c o u n t E q u i p m e n t c o m t o o r d e r y o u r p a r t s ...
Page 7: ...m the spare parts catalogue for the machine This manual is not subject of an updating service for this reason we would like to draw your attention to our additional Technical Service Bulletins In case of a new release all necessary changes will be included In the course of technical development we reserve the right for technical modifications without prior notifica tion Information and illustratio...
Page 8: ... a machine under re pair by attaching a clearly visible warning label to the dashboard l Block the articulated joint with the articulation lock l Use protective clothes like hard hat safety boots and gloves l Keep unauthorized persons away from the machine during repair work l Tools lifting gear lifting tackle supports and other auxiliary equipment must be fully functional and in safe condition l ...
Page 9: ... doctor Operation of high voltage systems i Note The rules and statutory regulations valid in the corre sponding do apply in addition to the notes given here Caution The high voltage system must only be operated and serviced by qualified and authorized person nel Before starting operation the operator must check the proper condition of the system Danger Possibility of injury or even death caused b...
Page 10: ...t por tion of spilled fuel is therefore potentially dangerous l Fire extinguishers charged with FOAM CO2 GAS or POWDER must be available wherever fuel is stored filled in drained off or where work on fuel systems is performed l The vehicle battery must always be disconnected BEFORE work in the fuel system is started Do not disconnect the battery while working on the fuel system Sparks could cause ...
Page 11: ...G spare parts for repair and maintenance work Genuine spare parts and original accessories were specially developed test ed and approved for the machine l The installation and use of non genuine spare parts or non genuine accessories may therefore have an adverse effect on the specific characteristics of the machine and thereby impair the active and or pas sive driving safety The manufacturer expl...
Page 12: ...atic trouble shooting session to eliminate any other possible fault sources Knowledge in basic electrics is re quired for this purpose If a fault was diagnosed without having pulled the plug of the control unit or inspected the wiring this should be done before changing any parts l Check for good cable and ground contacts there fore keep all mechanical transition points between electric conductors...
Page 13: ...e electrical sys tem of the machine l Disconnect the minus pole of the battery or interrupt the electric circuit with the main battery switch l Isolate the generator and all control units from the electric circuit l Always fasten the earth clamp of the welding unit in the immediate vicinity of the welding location l When choosing the location for the earth clamp make sure that the welding current ...
Page 14: ...welding on the vehicle When cleaning the generator with a steam or water jet make sure not to direct the steam or water jet directly on or into the generator openings or ball bearings Af ter cleaning the generator should be operated for about 1 2 minutes to remove any deposits of water from the generator Starter motor So called jump starting using an additional external battery without the battery...
Page 15: ...onents into oper ation fill these with hydraulic oil as specified in the operating and maintenance instructions l After changing a hydraulic component thoroughly flush refill and bleed the complete hydraulic sys tem l Perform measurements at operating temperature of the hydraulic oil approx 40 C l After changing a component perform a high and charge pressure test if necessary check the speed of th...
Page 16: ...y old sealing compound be fore assembling For this purpose do not use any tools that could damage the sealing surfaces l Sealing compound must be applied thin and evenly on the corresponding surfaces take care that the compound does not enter into oil galleries or blind threaded bores l Examine the contact faces for scratches and burrs remove these with a fine file or an oilstone take care that no...
Page 17: ...l into the housing first be fore sliding it over the shaft Under no circumstances should the full weight of the shaft rest on the seal If you have no proper service tools at hand use a suit able drift punch with a diameter which is about 0 4 mm smaller than the outer diameter of the seal Use VERY LIGHT blows with the hammer if no press is available Feather keys and keyways Caution Feather keys may...
Page 18: ...r bearing with the recom mended type of grease before assembly or reas sembly l On greased bearings e g wheel bearings fill the space between ball or roller bearing and outer seal with the recommended type of grease before as sembling the seal l Check shaft and bearing housing for discolouration or other signs of movement between ball or roller bearing and seats l Make sure that shaft and housing ...
Page 19: ...into blind tapped bores The hydraulic power generated when turning in the screw could cause breakage of the ef fected part Strength classes metric screws The strength classes from 3 6 to 12 9 are specified for all strength classes from a nominal diameter of 5mm The corresponding identification can be found where allowed for by the shape of the screw Fig 7 Identification of screws Example A screw i...
Page 20: ... of a screw to a limited extent Nut height below 0 8 d d nominal dimension Nuts for screw joints without specified load factor 11H 14H 17H 22H This standard contains strength classes hardness classes for nuts 3 Fig 8 for which no load values can be specified e g because of their shape and di mensions but which can only be classified by their hardness Nut height below 0 5 d d nominal dimension Iden...
Page 21: ...the nut on a hexagon area 2 Studs and brake rods At the outmost end a short end of the component is re duced to its core diameter 1 Cotter pins Fig 11 In places where cotter pins are used these must be reassembled Cotter pins must generally be renewed after disassembly Cotter pins must be assembled as shown in the illus tration unless specified differently G o t o D i s c o u n t E q u i p m e n t...
Page 22: ...ew dimension Tightening torques Nm 8 8 10 9 12 9 M4 3 5 5 M5 6 9 10 M6 10 15 18 M8 25 35 45 M10 50 75 83 M12 88 123 147 M14 137 196 235 M16 211 300 358 M18 290 412 490 M20 412 578 696 M22 560 785 942 M24 711 1000 1200 M27 1050 1480 1774 M30 1420 2010 2400 Tightening torques for screws with metric unified fine thread Coefficient of friction μ tot 0 14 Screw dimension Tightening torques Nm 8 8 10 9 ...
Page 23: ...92 M18 x 1 5 260 373 444 M20 330 463 557 M20 x 1 5 369 502 620 M22 448 628 754 M22 x 1 5 495 691 847 M24 569 800 960 M24 x 2 624 879 1036 M27 840 1184 1520 M27 X 2 918 1263 1536 M30 1136 1608 1920 M30 x 2 1255 1804 2156 3 4 10 UNC 276 388 464 3 4 16 UNC 308 432 520 Tightening torques for wheel nuts fine thread Coefficient of friction μ tot 0 14 These values result in a 90 utilization of the yield ...
Page 24: ...ad UNC Unified Coarse Thread Series American Unified Coarse Thread Coefficient of friction μ tot 0 14 Screw dimension Tightening torques Nm 8 8 10 9 12 9 1 4 20 11 15 19 5 16 18 23 32 39 3 8 16 39 55 66 7 16 14 62 87 105 1 2 13 96 135 160 9 16 12 140 200 235 5 8 11 195 275 330 3 4 10 345 485 580 7 8 9 560 770 940 1 8 850 1200 1450 1 1 8 7 1200 1700 2000 1 1 4 7 1700 2400 2900 1 3 8 6 2200 3100 370...
Page 25: ...2600 3700 4400 1 1 2 12 3300 4600 5600 Coefficient of friction μ tot 0 14 Tightening torques for screws with UNF thread UNF Unified National Fine Thread Series American Unified Fine Thread Screw dimension Tightening torques Nm 8 8 10 9 12 9 G o t o D i s c o u n t E q u i p m e n t c o m t o o r d e r y o u r p a r t s ...
Page 26: ...BOMAG 25 008 921 86 2 Technical data G o t o D i s c o u n t E q u i p m e n t c o m t o o r d e r y o u r p a r t s ...
Page 27: ...lbs kg 1320 599 Mean static linear load pli kg cm 37 4 6 7 Max operating weight lbs kg 2815 1277 Travel characteristics Travel speed 1 mph km h 0 2 5 0 4 Travel speed 2 mph km h 0 5 4 0 9 Max gradability without with vibration soil dependent 40 30 Drive Engine manufacturer Honda Type GX 630 Cooling Air Number of cylinders 2 Rated power SAE J 1349 hP kW 20 14 9 Rated speed rpm 3300 Electrical equip...
Page 28: ...Hydraulic oil gal l approx 5 19 Engine oil gal l approx 0 5 1 9 The right for technical modifications remains reserved Additional engine data Engine type Four stroke two cylinder engine with suspended valves Valve clearance intake 0 0031 in 0 0079 in 0 08 0 02 mm Valve clearance exhaust 0 0039 in 0 0079 in 0 10 0 02 mm Spark plug electrode gap mm 0 7 to 0 8 Low idle speed min 1 1050 50 High idle s...
Page 29: ...bar 220 Operating pressure soil dependent bar 50 to 100 Vibration motor System Gear motor Displacement cm3 rev 4 Perm leak oil rate l min 0 5 Steering valve Type OSPM 80 ON Manufacturer Sauer Danfoss System Rotary spool valve G o t o D i s c o u n t E q u i p m e n t c o m t o o r d e r y o u r p a r t s ...
Page 30: ...BOMAG 29 008 921 86 3 Maintenance G o t o D i s c o u n t E q u i p m e n t c o m t o o r d e r y o u r p a r t s ...
Page 31: ...circumstances must the drum be rolled to the tapping point just before drawing out fuel l When choosing the storage place for fuel make sure that spilled fuel will not harm the environment l Do not let the hose stir up the slurry at the bottom of the drum l Do not draw off fuel from near the bottom of the drum l The rest in the drum is not suitable for the engine and should only be used for cleani...
Page 32: ...Number 86 or higher Use only commercially available brand fuel You can use unleaded standard grade petrol with maximum 10 percent by volume of ethanol E10 or maximum 5 percent by volume of methanol Methanol must also contain co solvents and corrosion inhibitors Using fuels with higher ethanol or methanol contents exceeding the values specified above may cause starting difficulties and or performan...
Page 33: ...104 F 10 C to 40 C Synthetic SAE 5W 30 13 F to 104 F 25 C to 40 C Fuel Gasoline unleaded approx 7 gal approx 27 l Hydraulic system Hydraulic oil ISO HLP 46 or ester based biodegradable hydraulic oil approx 5 gal approx 19 l Sprinkler system Water Anti freeze mixture water approx 36 gal approx 137 l Rear drum bearings High pressure grease lithium saponified as required Mix water and anti freeze age...
Page 34: ...day Depending on the load the engine is subjected to the oil consumption will drop to the normal level after approx 100 to 250 operating hours Maintenance after 20 operating hours l Change engine oil and filter l Check the engine for leaks l Retighten the fastening screws on air filter exhaust and other attachments l Check screw connections on the machine retighten as necessary G o t o D i s c o u...
Page 35: ...annually or af ter 250 operating hours X 5 15 Change engine oil and oil filter at least every 6 months see foot note X 5 16 Lubricate the rear drum bearings X 5 17 Change the fuel pre filter X 5 18 Clean the water sprinkler system X 5 19 Battery service pole grease X 5 20 Check adjust the valve clearance Intake valve 0 08 mm Exhaust valve 0 10 mm on cold engine X 5 21 Check adjust the idle speed o...
Page 36: ...BOMAG 37 008 921 86 4 Overall view of machine G o t o D i s c o u n t E q u i p m e n t c o m t o o r d e r y o u r p a r t s ...
Page 37: ...4 1 Overview BOMAG 38 008 921 86 Fig 1 G o t o D i s c o u n t E q u i p m e n t c o m t o o r d e r y o u r p a r t s ...
Page 38: ...ntral electrics with fuses 9 Fuel tank 10 Water tank 11 Drum drive motor rear 12 Parking brake 13 Sprinkling pump M02 14 Steering valve 15 Oscillating articulated joint 16 Steering cylinder 17 Charge oil filter 18 Drum drive motor front 19 Steering charge vibration pump 20 Travel pump 21 Vibration motor G o t o D i s c o u n t E q u i p m e n t c o m t o o r d e r y o u r p a r t s ...
Page 39: ...BOMAG 41 008 921 86 5 Electrics G o t o D i s c o u n t E q u i p m e n t c o m t o o r d e r y o u r p a r t s ...
Page 40: ...ery as possible Fig 2 l Start as described under Starting the engine l Once the engine is running switch on a powerful consumer working light etc Caution If no powerful consumer is switched on voltage peaks may occur when separating the connecting cables between the batteries which could dam age electrical components l After starting disconnect the negative poles ground cable first and the positiv...
Page 41: ... forms a high frequency magnetic stray field This stray field leaks out from the active area of the proximity switch If metal or non ferrous metal enters into the response range energy is absorbed The os cillator is thus dampened and the resulting change in current consumption is evaluated PNP circuitry Fig 3 PNP circuitry On sensors with PNP circuitry the output stage con tains a PNP transistor w...
Page 42: ...or has de tected metal in its stray field Fig 6 Circuit diagram making contact The circuit diagram Fig 6 shows a proximity switch with normally open contact Brown voltage supply Blue ground supply Black switching output The initiator switches the relay K05 G o t o D i s c o u n t E q u i p m e n t c o m t o o r d e r y o u r p a r t s ...
Page 43: ...rinkling pump 8 K29 Relay vibration 9 K04 Step relay vibration K04 This module is an electronic stepper relay A ground switching pulse on Pin S sets the output 56b oper ating voltage applied to the output 56b The next pulse resets the output 56b no operating voltage applied to the outlet 56b If the operating voltage 15 54 is switched off the out put will remain dead when switching on again G o t o...
Page 44: ...n switch 7 Choke lever 8 S01 Emergency stop switch 9 A01 Rotary switch for interval sprinkling 10 S03 Push button for warning horn 11 S38 Rotary switch for flashing beacon1 12 S13 Vibration push button 13 Travel lever 14 Throttle lever 15 Parking brake lever 834063 HOURS 1 2 3 4 5 D W 1 10 1 2 3 4 6 7 8 9 10 11 12 13 15 5 14 Optional equipment G o t o D i s c o u n t E q u i p m e n t c o m t o o ...
Page 45: ...d do not repair fuses with a piece of wire 5 25A F148 Fuse control MESX potential 15 6 15A F41 Flashing beacon 7 15A F06 Water sprinkling system 8 20A F100 Working head lights Fig 4 No 2 Main fuse Danger Fire hazard Do not use fuses with higher ampere ratings and do not repair fuses with a piece of wire 25A F 00 G o t o D i s c o u n t E q u i p m e n t c o m t o o r d e r y o u r p a r t s ...
Page 46: ...BOMAG 49 008 921 86 6 Engine G o t o D i s c o u n t E q u i p m e n t c o m t o o r d e r y o u r p a r t s ...
Page 47: ...quipped with an electric fuel shut down solenoid Y58 which interrupts the fuel supply to the main carburettor nozzle when energized Fig 1 Motor 1 Oil dipstick 2 Oil filler neck 3 Charge controller 4 Air filter 5 Connection of fuel pre filter 6 Spark plugs 7 Oil pressure switch B06 8 Oil filter 9 Oil drain 10 Crankshaft 11 Exhaust outlet 12 Starter motor M01 13 Cooling fan G o t o D i s c o u n t E...
Page 48: ...BOMAG 51 008 921 86 6 1 Fig 2 1 Valve cover 2 Rocker arm 3 Exhaust valve 4 Combustion chamber 5 Push rod 6 Plunger 7 Camshaft 8 Spark plug G o t o D i s c o u n t E q u i p m e n t c o m t o o r d e r y o u r p a r t s ...
Page 49: ...s too high determine the cause and drain the oil off 6 3 Changing engine oil and oil fil ter Danger Danger of scalding When draining off hot oil By hot oil when unscrewing the engine oil filter Caution Drain the engine oil only when the engine is warm For quality and quantity of oil refer to the table of fuels and lubricants Environment Catch running out oil and dispose of environmen tally togethe...
Page 50: ...ce again if necessary top up to the top mark Max 6 4 Change the fuel pre filter Danger Fire hazard When working on the fuel system do not use open fire do not smoke Do not spill any fuel Danger Health hazard Do not inhale any fuel fumes Environment Catch running out fuel do not let it seep into the ground Dispose of the used fuel precleaners environmen tally Fig 7 l Loosen the hose clamps Fig 7 l ...
Page 51: ... any case It is therefore recommended to keep at least one air filter in stock The air filter must be changed after 500 operating hours but at the latest after 2 years Incorrectly handled filter cartridges may become ineffective because of damage e g cracks and cause damage to the engine Fig 9 l Unscrew the air filter cover locking nut 1 Fig 9 and remove the cover 2 l Unscrew the wing nut 3 l Take...
Page 52: ... rubber element in warm soapsuds rinse and dry thoroughly l Then submerge the foam rubber element in clean engine oil and finally press out all excess oil i Note If the amount of oil remaining in the foam rubber ele ment is too high the engine will develop smoke during starting Fig 12 l Place the foam rubber element 6 Fig 12 on the paper element 4 l Reinstall the assembled air filter Make sure tha...
Page 53: ...ombustion residuals or burned off electrodes replace the spark plug en sure correct heat value of the spark plug Do not use spark plugs with incorrect heat value Recommended spark plug ZFR5F NGK l Check the electrode gap with a feeler gauge if nec essary adjust the gap to0 03 0 032 in 0 7 0 8 mm l Turn the spark plug carefully in by hand l Tighten the spark plug with a spark plug spanner until it ...
Page 54: ... i Note Cylinder 1 in top dead centre position in compression stroke Both valves closed If not crank the engine for 360 Fig 17 l A feeler gauge of appropriate thickness Fig 17 must fit with little resistance between rocker arm and valve l If the gap is too narrow or too wide for the feeler gauge the valve must be adjusted l After the adjustment tighten the nut with 5 5 lbf ft 7 5 Nm Fig 18 l Turn ...
Page 55: ...k only after the engine has cooled down and with the engine stopped Caution If fuel lines or hose clamps are found to be dam aged the corresponding parts must be immedi ately repaired or replaced After replacing lines or hose clamps the fuel sys tem needs to be bled Disassembled or new fuel lines must be closed with clean cloths on both ends to make sure that no dirt will enter into the fuel syste...
Page 56: ...engine is to be shut down for a longer period of time e g over winter we recommend the following measures to avoid corrosion l Clean engine and cooling system With cold cleans ing agent and water jet or even better with steam cleaning equipment l Run the engine warm and shut it down l Drain the still warm engine oil and fill in anti corro sion engine oil l Drain the fuel from the fuel tank l Remov...
Page 57: ...dirt Use needle A Ф 0 5 to clean 4 Main nozzle clogged Remove foreign materials dirt 5 Main nozzle air path clogged Remove foreign materials dirt 6 Fuel strainer screen clogged Blow air and check the screen for clogging 7 Float doesn t move properly Remove foreign materials around float pin 10 For long storage of the engine More than 3 months Drain gasoline from float chamber by running the engine ...
Page 58: ...he pole clamps tighten and cover them with acid free grease Especially in winter use of too viscous en gine oil Use an engine oil complying with the am bient temperatures Fuel supply too low fuel system clogged Change the fuel filter Check the line con nections for leaks and tighten the fittings The specified valve clearance is not cor rect Adjust the valve clearance Carburettor defective Have exa...
Page 59: ...BOMAG 63 008 921 86 7 Hydraulics G o t o D i s c o u n t E q u i p m e n t c o m t o o r d e r y o u r p a r t s ...
Page 60: ... the surface of which is in open contact with atmospheric pressure Reliable equalization of pressure between the air in the hydraulic oil tank and the ambient air ensures problem free suction of the pump In an open circuit the hydraulic fluid is fed to the consumer 2 or 3 and also returned to the tank through way valves G o t o D i s c o u n t E q u i p m e n t c o m t o o r d e r y o u r p a r t ...
Page 61: ...ressure side The medium remains in the circuit Only the permanent leakage on pump and motor needs to be replenished This is accomplished by a charge pump 1 which permanently delivers a sufficient amount of fluid charge capacity through a check valve 5 into the low pressure side of the closed circuit Any excess oil delivered by the charge pump which works in an open circuit runs through a charge pr...
Page 62: ... speed is identical with the engine speed Fig 1 Pump assembly POS Designation POS Designation 1 Travel pump A Work output travel pump forward 2 Steering charge vibration pump B Work output travel pump reverse 3 Elastic coupling S Pressure port for charge circuit 4 Petrol engine IN Suction side steering charge vibration pump OUT Pressure side steering charge vibration pump MA Pressure test port pre...
Page 63: ...s must also be considered for longer periods of rest because the system may run empty through the hydraulic lines The PMVO is a variable displacement axial piston pump in swash plate design for hydrostatic drives in closed circuits The volumetric flow is proportional to the drive speed and the displacement The volumetric flow can be infinitely changed by adjusting the swash plate accordingly Fig 2...
Page 64: ...pressure side The fluid quantity always remains constant in the closed hydraulic circuit Leakages in pump and motor are compensated by the charge pump Pos Designation Pos Designation 1 mechanical control A Work connection 2 High pressure relief valves B Work connection 3 Charge pressure relief valve M Motor Ma Pressure test port pressure A Mb Pressure test port pressure B PS Control pressure inlet...
Page 65: ... pistons arranged axially to the drive shaft The pistons are thereby supported by the swash plate Axial piston units based on the swash plate principle with fixed or variable displacement can be used as hydraulic pumps or hydraulic motors In pump mode the mechanical energy is converted to hydrostatic energy when used in motor mode the hydrostatic energy is converted to mechanical energy When used ...
Page 66: ...entre to dead centre is performs a full piston stroke During this process the flow volume determined by the stroke is drawn in through the control slots in the valve plate or pumped out During the suction stroke the hydraulic fluid is drawn into the increasing piston cham ber i e it is actually pressed in On the opposite side the oil is pressed out of the piston bores into the hydraulic system dur...
Page 67: ...hat kind l Has the product or the machine been operated as intended l How does the fault occur Fault Possible cause Remedy Unusual noises Insufficient suction conditions e g air in the suction line inadequate di ameter of the suction line excessive viscosity of the pressure fluid ex treme suction height too low suction pressure foreign bodies in the suc tion line Machine or system manufacturer e g...
Page 68: ...ion line with pres sure fluid Remove foreign bodies from inside the suction line Pressure fluid not within the optimal viscosity range Use appropriate pressure fluid External control and setting facilities defective Check the external control Pilot or control pressure too low Check pilot and control pressure consult the service department Functional disturbance in the control facility or the regul...
Page 69: ...e to the axial pis ton unit Replace the axial piston unit Drive unit defective e g hydraulic motor or cylinder Check the drive unit replace if nec essary Fluctuations in pressure volumetric flow Axial piston unit not or insufficiently purged Completely purge the axial piston unit Insufficient suction conditions e g air in the suction line inadequate di ameter of the suction line excessive viscosit...
Page 70: ...l size of motor determines both the speed and the torque This means a that the speed is determined by the supplied oil flow and b the torque depends on the available pressure Fig 6 The drive sets of the hydraulic motors consist of a housing section with internal gearing and a gear wheel the centre of which during rotation orbits around the centre of the ring gear G o t o D i s c o u n t E q u i p ...
Page 71: ... torque alternately on 7 screws 2 Insert commutator completely with new seal The flat side of the seal faces towards the outside 3 Before assembling the drive shaft thoroughly grease the space between the dashed lines G o t o D i s c o u n t E q u i p m e n t c o m t o o r d e r y o u r p a r t s ...
Page 72: ...ng into the gear motor works on the gears It generates a torque which is then transferred by the output shaft External gear motors for one sense of rotation are of asymmetrical design i e high and low pressure sides are predetermined Reversing operation is not possible The arising leak oil is internally fed to the outlet The pres sure load in the outlet is limited because of the radial seal G o t ...
Page 73: ...ent forces This results in an ex cellent rate of efficiency On the rear side the moveable bearing bushings are pressurized and thus tightly pressed against the gears The pressurized pressure fields are thereby limited by special seals Sealing around the circumference of the gears to the housing is assured by small gaps which appears between gears and hous ing in dependence on the pressure Function...
Page 74: ...08 921 86 Fig 11 1 Cover 6 Gear driven 2 Seals and gaskets 7 Shaft 3 Housing 8 Flange 4 Gear driving 9 Bearing plate 5 Displacement chamber 10 Bearing plate G o t o D i s c o u n t E q u i p m e n t c o m t o o r d e r y o u r p a r t s ...
Page 75: ...set measures the oil flow to the steering cylinder proportionally to the turning angle of the steering wheel Fig 12 The steering valve is additionally equipped with a pressure relief valve it limits the steering pressure Suddenly occurring pressure peaks which may be caused by e g external influences like driving against a curb stone are compensated by two shock valves which are integrated in the ...
Page 76: ...n steering and the charge circuit the return flow form the steering valve passes through the charge oil filter and the charge oil port on the travel pump The filter is equipped with a bypass valve This valve opens at a pressure differential pressure difference be tween filter inlet and filter outlet of Δ p 3 5 bar This pressure differential depends on the filter contamination and the viscosity of ...
Page 77: ...Travel circuit BOMAG 81 008 921 86 7 9 Fig 2 G o t o D i s c o u n t E q u i p m e n t c o m t o o r d e r y o u r p a r t s ...
Page 78: ...errupted the machine is hydrostatically braked Pos Designation Pos Designation 1 Vibration valve Y22 with pressure test port 6 Charge oil filter with pressure test port 2 Hydraulic oil tank 7 Rear drum drive motor 3 Steering valve 8 Front drum drive motor 4 Check valve 1 bar 9 Steering charge vibration pump 5 Travel pump M Pressure test ports G o t o D i s c o u n t E q u i p m e n t c o m t o o r...
Page 79: ...witched on hydraulic oil flows to the vibration motor Rotation of the vibration motor causes rotation of the exciter shaft The eccentric weight attached to the exciter shaft generate the vibration of the drum Pos Designation Pos Designation 1 Hydraulic oil tank M Pressure test port 2 Steering charge vibration pump 3 Vibration motor 4 Vibration valve Y22 with pressure test port G o t o D i s c o u ...
Page 80: ...7 10 Vibration circuit BOMAG 84 008 921 86 Fig 2 1 Exciter shaft 2 Rubber buffer 3 Vibration motor 4 Weights G o t o D i s c o u n t E q u i p m e n t c o m t o o r d e r y o u r p a r t s ...
Page 81: ... is not operated the complete oil flow will flow through the charge oil filter Pos Designation Pos Designation 1 Vibration valve Y22 with pressure test port 6 Charge oil filter with pressure test port 2 Hydraulic oil tank 7 Rear drum drive motor 3 Steering valve 8 Front drum drive motor 4 Check valve 1 bar 9 Steering charge vibration pump 5 Travel pump 10 Steering cylinder M Pressure test ports G ...
Page 82: ... to the piston or piston rod side of the steering cylinder A metering pump inside the steering unit measures the exact oil quantity required for the steering wheel rotation and feeds it to the steering cylinder The steering cylinder extends or retracts and articulates the machine G o t o D i s c o u n t E q u i p m e n t c o m t o o r d e r y o u r p a r t s ...
Page 83: ...me oil to top up With oth er ester based oils consult the lubrication oil serv ice of the respective oil manufacturer For quality of oil refer to the table of fuels and lu bricants Fig 2 l Check the oil level in the oil level inspection glass Fig 2 i Note At room temperature of approx 68 F 20 C the hy draulic oil level should reach approx the middle of the inspection glass l If the oil level is to...
Page 84: ...f fuels and lubricants When changing from mineral oil based hydraulic oil to an ester based biologically degradable oil you should consult the lubrication oil service of the oil manufacturer for details Environment Catch running out oil and dispose of environmen tally l Drive the machine until the hydraulic oil has reached operating temperature l Shut down the engine Fig 3 l Remove the cap from th...
Page 85: ...lic oil fil ter element Caution If the hydraulic oil is very cold the pin may pop up you should therefore only check the filter and press the pin in at operating temperature Fig 6 l Check the contamination indicator Fig 6 at oper ating temperature and with the engine running at maximum speed l If necessary press the pin in Pin remains pressed in Hydraulic oil filter element o k Pin pops out Replac...
Page 86: ...ve compo nents if necessary Negligence may cause de struction to the entire hydraulic system Do not clean or reuse the filter element Apart from the normal oil change intervals the fil ter element must also be changed after major re pairs in the hydraulic system Environment Catch running out oil dispose of oil and filter ele ment environmentally Fig 7 l Remove filter bowl 4 Fig 7 with filter eleme...
Page 87: ...BOMAG 91 008 921 86 8 Tests and adjustments G o t o D i s c o u n t E q u i p m e n t c o m t o o r d e r y o u r p a r t s ...
Page 88: ...cy meter BOMAG part no 300 120 80 2 Hydraulic test case BOMAG part no 007 610 03 3 Electric test case BOMAG part no 057 505 70 4 Gear pump testing device BOMAG part no 007 610 05 Fig 1 Fig 2 Fig 3 Fig 4 G o t o D i s c o u n t E q u i p m e n t c o m t o o r d e r y o u r p a r t s ...
Page 89: ...Special tools BOMAG 93 008 921 86 8 1 5 Vacuum pump for hydraulic oil tank BOMAG part no 007 610 04 12V Fig 5 G o t o D i s c o u n t E q u i p m e n t c o m t o o r d e r y o u r p a r t s ...
Page 90: ...era ture of the hydraulic oil 40 C 1 Drive the drum of the machine on an elastic base rubber buffers Fig 1 and block the rear drum additionally with suitable chocks 2 Pull up the parking brake lever Fig 2 3 Start the engine and shift the throttle lever to max speed position Fig 3 Fig 1 Fig 2 Fig 3 G o t o D i s c o u n t E q u i p m e n t c o m t o o r d e r y o u r p a r t s ...
Page 91: ...r thumb Fig 4 Nominal value high idle speed See technical data 2 Switch the vibration on Setpoint nominal speed See technical data Evaluation of test If the nominal value is not reached perform trou ble shooting for the petrol engine Fig 4 G o t o D i s c o u n t E q u i p m e n t c o m t o o r d e r y o u r p a r t s ...
Page 92: ...d 2 Measure the speed of the vibrator shaft by letting the tester rest on your thumb Fig 5 Nominal value See technical data Evaluation of test If the nominal value is not reached perform trou ble shooting on the engine or in the vibration sys tem Fig 5 G o t o D i s c o u n t E q u i p m e n t c o m t o o r d e r y o u r p a r t s ...
Page 93: ...pressure test ports for MA and MB and a 60 bar pressure gauge Fig 3 to the charge pressure test port Caution Do not activate the vibration and do not steer while checking the pressure This would destroy the 60 bar pressure gauge 4 Start the engine and shift the throttle lever to max speed position 5 Read charge and high pressure gauges Nominal value Charge pressure gauge See technical data High pr...
Page 94: ...ges Nominal value See technical data Evaluation of test If the charge pressure drops below the nominal value during the high pressure test check the in dividual components If the specified high pressure is not reached check the travel pump If the starting pressure is reached to one travel di rection only check the high pressure relief valves G o t o D i s c o u n t E q u i p m e n t c o m t o o r ...
Page 95: ...measurements at operating tempera ture of the hydraulic oil 40 C 1 Raise the machine Fig 1 so that both drums can turn freely 2 Shift the travel lever to position 0 Fig 2 3 Start the engine and run it with maximum speed 4 Adjust the travel control cable Fig 3 so that both drums stop Fig 1 Fig 2 Fig 3 G o t o D i s c o u n t E q u i p m e n t c o m t o o r d e r y o u r p a r t s ...
Page 96: ...operating tempera ture of the hydraulic oil 40 C 1 Block the drums with suitable chocks Fig 1 2 Pull up the parking brake lever Fig 2 3 Connect 600 bar pressure gauges Fig 3 to high pressure test ports MA and MB 4 Close high pressure ports MA and MB with plugs Fig 1 Fig 2 Fig 3 G o t o D i s c o u n t E q u i p m e n t c o m t o o r d e r y o u r p a r t s ...
Page 97: ... Fig 4 and read the high pressure gauges Nominal value approx 320 bar Evaluation of test If the nominal value is reached to one travel direc tion only check the high pressure relief valves If the nominal value is not reached to both direc tions check the travel pump replace if necessary Fig 4 G o t o D i s c o u n t E q u i p m e n t c o m t o o r d e r y o u r p a r t s ...
Page 98: ...n valve Fig 2 3 Start the engine and shift the throttle lever to max speed position 4 Switch the vibration on Fig 3 Nominal value Start up pressure see technical data Operating pressure see technical data Evaluation of test i Note If starting pressure is not reached check the vi bration control valve block If the starting pressure is reached but the operat ing pressure is too low you should also c...
Page 99: ...ith suitable chocks Fig 1 2 Pull up the parking brake lever Fig 2 Caution Run the following pressure test for max 3 seconds 3 Close the pump outlet Fig 3 with a 200 bar pressure relief valve 4 Start the engine for a moment Nominal value approx 200 bar Evaluation of test If the nominal value is not reached replace the vi bration pump Fig 1 Fig 2 Fig 3 G o t o D i s c o u n t E q u i p m e n t c o m...
Page 100: ...itable chocks 2 Pull up the parking brake lever Fig 2 3 Disconnect the leak oil hose Fig 3 connect a measuring hose and hold it into a measuring beaker 4 Start the engine and shift the throttle lever to max speed position 5 Switch the vibration on and measure the running out leak oil during one timed minute Nominal value max 0 25 litre min Evaluation of test If the permissible leak oil rate is exc...
Page 101: ... Connect a 600 bar pressure gauge to the steering pressure test port Fig 2 3 Engage the articulation lock Fig 3 4 Start the engine and run it at idle speed 5 Operate the steering system and read the pres sure gauge Nominal value approx 100 bar Evaluation of test If the nominal value is reached check the steer ing cylinder Fig 1 Fig 2 Fig 3 G o t o D i s c o u n t E q u i p m e n t c o m t o o r d ...
Page 102: ...s not reached check the steering charge pump 8 Reconnect the hydraulic hoses to the steering cylinders 9 Close the pump outlet Fig 5 with a 200 bar pressure relief valve 10 Run the engine for a short while with idle speed and read the pressure gauge Nominal value approx 200 bar Evaluation of test If the nominal value is reached replace the steer ing valve If the nominal value is not reached replac...
Page 103: ...BOMAG 107 008 921 86 9 Flushing and bleeding G o t o D i s c o u n t E q u i p m e n t c o m t o o r d e r y o u r p a r t s ...
Page 104: ...ement 1μ BOMAG part no 079 930 52 14 Flushing hose 20S 25S 2 pieces BOMAG part no 055 509 19 15 Screw socket R1 25S 2 pieces BOMAG part no 055 400 52 16 Flushing filter L connection BOMAG part no 079 390 29 17 Filter element BOMAG part no 079 390 14 18 Flushing hose 15L 2 pieces BOMAG part no 055 510 09 19 Screw socket R3 4 15L 2 pieces BOMAG part no 055 400 89 20 SAE flange 1 20S BOMAG part no 05...
Page 105: ...8 23 O ring BOMAG part no 062 202 22 24 Reducing fitting 18L 15L BOMAG part no 055 422 92 25 Reducing fitting 25S 20S BOMAG part no 055 422 98 26 Reducing fitting 20S 16S BOMAG part no 055 423 26 Fig 5 Fig 6 Fig 7 Fig 8 G o t o D i s c o u n t E q u i p m e n t c o m t o o r d e r y o u r p a r t s ...
Page 106: ...MAG part no 055 426 55 28 Connecting socket 18L BOMAG part no 055 426 06 29 Connecting socket 16S BOMAG part no 055 459 43 30 Connecting fitting 20S BOMAG part no 055 459 44 Fig 9 Fig 10 Fig 11 Fig 12 G o t o D i s c o u n t E q u i p m e n t c o m t o o r d e r y o u r p a r t s ...
Page 107: ...ing 25S BOMAG part no 055 459 45 32 Angular fitting 18L BOMAG part no 055 421 26 33 Elbow fitting 16L BOMAG part no 055 421 36 34 Elbow 20S BOMAG part no 055 421 37 Fig 13 Fig 14 Fig 15 Fig 16 G o t o D i s c o u n t E q u i p m e n t c o m t o o r d e r y o u r p a r t s ...
Page 108: ... 921 86 35 Elbow 25S BOMAG part no 055 421 38 36 Pipe connection 16S 16S BOMAG part no 493 301 01 37 Connecting hose 15L BOMAG part no 055 510 09 Fig 17 Fig 18 Fig 19 G o t o D i s c o u n t E q u i p m e n t c o m t o o r d e r y o u r p a r t s ...
Page 109: ... controlling behaviour blockage of valves Extra fine particle contamination 2 5 µm Silting of oil accelerated aging of oil corrosion Water in oil Increased wear accelerated aging of oil Chips abrasion in the oil l Open and clean all components in the oil circuit replace if necessary l Clean all high pressure hoses in the oil cir cuit replace if necessary l If abrasion is found in the travel circui...
Page 110: ...tank thoroughly from inside if necessary remove the tank cover l Reconnect all hoses l Fill the hydraulic oil tank again with the fill ing and filtering unit Bleeding Fig 3 l Always bleed closed hydraulic circuits if lines had been removed or connected Servicing the flushing filter kit Fig 4 l Replace the filter element of the flushing fil ter when the red control pin of the contami nation indicat...
Page 111: ...ool 3 Elbow union tool 4 Screw socket 1 25S tool 5 Flushing hose 25S 20S tool 6 Flushing hose 25S 20S tool 7 Flushing filter with filter element 1μ tool 8 Hose connection travel pump B drum drive mo tor front 9 Front drum drive motor 10 Rear drum drive motor G o t o D i s c o u n t E q u i p m e n t c o m t o o r d e r y o u r p a r t s ...
Page 112: ... pressure side in the return flow to the pump so that only cleaned oil will enter the travel pump With the connection shown in the illustration the travel pump must therefore be actuated to forward direction 1 Disconnect the high pressure hose 8 from the travel pump port B and connect it with the flush ing hose 6 flushing filter inlet IN see chapter Flushing schematic travel circuit 2 Connect the ...
Page 113: ...ntire flushing process Caution Move the travel lever only to travel direction forward as otherwise the flushing filter will be subjected to oil flow from the wrong direction 5 Start the engine and shift the travel lever to travel direction forward 6 Perform the flushing process at various engine speeds for approx 10 minutes 7 Shut down the engine 8 Reconnect the high pressure hoses to the drum dri...
Page 114: ...m speed and shift the travel lever to travel direction forward 11 Run the flushing procedure for approx 10 min utes During this process keep changing the pump flow by shifting the travel lever several times between full and halve reverse travel 12 Shut down the engine 13 Remove the flushing filter and reconnect the high pressure lines Bleeding the travel circuit i Note Bleed the travel circuit see...
Page 115: ...ll connections for leaks with the engine running visual inspection 17 Perform a test drive load the travel system in for ward and reverse e g by driving uphill or starting on a gradient 18 Check all ports and connections for leak tightness visual inspection Fig 9 G o t o D i s c o u n t E q u i p m e n t c o m t o o r d e r y o u r p a r t s ...
Page 116: ...sure test hose to the charge pres sure test port 4 Install a pressure test hose each to the high pres sure test ports 5 Hold the open ends of the pressure test hoses Fig 3 into a container 6 Operate the starter motor for approx 30 seconds Wait one minute and repeat this procedure until oil starts to run out from the pressure test hoses 7 Remove the pressure test hoses Fig 1 Fig 2 Fig 3 G o t o D i...
Page 117: ... erwise the flushing filter will be subjected to oil flow from the wrong direction Danger Only run the engine with idle speed 11 Start the engine 12 Shift the travel lever Fig 6 approx 1 3 to for ward direction 13 After approx 1 to 2 minutes shut down the engine for a minute i Note This waiting time is necessary to allow air bub bles to escape through the leak oil return line 14 After a waiting ti...
Page 118: ...BOMAG 123 008 921 86 10 Drum G o t o D i s c o u n t E q u i p m e n t c o m t o o r d e r y o u r p a r t s ...
Page 119: ...10 1 Special tools BOMAG 124 008 921 86 10 1 Special tools 1 Bell to change the rubber buffers Fig 1 G o t o D i s c o u n t E q u i p m e n t c o m t o o r d e r y o u r p a r t s ...
Page 120: ...10 2 Repair overview vibrating drum BOMAG 126 008 921 86 Fig 1 G o t o D i s c o u n t E q u i p m e n t c o m t o o r d e r y o u r p a r t s ...
Page 121: ...view vibrating drum BOMAG 127 008 921 86 10 2 1 Drum 2 Vibration motor 3 Rubber buffer 4 Exciter shaft 5 Clutch 6 Vibration bearings G o t o D i s c o u n t E q u i p m e n t c o m t o o r d e r y o u r p a r t s ...
Page 122: ...s 2 and remove the vibration motor with its flange 4 Unscrew the fastening nuts 3 for support leg rubber buffers 5 Mark the hydraulic hoses 2 Fig 2 and discon nect them from the ports 6 Unscrew the fastening screws for the hose mounting bracket 3 7 Close all hydraulic hoses and motor ports with suitable plugs 8 Unscrew the support fastening screws 1 and pull out the drum with the support leg 9 Che...
Page 123: ... rubber buffers Caution Install the support legs under pre load The preload of the rubber buffers is achieved by a gap X Fig 5 between support leg and spacer block when tightening Nominal value Distance X 1mm i Note If necessary attach compensation shims on either side 13 Check the hydraulic oil level Fig 6 top up if nec essary Caution Bleed the travel circuit before starting opera tion 14 Perform...
Page 124: ...pport leg 2 Fig 1 3 Unscrew the nuts 1 remove the washers and take off the support leg with travel motor and drive disc 4 Unscrew fastening nut 1 Fig 2 and remove drive disc 2 5 Disassemble fastening screws 1 Fig 3 with nuts and washers lift the travel motor off the support leg 6 Remove the feather key 2 from the travel motor Fig 1 Fig 2 Fig 3 G o t o D i s c o u n t E q u i p m e n t c o m t o o ...
Page 125: ...crew and replace if necessary Dismantling the travel bearing on the vibration drive side 1 Use a suitable rubber buffer mounting bell to un screw the rubber buffers 1 Fig 5 2 Take off V ring 1 Fig 6 Fig 4 Fig 5 Fig 6 G o t o D i s c o u n t E q u i p m e n t c o m t o o r d e r y o u r p a r t s ...
Page 126: ... 7 4 Press flange 1 Fig 8 off the bearing flange with forcing screws 2 5 Knock ball bearing 1 Fig 9 out of the flange 6 Take shim 1 Fig 10 and V ring 2 off the bear ing flange Fig 7 Fig 8 Fig 9 Fig 10 G o t o D i s c o u n t E q u i p m e n t c o m t o o r d e r y o u r p a r t s ...
Page 127: ...smantling the exciter shaft 8 Unscrew fastening screws 1 Fig 12 9 Force the bearing flange off the drum using forc ing screws 2 Caution Danger of squashing 10 Pull the exciter shaft out of the drum Fig 13 Fig 11 Fig 12 Fig 13 G o t o D i s c o u n t E q u i p m e n t c o m t o o r d e r y o u r p a r t s ...
Page 128: ...citer shaft 13 Pull inner bearing race 1 Fig 16 off both sides of the exciter shaft i Note If the inner bearing race sits very tight heat the ring up with a torch 14 Remove seal ring 2 from both ends of the excit er shaft 15 Unscrew fastening screws 1 Fig 17 Fig 14 Fig 15 Fig 16 Fig 17 G o t o D i s c o u n t E q u i p m e n t c o m t o o r d e r y o u r p a r t s ...
Page 129: ...8 921 86 10 4 16 Force the bearing cover off the drum using forc ing screws 1 Fig 18 17 Remove cylinder roller bearing 1 Fig 19 from the bearing cover Fig 18 Fig 19 G o t o D i s c o u n t E q u i p m e n t c o m t o o r d e r y o u r p a r t s ...
Page 130: ...between the rolling ele ments and approx 15 g into the grease chamber of the flanged bearing cover 2 Cool the new cylinder roller bearing 1 Fig 2 down to 25 C and press it into the bearing cover fill with grease i Note Fill approx 15 g of lithium saponified high pres sure grease into the gap between the rolling ele ments and approx 15 g into the grease chamber of the flanged bearing cover 3 Bolt t...
Page 131: ... the inner bearing races 1 up to approx 80 C and slide them on the exciter shaft from both ends 6 Install coupling hub 1 Fig 5 Caution Danger of squashing 7 Guide the exciter shaft into the opposite cylinder roller bearing Fig 6 8 Slide the bearing flange over the exciter shaft and fasten it with screws 1 Fig 7 Fig 4 Fig 5 Fig 6 Fig 7 G o t o D i s c o u n t E q u i p m e n t c o m t o o r d e r y...
Page 132: ... distance between coupling and front face once again i Note Subtract the second measurement from the first measurement to calculate the end float Nominal value min 0 65 mm max 1 89 mm 13 Insert coupling element 1 Fig 9 into the cou pling hub Assembling the travel bearing on the vibration side 1 Attach shim 1 Fig 10 2 Install the new V ring 2 to the bearing flange and lubricate as shown Fig 8 Fig 9...
Page 133: ...nch 5 Insert circlip 1 Fig 13 into the groove in the bearing flange and check the correct fit 6 Install the new V ring 1 Fig 14 and grease 7 Fill the ball bearing with high pressure grease i Note Fill bearings and cavities to 2 3 with lithium sa ponified high pressure grease Fig 11 Fig 12 Fig 13 Fig 14 G o t o D i s c o u n t E q u i p m e n t c o m t o o r d e r y o u r p a r t s ...
Page 134: ... 16 with a match ing rubber buffer mounting bell Tightening torque for rubber buffers 211 Nm 10 Mount the travel motor with fastening screws 1 Fig 17 and nuts to the support leg 11 Assemble the feather key 2 for the travel motor 12 Assemble the drive disc 2 Fig 2 with fastening nuts 1 to the travel motor Tightening torque 407 to 542 Nm Fig 15 Fig 16 Fig 17 Fig 18 G o t o D i s c o u n t E q u i p ...
Page 135: ...G 141 008 921 86 10 5 13 Attach the support leg 2 Fig 1 with travel motor and drive disc to the drum Tightening torques for rubber buffers 1 211 Nm Fig 19 G o t o D i s c o u n t E q u i p m e n t c o m t o o r d e r y o u r p a r t s ...
Page 136: ...BOMAG 143 008 921 86 11 Oscillating articulated joint G o t o D i s c o u n t E q u i p m e n t c o m t o o r d e r y o u r p a r t s ...
Page 137: ...ng the bearing housing 4 move the bearing housing slightly to and fro to ensure a uniform wear pattern of the individual bearing rollers 1 Housing 4 Bearing housing 2 Bearing block top 5 Bearing journal 3 Bearing block bottom 6 Rocker bearings for steering cylinder G o t o D i s c o u n t E q u i p m e n t c o m t o o r d e r y o u r p a r t s ...
Page 138: ... BOMAG 145 008 921 86 11 1 1 Bearing journal 5 Taper roller bearing 2 Bearing block top 6 Hinge bearing 3 Bearing block bottom 7 Taper roller bearing 4 Bearing housing G o t o D i s c o u n t E q u i p m e n t c o m t o o r d e r y o u r p a r t s ...
Page 139: ...suitable chocks Fig 2 3 Safely support front and rear frames Danger Danger of accident Block front and rear drums with wedges against rolling Do not work in the articulation area of the roll er while the engine is running Caution Do not start the engine during repair work 4 Pull up the parking brake lever Fig 3 Fig 1 Fig 2 Fig 3 G o t o D i s c o u n t E q u i p m e n t c o m t o o r d e r y o u r...
Page 140: ...articulated joint 6 Remove the split pin form the steering cylinder bearing bolt 1 Fig 4 and knock out the bolt 7 Take off supporting discs 2 8 Unscrew fastening screws 3 with washers and lift out the oscillating articulated joint Fig 4 G o t o D i s c o u n t E q u i p m e n t c o m t o o r d e r y o u r p a r t s ...
Page 141: ...Dismantling the oscillating articulated joint 1 Pull bearing blocks 1 Fig 4 off both sides 2 Remove supporting discs 1 Fig 2 shims 2 and seal rings 3 from both sides 3 Extract the rocker bearing Fig 3 with a suitable puller Fig 1 Fig 2 Fig 3 G o t o D i s c o u n t E q u i p m e n t c o m t o o r d e r y o u r p a r t s ...
Page 142: ...t secured with LOCTITE 5 Pull bearing housing 1 Fig 5 off bearing journal 2 6 Take disc 1 Fig 6 out of the bearing housing and remove O ring 2 7 Remove the Belleville springs 3 8 Remove taper roller bearing 1 Fig 7 Fig 4 Fig 5 Fig 6 Fig 7 G o t o D i s c o u n t E q u i p m e n t c o m t o o r d e r y o u r p a r t s ...
Page 143: ... 10 Turn the bearing housing upside down and take out seal ring 1 Fig 9 11 Knock the outer bearing race 1 Fig 10 out of the bearing housing 12 Pull taper roller bearing 1 Fig 11 off the bearing journal Fig 8 Fig 9 Fig 10 Fig 11 G o t o D i s c o u n t E q u i p m e n t c o m t o o r d e r y o u r p a r t s ...
Page 144: ...2 Press outer bearing race 1 Fig 2 into the bear ing housing and fill to 2 3 with lithium saponified high pressure grease 3 Turn the bearing housing upside down 4 Press outer bearing race 1 Fig 3 into the bear ing housing and fill to 2 3 with lithium saponified high pressure grease Fig 1 Fig 2 Fig 3 G o t o D i s c o u n t E q u i p m e n t c o m t o o r d e r y o u r p a r t s ...
Page 145: ...ig 5 to bearing jour nal 2 7 Knock taper roller bearing 1 Fig 6 into the bear ing housing 8 Insert Belleville springs 3 Fig 7 with the curva ture pointing down 9 Fit the new O ring 2 with grease into the disc 1 10 Install disc 1 into the bearing housing Fig 4 Fig 5 Fig 6 Fig 7 G o t o D i s c o u n t E q u i p m e n t c o m t o o r d e r y o u r p a r t s ...
Page 146: ...idual bearing rollers 12 Knock the new rocker bearings Fig 9 in until they bottom Caution The assembly mandrel should only contact the outer race of the rocker bearing as other wise the bearing will be destroyed 13 Install new seal rings 3 Fig 10 shims 2 and supporting discs 1 to the bearing journals of the bearing housing 14 Knock both bearing blocks 1 Fig 11 onto the bearing journals Fig 8 Fig 9...
Page 147: ...BOMAG 155 008 921 86 12 Suppliers documentation G o t o D i s c o u n t E q u i p m e n t c o m t o o r d e r y o u r p a r t s ...
Page 148: ...BOMAG 156 008 921 86 G o t o D i s c o u n t E q u i p m e n t c o m t o o r d e r y o u r p a r t s ...
Page 149: ...BOMAG 157 008 921 86 12 1 Steering valve G o t o D i s c o u n t E q u i p m e n t c o m t o o r d e r y o u r p a r t s ...
Page 150: ...g valve BOMAG 159 008 921 86 12 1 service manual HN 21 TA 93 is new Service 02 2007 Steering unit type OSPM All standard versions G o t o D i s c o u n t E q u i p m e n t c o m t o o r d e r y o u r p a r t s ...
Page 151: ...12 1 Steering valve BOMAG 160 008 921 86 Exploded view G o t o D i s c o u n t E q u i p m e n t c o m t o o r d e r y o u r p a r t s ...
Page 152: ...9 1 100 cm3 1 15 O ring 60 x 1 5 1 16 Distributor plate 1 Gearwheel set 32 cm3 11 1 Gearwheel set 50 cm3 17 1 1 Gearwheel set 63 cm3 21 6 1 17 Gearwheel set 70 cm3 24 1 Gearwheel set 80 cm3 27 4 1 Gearwheel set 100 cm3 34 2 1 18 O ring 60 x 1 5 2 19 End cover 1 20 O ring 10 x 1 5 5 32 1 For OSPM 32 ON 1 38 2 For OSPM 50 ON 1 22 Special screw incl O ring 42 7 For OSPM 63 ON 1 44 9 For OSPM 70 ON 1 ...
Page 153: ...9 x 4 Integrated column 1 5 Shaft seal 21 9 x 17 5 x 3 1 1 23 4 x 19 x 3 Integrated column 1 15 O ring 60 x 1 5 1 18 O ring 60 x 1 5 2 20 O ring 10 x 1 5 5 30 O ring 12 4 x 1 78 For relief valve adjusting screw 1 seals Tilspændingsmoment Tightening torque Anzugsmoment Couple de serrage Tightening torque Item Nm Lbf in 22 30 3 265 25 23 G o t o D i s c o u n t E q u i p m e n t c o m t o o r d e r ...
Page 154: ...ür Kolben im Druckbegrenzungsventil Artikelnr SJ150 9000 25 E Pince pour piston dans soupape de limite de pression n de commande SJ150 9000 25 F Gaffel for montage af kardanaksel OMM SJ 151G9000 1 F Fork for fitting cardan shaft OMM SJ 151G9000 1 F Gabel für Montage der Kardanwelle OMM SJ 151G9000 1 F Fourche de montage de l arbre à cardan OMM SJ 151G9000 1 G Alm håndværktøj Kan ikke købes hos Dan...
Page 155: ... mit einer Spezialzange ist der Ventilkegel aus dem Gehäuse zu heben Si OSPM a une soupape de limite de pression enlever le bouchon plastique de la vis de réglage que l on dévisse ensuite avec la clé à 6 pans dim 5 Enlever le ressort et retirer du boîtier le cône de la soupape avec une pince spéciale Løft OSPM fri af holdeværktøjet vend OSPM med udgangsakslen nedad og placer den i værktøjet igen B...
Page 156: ...l des Rückschlagventils nicht in allen Einheiten Kugelanschlag und Notlenkungskugel herausschütteln Evt eine Pinzette benutzen Secouer et faire sortir la bille du clapet anti retour n est pas dans toutes les unités ainsi que la butée de bille et la bille guide d urgence Au besoin employer une pincette Placer OSPM i værktøjet igen Styreenhed og fixtur løftes samlet og drejes 90 til vandret Place th...
Page 157: ...position neutre 11 Cross pin Tryk stiften ud af glidersættet Tryk forsigtigt indre glider ud af ydre glider Press the pin out of the spool set Carefully press the spool out of the sleeve Den Stift aus dem Schiebersatz herausdrücken Vorsichtig den inneren Schieber aus dem äußeren Schieber heraus drücken Presser la goupille hors du jeu de glisseurs Presser doucement le glisseur interne hors du gliss...
Page 158: ...g kontrollieren und falls notwendig auswechseln Alle Dichtungsteile sind in Verbindung mit einer Reparatur zu erneuern Alle Einzelteile vor der Montage mit Hydrauliköl einschmieren und Gummiteile mit Vaseline einfetten Nettoyer soigneusement toutes les pièces Contrôler minutiesement toutes les pièces et les remplacer au besoin Lors d une rèparation remplacer tous les joints Avant le remontage endu...
Page 159: ...12 01 Die Wellendichtung mit dem Montagewerkzeug ins Gehäuse pressen Beachte daß sich die vorne am Werkzeug befindliche kleine Führung beim Herausziehen des Werkzeugs aus dem Gehäuse in der Bohrung für die Ausgangswelle sitzen bleibt Achtung es gibt zwei unterschiedliche Werkzeuge Und zwar für Gehäuse mit Lenksäulenmontage SJ150L4011 01 und für Gehäuse mit integrierter Lenksäule SJ150L4012 01 Pres...
Page 160: ...glisseur interne doit être graissé au Molykote PG plastslip 75 sur la surface qui est en contact avec la garniture d étanchéité 2 Housing Huset er stadig anbragt horisontalt i holdeværktøjet Hold fast med spoole sleeve den ene hånd Tag det samlede glidersæt i den anden hånd således at de to fingre holder stiften 11 på plads Før glidersættet ind i huset med stif ten 11 i horisontal position Pas på ...
Page 161: ...l orifice P 37 Ball Læg evt kontraventilkuglen i P porten Place the check valve ball if required in port P Evt die Rückschlagventilkugel in die P Öffnung legen Placer éventuellement la bille clapet anti retour dans l orifice P 15 O ring Monter O ring i huset Fit the O ring in the housing Den O Ring im Gehäuse montieren Monter le joint torique dans le boîtier 16 Distributor plate Læg fordelerpladen...
Page 162: ...nder liegen Placer la couronne dentée au dessus de la plaque de répartition en alignant tous les trous respectifs 14 Spacer Læg afstandstykket oven på kardanakslen Place the spacer over the cardan shaft Das Zwischenstück auf die Kardanwelle legen Placer le manchon d espacement au dessus de l arbre à cardan 19 End cover Anbring dækslet således at hullet mærket P passer over P porten i huset klokken...
Page 163: ...tment Skru indstillingsskruen i Screw in the adjusting screw Stellschraube einschrauben Visser en place la vis de réglage Test Løft OSPM ud af værktøjet og klargør for afprøvning Lift OSPM out of the tool and prepaire it for testing OSPM aus dem Werkzeug anheben und und zur Prüfung vorbereiten Sulever l OSPM del outil et le préparer pour le ersai 30 Indstilling af trykbegrænsningsventilen foretage...
Page 164: ... dust seal must be fitted after testing so that any leakage from the shaft seal can be detected Die Staubdichtung über die Welle ziehen und mit Montagewerkzeug SJ 150L0396 01 ins Gehäuse einpressen NB Die Staubdichtung ist erst nach der Prüfung zu montieren um evt Undichtheiten der Wellendichtung feststellen zu können La bague étanche anti poussière est pressée à sa place avec l outil de montage S...
Page 165: ...BOMAG 175 008 921 86 13 Circuit diagrams G o t o D i s c o u n t E q u i p m e n t c o m t o o r d e r y o u r p a r t s ...
Page 166: ...BOMAG 176 008 921 86 G o t o D i s c o u n t E q u i p m e n t c o m t o o r d e r y o u r p a r t s ...
Page 167: ...BOMAG 177 008 921 86 13 1 Hydraulic diagram 138 G o t o D i s c o u n t E q u i p m e n t c o m t o o r d e r y o u r p a r t s ...
Page 168: ...SH DJHQ DJHQ DJHQ DJHQ 3URMHNWEHVFKUHLEXQJ 3URMHFW GHVFULSWLRQ RSSDUG RSSDUG RSSDUG RSSDUG HDUEHLWHW DP GLW GDWH UVWHOOW DP UHDWHG RQ HLFKQXQJVQXPPHU UDZLQJ QXPEHU B 7 B 7 B 7 B 7 KDJHQ KDJHQ KDJHQ KDJHQ HOOHUZDOG HOOHUZDOG HOOHUZDOG HOOHUZDOG 7 S 7 SH YRQ U HO E VKRUW QDPH RPDJ PE RPDJ PE RPDJ PE RPDJ PE GUDXOLNVFKDOWSODQ GUDXOLF VFKHPDWLF 0DVFKLQHQKRFKQXPPHU 0DFKLQH LQGH G o t o D i s c o u n t ...
Page 169: ...DJHQ HDUEHLWHU 6SDOWH HLQH DXWRPDWLVFK HU HXJWH 6HLWH ZXUGH PDQXHOO QDFKEHDUEHLWHW ROXPQ Q DXWRPDWLFDOO JHQHUDWHG SDJH ZDV HGLWHG QKDOWVYHU HLFKQLV DWXP 6HLWHQEHVFKUHLEXQJ B 6HLWH 3DJH 7DEOH RI FRQWHQWV 3DJH GHVFULSWLRQ DWH GLWHG E KDJHQ KDJHQ KDJHQ HFNEODWW QKDOWVYHU HLFKQLV hEHUVLFKW FRYHU VKHHW 7DEOH RI FRQWHQWV 2YHUYLHZ KDJHQ DKUNUHLV 3URSHO FLUFXLW KDJHQ 9LEUDWLRQ HQNXQJ 9LEUDWLRQ VWHHULQJ KD...
Page 170: ...G E hEHUVLFKW hEHUVLFKW hEHUVLFKW hEHUVLFKW 2YHUYLHZ 2YHUYLHZ 2YHUYLHZ 2YHUYLHZ HSU SSU HLFKQXQJVQXPPHU GUDZLQJ QXPEHU 1HLO LX 1HLO LX 1HLO LX 1HLO LX RNXPHQWDUW GRFXPHQW W SH DJHQ DJHQ DJHQ DJHQ G o t o D i s c o u n t E q u i p m e n t c o m t o o r d e r y o u r p a r t s ...
Page 171: ...V DKUNUHLV 3URSHO FLUFXLW 3URSHO FLUFXLW 3URSHO FLUFXLW 3URSHO FLUFXLW HSU SSU HLFKQXQJVQXPPHU GUDZLQJ QXPEHU 1HLO LX 1HLO LX 1HLO LX 1HLO LX RNXPHQWDUW GRFXPHQW W SH DJHQ DJHQ DJHQ DJHQ FPñ EDU EDU EDU PLQ 0E 36 7 7 5 0D 6 G o t o D i s c o u n t E q u i p m e n t c o m t o o r d e r y o u r p a r t s ...
Page 172: ...RQ HQNXQJ 9LEUDWLRQ HQNXQJ 9LEUDWLRQ VWHHULQJ 9LEUDWLRQ VWHHULQJ 9LEUDWLRQ VWHHULQJ 9LEUDWLRQ VWHHULQJ HSU SSU HLFKQXQJVQXPPHU GUDZLQJ QXPEHU 1HLO LX 1HLO LX 1HLO LX 1HLO LX RNXPHQWDUW GRFXPHQW W SH DJHQ DJHQ DJHQ DJHQ EDU EDU 0 3 7 3 3 7 5 G o t o D i s c o u n t E q u i p m e n t c o m t o o r d e r y o u r p a r t s ...
Page 173: ...JH ODWW 3DJH HDUE G E 7DQN 7DQN 7DQN 7DQN 7DQN 7DQN 7DQN 7DQN HSU SSU HLFKQXQJVQXPPHU GUDZLQJ QXPEHU 1HLO LX 1HLO LX 1HLO LX 1HLO LX RNXPHQWDUW GRFXPHQW W SH DJHQ DJHQ DJHQ DJHQ G o t o D i s c o u n t E q u i p m e n t c o m t o o r d e r y o u r p a r t s ...
Page 174: ...QVWH W XQFWLRQ WH W HWULHEVPLWWHONHQQ HLFKHQ HYLFH WDJ 6 PERO 6 PERO 7HFKQLVFKH DWHQ WHFKQLFDO GDWD 0HVVZHUW 0HWHUHG YDOXH 7HFKQLVFKH DWHQ WHFKQLFDO GDWD DOOH U FNH JHPHVVHQ EHL HLQHU gOWHPSHUDWXU YRQ FD 9HUEUHQQXQJVPRWRU LP KRKHQ HHUODXI DOO SUHVVXUH PHDVXUHPHQW DW RLO WHPSHUDWXUH FRPEXVWLRQ HQJLQH DW KLJK LGOH 0E 36 7 7 5 0D 6 0 3 7 3 3 7 5 DKUSXPSH ULYH SXPS FPñ 9LEUDWLRQVSXPSH 9LEUDWLRQ SXPS F...
Page 175: ...BOMAG 187 008 921 86 13 2 Wiring diagram 78 G o t o D i s c o u n t E q u i p m e n t c o m t o o r d e r y o u r p a r t s ...
Page 176: ...ULHJHELHW HOOHUZDOG RPDJ PE 3DJH ODWW IURP YRQ UHDWHG RYHU VKHHW 7 5DX 1DOOLQ LJKHU OHYHO IXQFWLRQ QODJH XQFWLRQ XQNWLRQ 0RXQWLQJ ORFDWLRQ LQEDXRUW KHFNHG UVWHOOW HSU IW HFNEODWW G o t o D i s c o u n t E q u i p m e n t c o m t o o r d e r y o u r p a r t s ...
Page 177: ...FNHG UVWHOOW HSU IW QKDOWVYHU HLFKQLV RYHU VKHHW HFNEODWW 7DEOH RI FRQWHQWV QKDOWVYHU HLFKQLV 6XSSO 6WDUWLQJ XQLW 9HUVRUJXQJ 6WDUWHQ 6WDUWLQJ XQLW VHDWFRQWDFW 6WDUWHQ 6LW NRQWDNW RUQ ZRUNLQJ OLJKWV URWDU EHDFRQ ZDUQLQJ EX HU XSH UEHLWVEHO 5XQNGXPNHQQOHXFKWH DUQVXPPHU 9LEUDWLRQ VSULQNOHU 9LEUDWLRQ HULHVHOXQJ HYLFH WDJ OLVW HWULHEVPLWWHOOLVWH HYLFH WDJ OLVW HWULHEVPLWWHOOLVWH 3OXJ RYHUYLHZ 6WHFNHU E...
Page 178: ...HFNHG UVWHOOW HSU IW 9HUVRUJXQJ 6WDUWHQ O 5 QJLQH VWRS GLRGH XVH FRQWUROOHU 6LFKHUXQJ 5HJOHU 0 6WDUWHU 6WDUWHU RQWUROOHU 5HJOHU X U U JQLWLRQ FRLO OHIW QGVSXOH OLQNV JQLWLRQ FRLO ULJKW QGVSXOH UHFKWV 6SDUN SOXJ QGNHU H 6SDUN SOXJ QGNHU H K DWWHU DWWHULH 9 9 U U HQHUDWRU HQHUDWRU D D RII GHOD B B G o t o D i s c o u n t E q u i p m e n t c o m t o o r d e r y o u r p a r t s ...
Page 179: ... 0RWRU OGUXFN D 5HOD QJLQH 6KXW RII 5HODLV 0RWRUDEVFKDOWXQJ D XHO FXW VROHQRLG UDIWVWRIIDEVWHOOXQJ 3 2SHUDWLQJ KRXUV FRXQWHU HWULHEVVWXQGHQ lKOHU K KDUJH FRQWURO DGHNRQWUROOH 6 6ZLWFK VHDWFRQWDFW 6FKDOWHU 6LW NRQWDNW RII GHOD 7LPLQJ UHOD VHDWFRQWDFW HLWUHODLV 6LW NRQWDNW D 6 PHUJHQF VWRS 1RW XV QGLFDWRU OLJKW IXHO RLO 0HOGHOHXFKWH UDIWVWRII ORDW VZLWFK IXHO 6FKZLPPHUVFKDOWHU UDIWVWRII XVH PDLQ DXS...
Page 180: ...WVVFKHLQZHUIHU YRUQH KHDGOLJKW UHDU UEHLWVVFKHLQZHUIHU KLQWHQ ODPS PRWRU 5RWDU EHDFRQ 5XQGXPNHQQOHXFKWH 6 6ZLWFK 5RWDU EHDFRQ 6FKDOWHU 5XQGXPNHQQOHXFKWH G DFN XS DODUP EX HU DUQVXPPHU 5 FNZlUWVIDKUW VWDUW ORFNLQJ 5HOD VWDUWLQJ FXUUHQW 5HODLV 6WDUWVWURP D XVH RUNLQJ OLJKWV 6LFKHUXQJ UEHLVVFKHLQZHUIHU 1 8 KLJK 3UR LPLW VZLWFK YLEUDWLRQ ORFN 1lKHUXQJVLQLWLDWRU 9LEUDWLRQVVSHUUH 1 8 KLJK 3UR LPLW VZLWF...
Page 181: ... UHOD YLEUDWLRQ 6FKULWWUHODLV 9LEUDWLRQ 6 3XVKEXWWRQ YLEUDWLRQ 7DVWHU 9LEUDWLRQ 6ROHQRLG YLEUDWLRQ 0DJQHWYHQWLO 9LEUDWLRQ 5HOD VSULQNOHU SXPS 5HODLV HULHVHOXQJVSXPSH D 6 6ZLWFK VSULQNOHUV VWHP 6FKDOWHU HULHVHOXQJ DWHUVDYHU VZLWFK QWHUYDOOVFKDOWHU HULHVHOXQJ XVH YLEUDWLRQ VSULQNOHU 6LFKHUXQJ 9LEUDWLRQ HULHVHOXQJ D 0 6SULQNOHU SXPS HULHVHOXQJVSXPSH D B B G o t o D i s c o u n t E q u i p m e n t c o...
Page 182: ...KDOWHU UDIWVWRII KHDGOLJKW IURQW UEHLWVVFKHLQZHUIHU YRUQH KHDGOLJKW IURQW UEHLWVVFKHLQZHUIHU YRUQH KHDGOLJKW UHDU UEHLWVVFKHLQZHUIHU KLQWHQ KHDGOLJKW UHDU UEHLWVVFKHLQZHUIHU KLQWHQ 5RWDU EHDFRQ ODPS PRWRU 5XQGXPNHQQOHXFKWH XVH PDLQ DXSWVLFKHUXQJ XVH YLEUDWLRQ VSULQNOHU 6LFKHUXQJ 9LEUDWLRQ HULHVHOXQJ XVH URWDU EHDFRQ 6LFKHUXQJ 5XQGXPNHQQOHXFKWH XVH RUNLQJ OLJKWV 6LFKHUXQJ UEHLVVFKHLQZHUIHU XVH FRQW...
Page 183: ... 6WDUWHU 0 6SULQNOHU SXPS HULHVHOXQJVSXPSH 3 2SHUDWLQJ KRXUV FRXQWHU HWULHEVVWXQGHQ lKOHU 6 JQLWLRQ VZLWFK 6WDUWVFKDOWHU 6 PHUJHQF VWRS 1RW XV 6 3XVK EXWWRQ ZDUQLQJ KRUQ 7DVWHU 6LJQDOKRUQ 6 6ZLWFK VSULQNOHUV VWHP 6FKDOWHU HULHVHOXQJ 6 6ZLWFK VHDWFRQWDFW 6FKDOWHU 6LW NRQWDNW 6 3XVKEXWWRQ YLEUDWLRQ 7DVWHU 9LEUDWLRQ 6 6ZLWFK 5RWDU EHDFRQ 6FKDOWHU 5XQGXPNHQQOHXFKWH 6 6ZLWFK ZRUNLQJ OLJKWV 6FKDOWHU UEH...
Page 184: ...NW ODWW 3IDG 7 S 3OXJ FRQWUROOHU HQJLQH 7 SH RQWDFW 3DJH 3DWK RQWDNW ODWW 3IDG 7 S 3OXJ HQJLQH IXQFWLRQV 7 SH RQWDFW 3DJH 3DWK RQWDNW ODWW 3IDG 7 S 3OXJ WUDYHO OHYHU 7 SH RQWDFW 3DJH 3DWK RQWDNW ODWW 3IDG 7 S 3OXJ 3XVKEXWWRQ YLEUDWLRQ 7 SH RQWDFW 3DJH 3DWK RQWDNW ODWW 3IDG 7 S 3OXJ URWDU EHDFRQ 7 SH RQWDFW 3DJH 3DWK RQWDNW ODWW 3IDG 7 S SOXJ VHDW FRQWDFW 7 SH RQWDFW 3DJH 3DWK RQWDNW ODWW 3IDG 7 S ...
Page 185: ...ne needs We sell worldwide for the brands Genie Terex JLG MultiQuip Mikasa Essick Whiteman Mayco Toro Stone Diamond Products Generac Magnum Airman Haulotte Barreto Power Blanket Nifty Lift Atlas Copco Chicago Pneumatic Allmand Miller Curber Skyjack Lull Skytrak Tsurumi Husquvarna Target Stow Wacker Sakai Mi T M Sullair Basic Dynapac MBW Weber Bartell Bennar Newman Haulotte Ditch Runner Menegotti M...