IL3 User’s Guide
11S-3002B
page 41
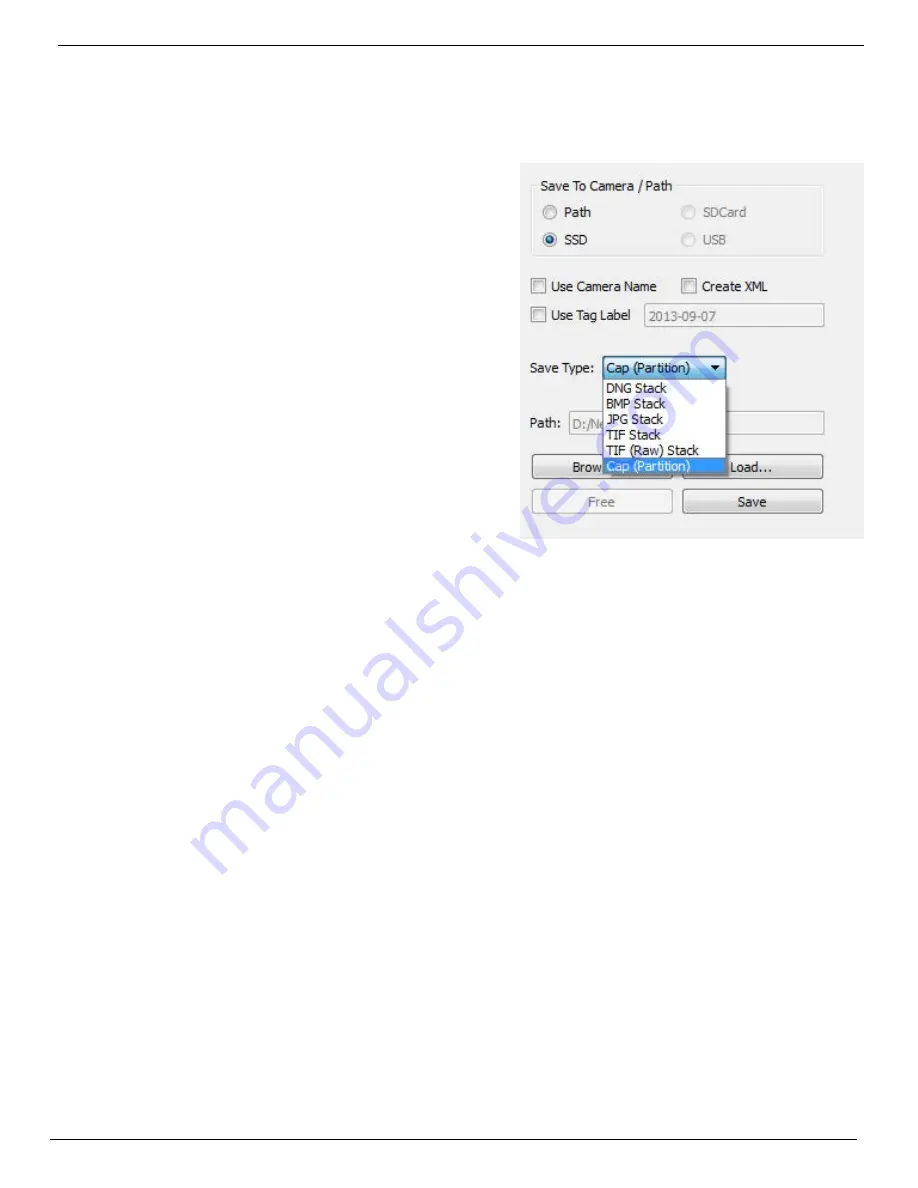
1. Select a target drive using the “Save to Camera / Path radio buttons. If you select “Path” the
target drive and folder will be a folder on a drive accessible by the PC. The Path to that folder is
shown at the bottom of the dialog. If you would like to change the path, click on the “Browse...”
button and navigate to and/or create the folder you wish to save to.
2. Select a file type from the “Save Type:” pull-down list.
File type choices may change depending on the target
drive. If you wish to save CAP files, you must save to
the SSD. If you wish to save AVI files, you must save
to a location other than SSD. See “Application Note 6:
Choosing an Image File Format” on page 76.
•
The default file name format for the image stacks is
Frame_000000.<TYPE>. If you would like the name
to include the camera name, Select Use Name in the
dialog. The resulting file name format for the example
would become IL3-11_000000.<EXT>.
•
If you would like to add a tag to the name, select Tag.
The Tag may be edited. Using the Tag in the example,
the file name becomes 2011-10-11_000000.<EXT>.
•
Both the Name and the Tag may be used, in which
case the file name becomes IL3-11_2011-10-
11_000000.<TYPE> in the example.
•
If AVI files are saved, the default file name is
IL3_000000.AVI. The Use Name and Use Tag options are
also valid for AVI files, in which case the resulting file names are IL3-11_000000.AVI, or 2011-10-
11_000000.AVI, etc. If the file size exceeds the 4GB limit for 32-bit file systems, the IL3 will make
a second file for the remainder of the imagery. (MiDAS and other players will play the video as
one.)
•
If CAP files are saved, they will not use either the camera name or the tag. CAP files are saved
only to the SSD. They must be loaded back into high-speed memory in the camera to be
reviewed, then converted into a downloadable file format.
Note: CAP files load back into memory much faster than they are saved, taking approximately 45
seconds for a full 8GB load and proportionately shorter times for smaller ones.
When the IL3 saves imagery to mass storage it creates the following:
•
DCIM. This is an industry standard directory name for Digital Camera Images.
•
100fastc. This is a sub-directory under DCIM.
•
IL3_000000. This is the first sub-directory under DCIM/100fastc, used for storing image stacks.
•
hs-video. This is the directory that all AVI files are written to.
•
<filename>.txt. For each download, the camera creates this text file. In it are the camera setup
values, including resolution, frame rate, camera name, time stamp for the capture, image
processing values, color processing values, etc. (See “Appendix G: Contents of Frame.txt file”.)
•
<filename>.cfg files. This is a binary file used for MiDAS player so that it can properly play the
image files as a movie.
Note: Image files may be saved multiple times using different formats, different start and stop points,
and different image processing options (brightness, contrast, gamma, color, etc.). If 10-bit images
have been captured, imagery may be saved multiple times using different bit-depths.
Figure 4-21: Save Dialog


