IL3 User’s Guide
11S-3002B
page 39
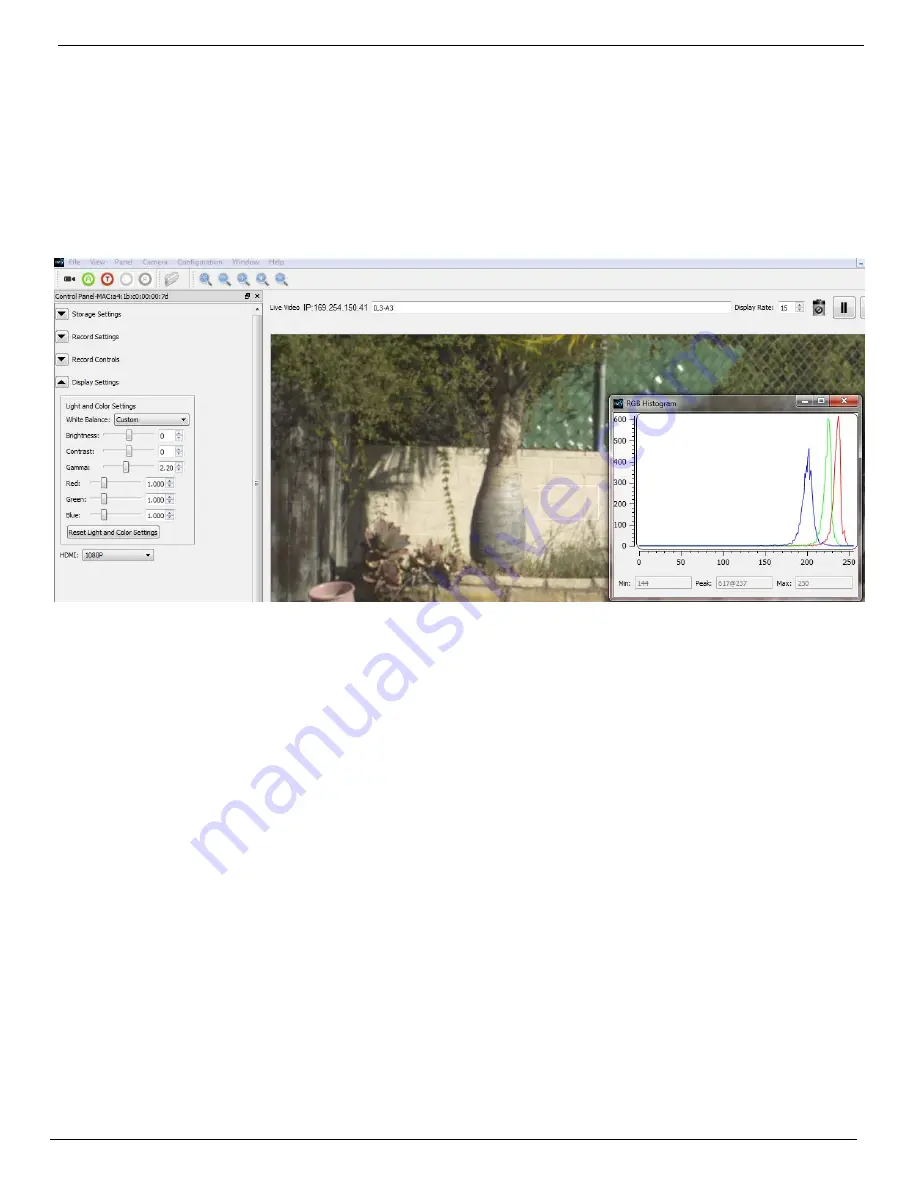
side of the box), but not saturated. It is important that the high pixel value is less than 255. Notice
on the example here, that the RGB peaks are not well aligned and that the Blue peak is farthest to
the left. This means that the color is skewed slightly towards the yellow, the complement to blue.
Note: The histogram used with Custom White Balance represents only the area of the reticle, not
the whole image. For more information regarding IL3 Histograms please refer to “Application Note 1:
Histograms” on page 60.
4. Press the Trigger button. You will immediately notice an difference in the color.
Using RGB Gain Controls
Another option for addressing color correction is via RGB Gains. It is recommended that you use the
RGB gains sparingly and as a final “tweak” to make subtle changes to the color. The best use of this
is to get the color as close as possible using the White Balance presets or Custom options before
adjusting the RGB gains.
To use RGB Gain:
1. Open the Display Settings Tab. You will notice sliders with edit boxes and spinners for Red, Green,
and Blue.
2. For any color gain you wish to increase, move the slider to the desired position. Remember to use
the D-Pad for fine adjustment.
Note: Remember that in the Bayer pattern, 1/2 of the pixels are green, 1/4 are blue and 1/4 are red.
Whenever you change gain values you will be adding some noise to the image. It is best to avoid using
any more gain than you need to, and to take special care with the green channel as it represents half
of the pixels in the image.
Figure 4-20:
Custom White Balance


