


103
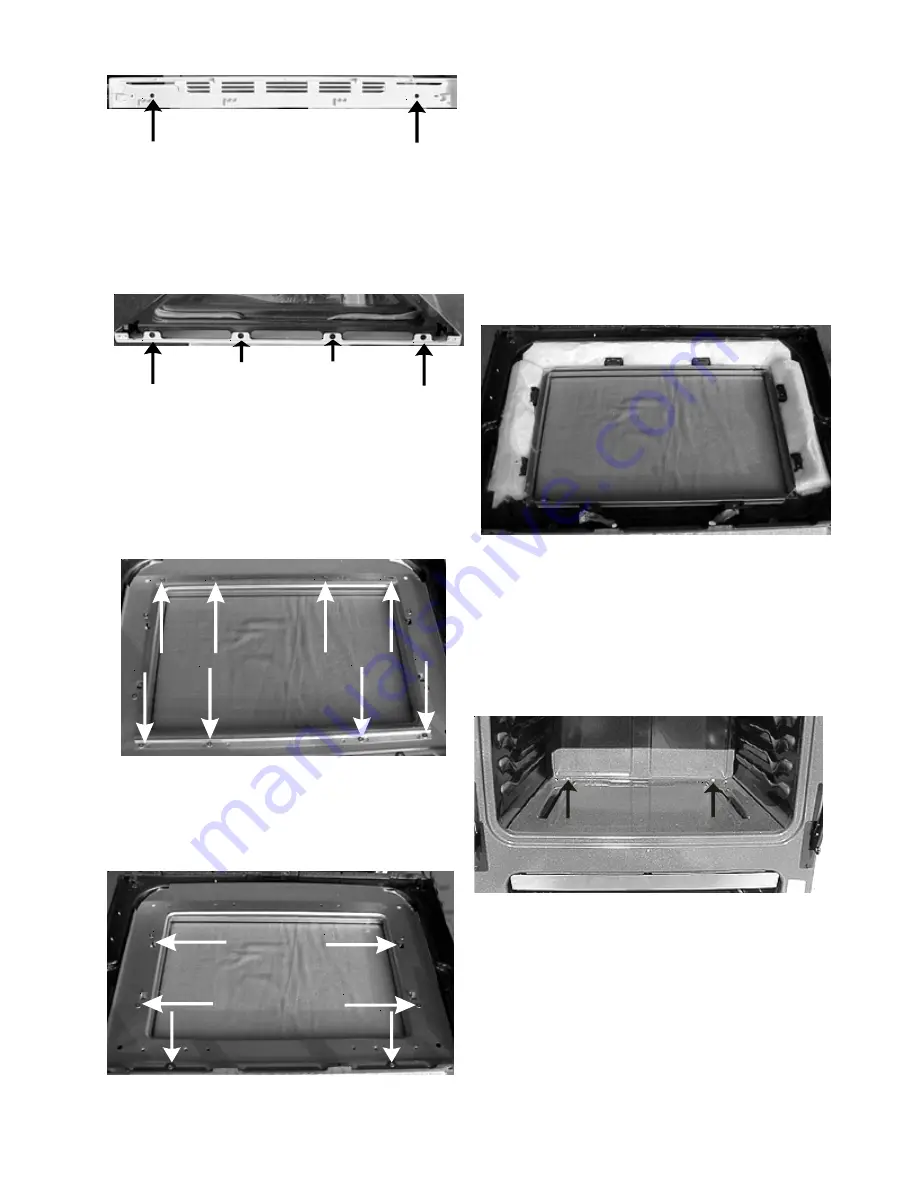
2. Remove the six screws, two at the bottom and two
on each side, holding the wool shield to the inner
liner and slide the wool shield up and off.
Glass package and inner door liner:
1. Remove the wool shield and the glass package can
be lifted out.
2. With the glass package removed the door seal, and
insulation and the inner door remains.
Glass package and insulation
Removing oven bottom:
1. Remove the two screws holding rear of the oven
bottom to liner tabs and lift the rear of the bottom up
and slide it back.
Oven bottom screws
Removing bake burner baffle:
1. Using a 3/8” socket remove the nut holding the baffle
to the burner.
2. Remove the two screws holding the baffle to the front
frame.
Oven door handle screws
Removing outer door glass and trim:
1. Remove upper door trim.
2. Remove four screws at the bottom holding the trim
to the inner door liner, and lift the glass and trim off.
Oven door bottom screws
Removing center glass:
1. Remove the outer door glass and trim.
2. Remove the eight screws, four from each, holding
the top and bottom center glass trims.
3. Remove the trims and lift the glass off.
Eight trim screws
Removing wool shield:
1. Remove the center glass.
Six wool shield screws
Summary of Contents for 30" GAS FREESTANDING RANGES
Page 43: ...43 SAMPLE SCHEMATIC FOR ES100 CONTROL SYSTEM ...
Page 50: ...50 SAMPLE SCHEMATIC FOR ES 200 CONTROL SYSTEM ...
Page 60: ...60 SAMPLE SCHEMATIC FOR ES 300 CONTROL SYSTEM ...
Page 72: ...72 SAMPLE SCHEMATIC FOR ES 400 CONTROL SYSTEM ...
Page 84: ...84 SAMPLE SCHEMATIC FOR ES 450 CONTROL SYSTEM ...
Page 93: ...93 Sample schematic for 36 gas range ...
Page 130: ...130 NOTES ...
Page 131: ...131 NOTES ...
Page 132: ...132 ...


