Zero 88 FLX Lighting Console
–
User Manual
Page
27
of
64
Cues
Recording cues
Once you have set up a look that you like, by selecting
fixtures and adjusting their parameters as described in the
previous chapters, you can then record that state into a
cue. To see the cues being recorded, it is recommended
that the Playback Window is displayed. To record a cue,
there are four possible methods:
…
Record Enter
…
This will record the next available cue, within the playback you are
currently viewing.
…
Record 5 Enter
…
This will record cue 5 within the playback you are currently viewing.
…
Record Go
…
This will record the next available cue, within the playback of the Go
button you press (this could be one of the MFFs, or the Master Go button)
…
Record 5 Go
…
This will record cue 5 within the playback of the Go button you press.
“Point Cues” can be defined up to two decimal places, an
d will be
automatically placed into the cue stack in numerical order.
Subsequent cues can then be set up and recorded using
the same method.
After recording a cue, one of three things will happen:
1)
If in tracking mode (and “Smart tag” is disabled) and
the p
layback fader is above the “trigger level”, the
cue will be played back, the command line is
cleared, the fixture parameters are automatically
untagged, but the fixtures remain selected.
2)
If in tracking mode (and “Smart tag” is disabled) and
the playback fa
der is below the “trigger level”, FLX
will ask you to raise the Playback fader. Once done,
FLX will act as per Option 1 above.
3) If in non-tracking mode (or in tracking mode with
“Smart tag” enabled) the cue is not played back, the
command line is cleared but the fixture parameters
remain tagged and the fixtures remain selected
Subsequent cues can then be set up and recorded in a
similar way.
As you become more experienced with the desk, you will
find the most efficient way of programming cues into cue
playbacks.
Please note: FLX can be operated as a tracking console. This means
that if a parameter is programmed in one cue, it will track through all
subsequent cues until it is programmed to do something else. If you
program playbacks sequentially, you shouldn
’
t have to worry too much
about tracking, as long as you ensure that you tag any parameters you
wish to be recorded in the cue you are working on.
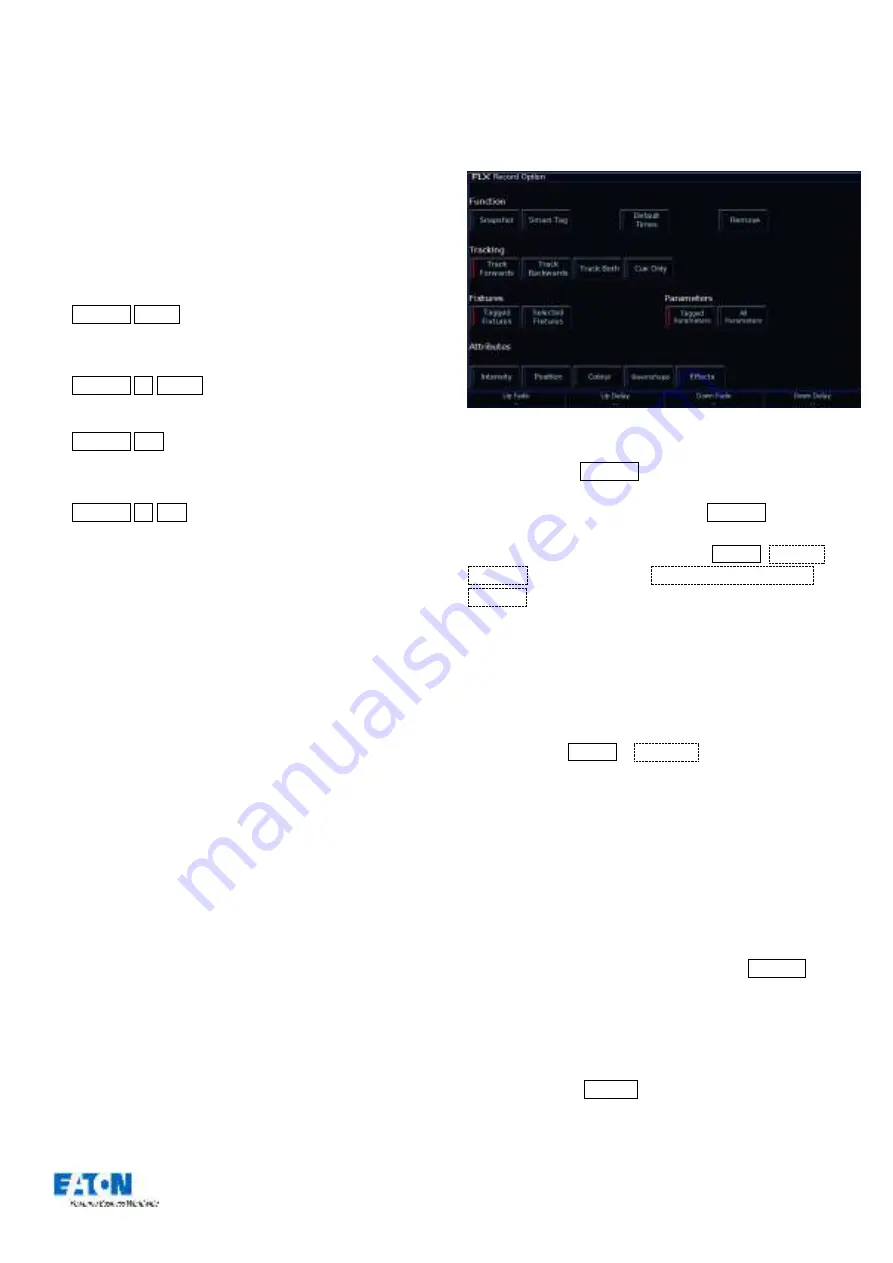
Record Window
Record Window
When you press Record , the Record Window opens on
the external monitor. To open the Record Window on the
internal monitor, press
and
hold
the Record button, rather
than just tapping it. You can change where and when the
Record Window opens by going into Setup ,
System
Settings
and changing the
Show Record & Update
Window
setting.
Within the Record Window are the following options:
Fade Times
Each cue can have a Fade Up, Fade Down,
Colour, Beam, Shape and Position fade time.
Within Setup >
Defaults
the default fade times
are defined, and can be adjusted if required prior
to programming cues. Cue 1 will always have a
default
of 0 seconds, but can be altered once
recorded if desired.
Fade times can be added when recording a cue, or
adjusted after the cue is recorded or when
updating a cue.
To add fade times when recording a cue, use the
encoder wheels. When you press Record during
the record process, “Up Fade”, “Up Delay”, “Down
Fade” and “Down Delay” will be shown on the
encoder wheels. Use the encoder wheels to
change these fade times, or press the middle
button on the encoder wheel to type in a fade time.
Pressing Colour
will put “Colour Up” and “Colour
Delay” on the encoders. Beam and Position will do
similar for these attributes.


