


D-Control Guide
54
Send Pan Mode
Send Pan mode allows you to adjust panning and level for an
individual send on a channel at the same time. In Send Pan
mode, Send Level is controlled by the channel fader and Send
Pan is controlled by the encoders.
Send Pan mode lets you view different sends on individual
channels, or by using the Do To All or Do To Selected
switches, the same send across multiple channels.
In Send Pan mode, you can link Pan controls of individual
Sends to the Main Pan controls of their tracks (the “Follow
Main Pan” or “FMP”).
To enter Send Pan mode:
1
Press the Sends switch to display sends on the channel’s en-
coders.
2
Press the encoder Select switch that corresponds to the send
you want to display. The channel’s Send and Pan switches
light to indicate that it is in Send/Pan mode.
To return to the top level display of sends on the channel strip:
Press the Sends switch again.
To link a Send’s Pan controls to the Main Pan controls of a track:
1
Put the track in Send Pan mode for the Send you want to
link.
2
Press the B/M/P switch on any of the active encoders on the
track to toggle the FMP status of the send.
Send Clipping Indication
The Sends switch flashes when a send on that channel has
clipped. To clear a clip, press the Clear Clip button in the Ses-
sion Management section. See “Clear Clip Switch and Plug-in
Clip Indicator” on page 102 for more information.
Channel Strip Function Controls
Each channel strip has a set of Channel Strip Function con-
trols for controlling channel selection and focus, mute, solo,
and record enable status, input monitor mode, and automa-
tion mode.
Input Monitor Mode Switch
The Input Monitor Mode switch toggles the input monitoring
mode for that channel between Auto Input and Input Only
mode. The switch lights when the channel is in Input Only
mode.
Record Enable Switch
The Record Enable switch toggles record enable status for the
channel. When the channel is record-enabled and the
Pro Tools transport is stopped, the switch flashes. During re-
cording, the switch lights continuously.
Record Safe Mode
To record safe a track from D-Control, hold
Control (Windows) or Command (Mac) and press the track’s
Record Enable switch.
Channel Select Switch
The function of the Channel Select switch depends on the Se-
lect/Focus Mode setting. See “Select/Focus Mode Switch and
Indicators” on page 67 for more information on changing the
Select/Focus mode.
Select Mode
If the Select/Focus Mode is set to Select, the
Channel Select switch selects the channel in Pro Tools. The
switch lights when the channel is selected. In this mode, the
Channel Select switch can be set to follow latching or exclu-
sive-or (non-latching) behavior.
Focus Mode
If the Select/Focus Mode is set to Focus, the Chan-
nel Select switch focuses that channel’s controls on the Focus
Channel Strip on the Main Unit. The switch lights when the
channel is focused. In this mode, because only one track can
be focused at a time, the Select switch follows exclusive-or
(non-latching) behavior only.
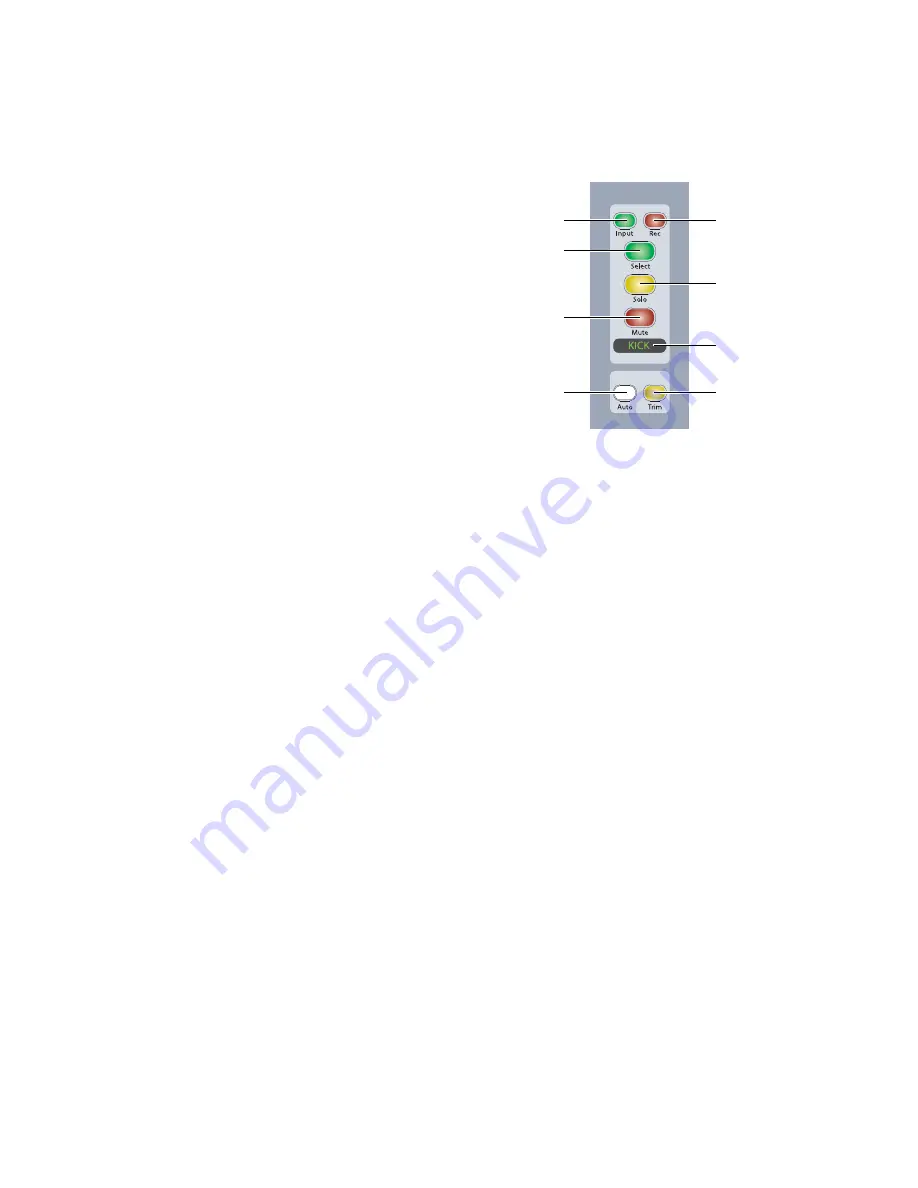
Channel Strip Function controls
Input Monitor Mode
switch
Channel Select
switch
Solo switch
Mute switch
Channel display
Automation Mode
switch
Record Enable
Automation Trim
switch
switch
Summary of Contents for D-Control
Page 1: ...D Control Version 8 0 ...
Page 4: ......
Page 8: ...D Control Guide viii ...
Page 9: ...Part I Introduction ...
Page 10: ......
Page 14: ...D Control Guide 6 ...
Page 21: ...Part II Installation ...
Page 22: ......
Page 40: ...D Control Guide 32 ...
Page 54: ...D Control Guide 46 ...
Page 55: ...Part III Reference ...
Page 56: ......
Page 78: ...D Control Guide 70 ...
Page 134: ...D Control Guide 126 ...
Page 146: ...D Control Guide 138 ...
Page 156: ...D Control Guide 148 ...
Page 172: ...D Control Guide 164 ...
Page 176: ...D Control Guide 168 ...
Page 183: ......


