


D-Control Guide
30
Mounting D-Control Cables (Optional)
Three different kinds of cable ties are provided with D-Con-
trol.
Velcro Rip Ties
These ties can be affixed to the D-Control
stand legs. Two pre-drilled holes inside each leg accept #8 x
1/2-inch self-tapping screws.
Screw-Mount Ties
These ties can be affixed to the D-Control
stand legs with the #8 x 1/2-inch self-tapping screws.
Adhesive-Backed Ties
These self-sticking tie mounts let you
place cable ties anywhere on the D-Control unit, and can be
used to dress cables or to mount an Ethernet hub under the
unit.
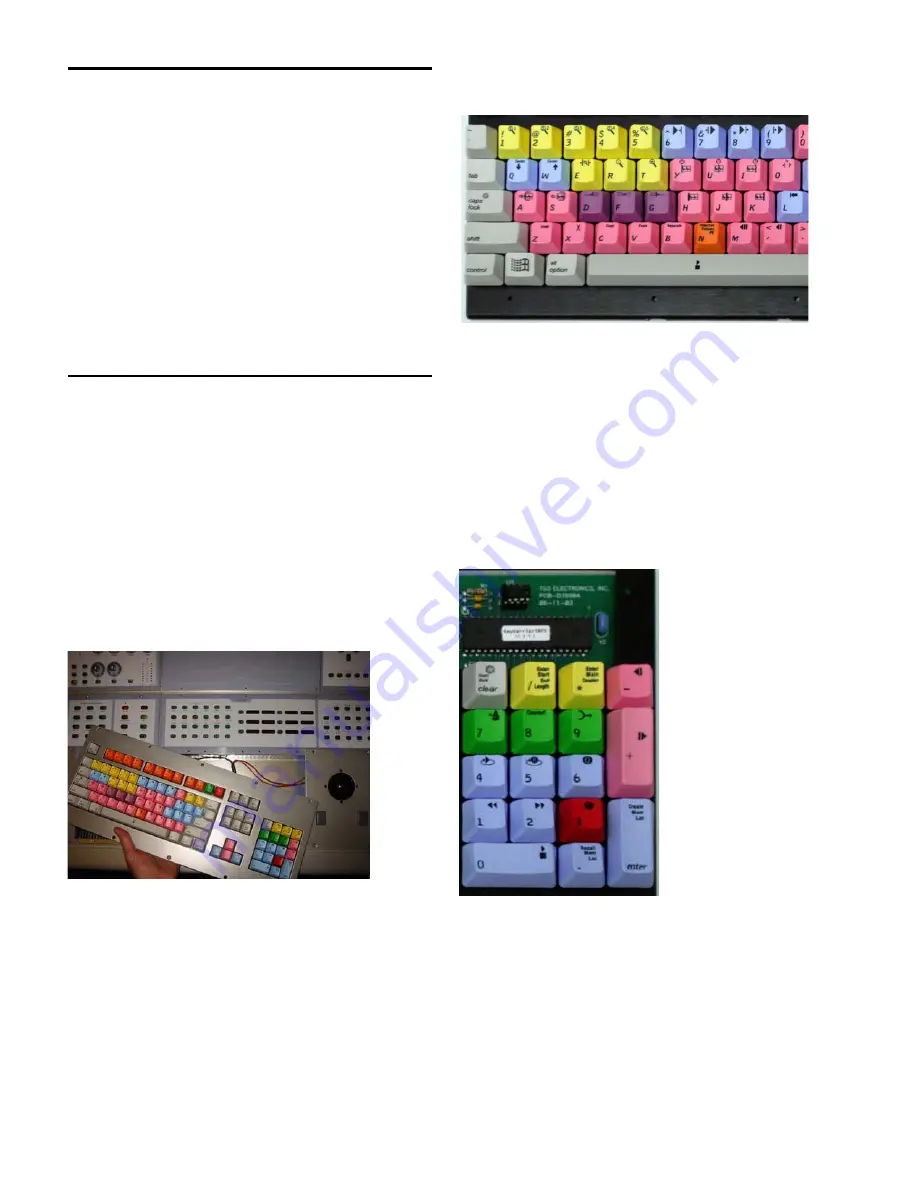
Reconfiguring the D-Control Keyboard
for a Windows System
The computer keyboard on the D-Control Main Unit ships
with a Mac keyboard configuration.
If you will be using D-Control with a Windows-based
Pro Tools system, you will need to reconfigure the computer
keyboard.
To reconfigure the D-Control computer keyboard for Windows:
1
Using a 5/64-inch hex wrench, remove the screws in the
computer keyboard panel and detach it from the D-Control
Main Unit.
2
Locate the switch on the printed circuit board under the
keyboard and move it to the opposite position.
3
Remove the two Apple Command (
a
) keys from either side
of the Spacebar on the alpha keyboard.
4
Move the Alt/Option keys inward to replace the Apple Com-
mand keys.
5
Install the included Start (or “Windows”) keys to replace the
Alt/Option keys.
6
Remove the Equals (=) key, also called “Capture” key, from
the numeric keypad.
7
Move the Slash (/) key, also called the “Enter Start End
Length” key, to replace the Equals key.
8
Move the Asterisk (*) key, also called the Enter Main Counter
key, to replace the Slash key.
9
Move the Minus (–) key to replace the Asterisk key.
10
Remove the Plus (+) key and install the included dou-
ble-sized plus key to replace the old Plus and Minus keys.
11
Replace the computer keyboard panel on the D-Control
Main Unit and reattach its screws.
Figure 44. Removing the computer keyboard from the Main Unit
Figure 45. Windows keys in place on alpha keyboard
Figure 46. Windows keys in place on the numeric keypad
Summary of Contents for D-Control
Page 1: ...D Control Version 8 0 ...
Page 4: ......
Page 8: ...D Control Guide viii ...
Page 9: ...Part I Introduction ...
Page 10: ......
Page 14: ...D Control Guide 6 ...
Page 21: ...Part II Installation ...
Page 22: ......
Page 40: ...D Control Guide 32 ...
Page 54: ...D Control Guide 46 ...
Page 55: ...Part III Reference ...
Page 56: ......
Page 78: ...D Control Guide 70 ...
Page 134: ...D Control Guide 126 ...
Page 146: ...D Control Guide 138 ...
Page 156: ...D Control Guide 148 ...
Page 172: ...D Control Guide 164 ...
Page 176: ...D Control Guide 168 ...
Page 183: ......


