Chapter 5: Configuring D-Control
39
Chapter 5: Configuring D-Control
Starting Up and Shutting Down the
System
Your D-Control-based system must be started up and shut
down in a specific order.
Start your D-Control-based system in this order:
1
Turn on external hard drives first. Wait 10 to 15 seconds for
them to come up to speed.
2
Turn on the D-Control units.
3
If you plan to work with MIDI equipment, turn on MIDI in-
terfaces and other MIDI devices.
4
Turn on all Pro Tools audio interfaces.
5
Turn on the computer.
6
Turn on the XMON interface.
7
Turn on monitor amplifiers or self-powered speakers.
Shut down your D-Control-based system in this order:
1
Turn off monitor amplifiers or self-powered speakers.
2
Turn off the XMON interface.
3
Turn off all Pro Tools audio interfaces.
4
Shut down the computer.
5
If using MIDI equipment, turn off MIDI interfaces or con-
trollers.
6
Turn off the D-Control units.
7
Turn off external hard drives.
Software Configuration
All D-Control software is included when Pro Tools software is
installed. The Pro Tools software installer places the D-Con-
trol Personality folder on the system drive.
Refer to the
Getting Started Guide
that came with your system
for instructions on installing or updating Pro Tools software.
Updating System Firmware
Each release of Pro Tools software includes the most current
D-Control firmware. When you declare a D-Control unit in
the Pro Tools Peripherals dialog, Pro Tools compares the firm-
ware of all connected units to the version available in
Pro Tools software, and prompts you if an update is available.
If you are prompted to update firmware, follow the on-screen
instructions to load the latest firmware to each D-Control
unit.
Declaring D-Control Units in Pro Tools
Communication between D-Control and Pro Tools is config-
ured from Pro Tools.
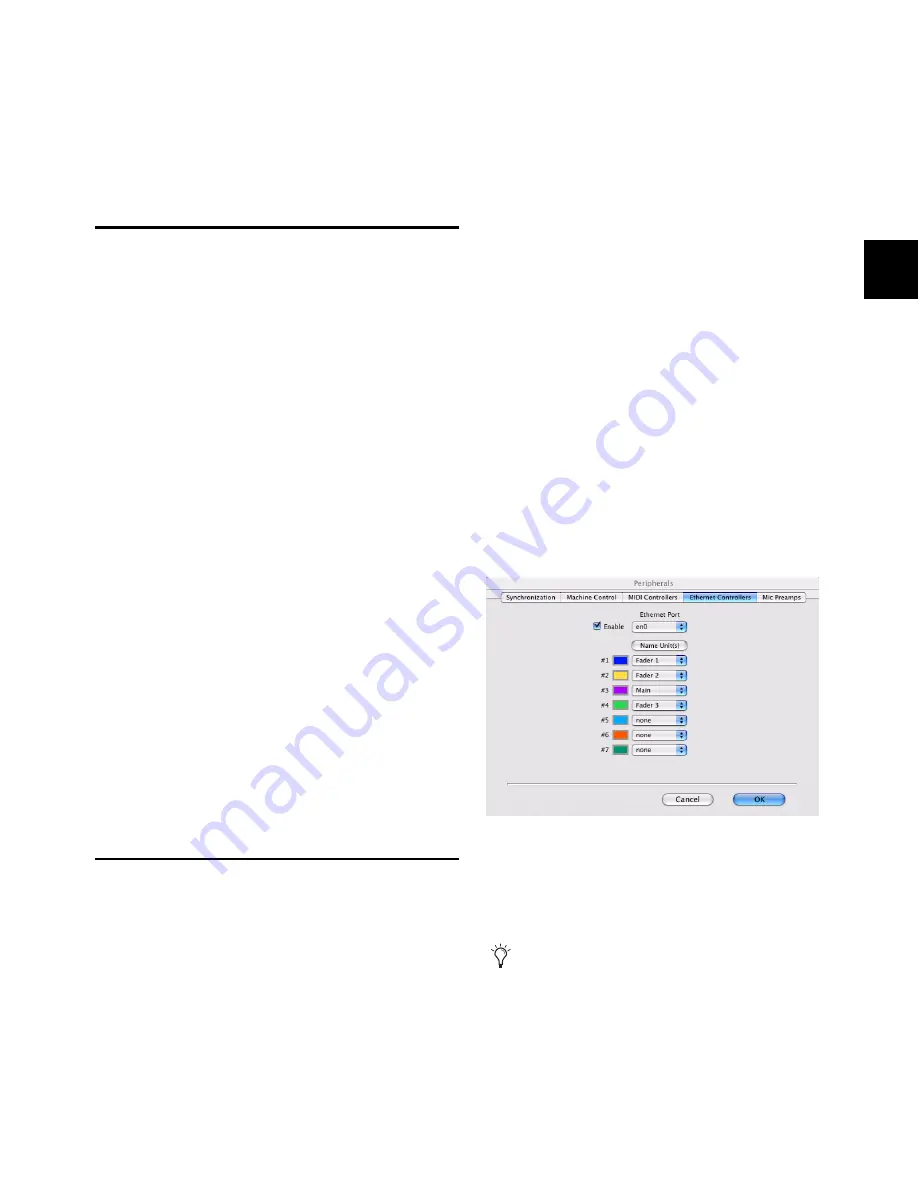
To declare D-Control units in Pro Tools:
1
Choose Setups > Peripherals, and click Ethernet Controllers.
2
Select Enable. Pro Tools scans the Ethernet connection for
any D-Control units connected to the system.
3
Select the units in order as you want them arranged left to
right.
Ethernet Controllers display in the Peripherals dialog
It is not necessary to declare units in the same sequence
as they are physically arranged in the D-Control stand.
You can set a Pro Tools system to use D-Control units in
any order, to fit your workflow.
Summary of Contents for D-Control
Page 1: ...D Control Version 8 0 ...
Page 4: ......
Page 8: ...D Control Guide viii ...
Page 9: ...Part I Introduction ...
Page 10: ......
Page 14: ...D Control Guide 6 ...
Page 21: ...Part II Installation ...
Page 22: ......
Page 40: ...D Control Guide 32 ...
Page 54: ...D Control Guide 46 ...
Page 55: ...Part III Reference ...
Page 56: ......
Page 78: ...D Control Guide 70 ...
Page 134: ...D Control Guide 126 ...
Page 146: ...D Control Guide 138 ...
Page 156: ...D Control Guide 148 ...
Page 172: ...D Control Guide 164 ...
Page 176: ...D Control Guide 168 ...
Page 183: ......


