


48
Drives
2
Remove the computer cover (see "Removing the Computer Cover" on
page 17).
3
Remove the primary hard drive (see "Removing the Primary Hard Drive"
on page 45).
4
Remove the hard drive cage (see "Removing the Hard Drive Cage" on
page 46).
5
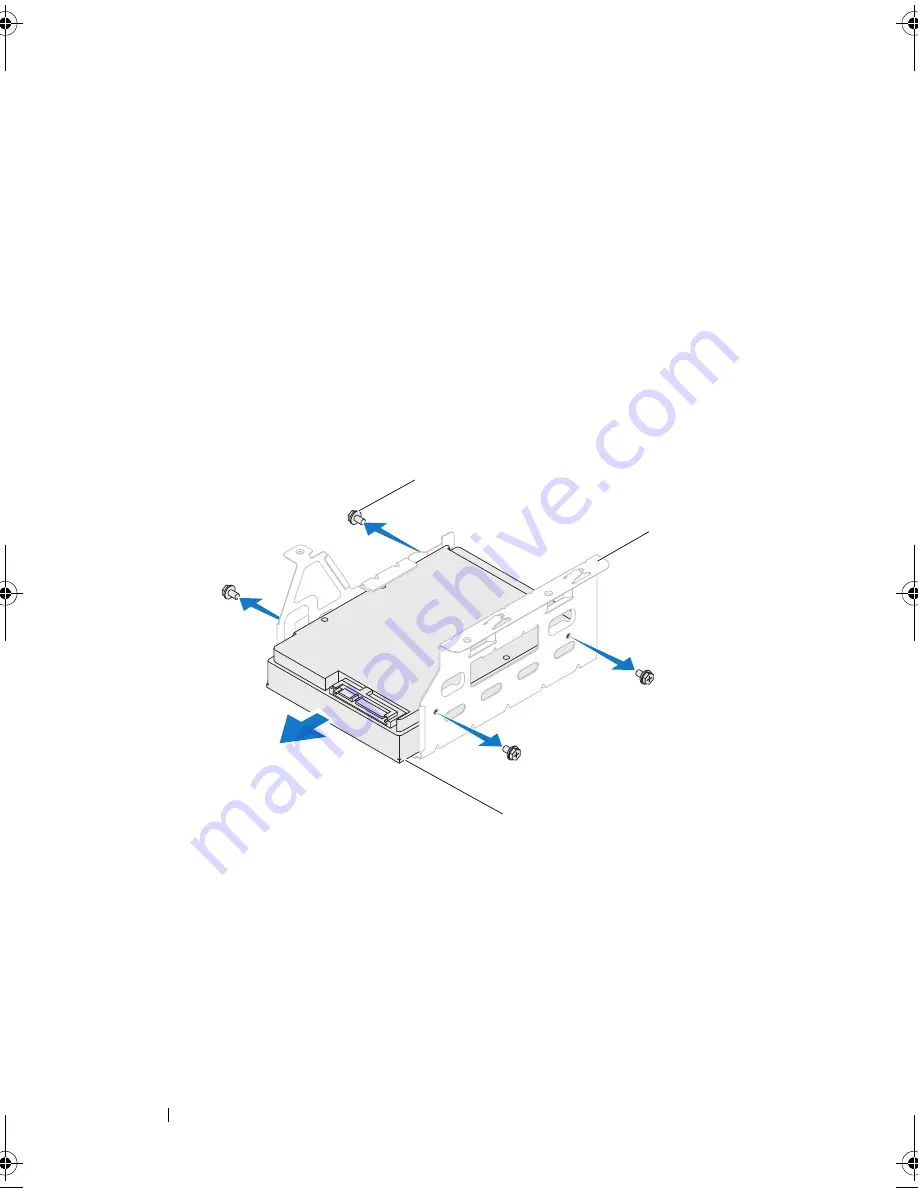
Remove the four screws that secure the secondary hard drive to the hard
drive cage.
6
Slide the secondary hard drive away from the hard drive cage.
Replacing the Secondary Hard Drive
1
Follow the instructions in "Before You Begin" on page 13.
1
screws (4)
2
hard drive cage
3
secondary hard drive
1
3
2
book.book Page 48 Wednesday, April 25, 2012 12:34 PM
Summary of Contents for XPS 8300
Page 1: ...Dell XPS 8300 Service Manual Model D03M Series Type D03M001 ...
Page 8: ...8 Contents ...
Page 12: ...12 Technical Overview ...
Page 16: ...16 Before You Begin ...
Page 20: ...20 Computer Cover ...
Page 26: ...26 Memory Module s ...
Page 36: ...36 Wireless Mini Card ...
Page 44: ...44 PCI Express Cards ...
Page 60: ...60 Top Cover ...
Page 64: ...64 Top I O Panel ...
Page 68: ...68 Front USB Panel ...
Page 72: ...72 Bluetooth Assembly ...
Page 76: ...76 Power Button Module ...
Page 80: ...80 Fans 1 processor fan cable 2 captive screws 4 3 processor fan and heat sink assembly 2 1 3 ...
Page 82: ...82 Fans ...
Page 88: ...88 Processor ...
Page 92: ...92 Coin Cell Battery ...
Page 94: ...94 Power Supply 1 screws 4 2 power supply 3 power supply clamps 2 1 2 3 ...
Page 96: ...96 Power Supply ...
Page 102: ...102 System Board ...
Page 114: ...114 System Setup Utility ...