DR Series System: Proper Shut Down and Start Up
Before you attempt to remove or replace any hardware component in the DR Series system, ensure that you observe the
following best practices for properly shutting down and starting up the system:
1.
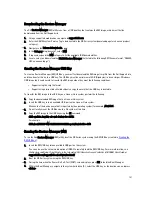
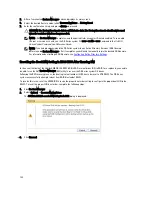
Power off the DR Series system by selecting Shutdown in the System Configuration page.
For more information, see
Shutting Down the DR Series System
. Another method you can use to shut down the
system is the DR Series system CLI command, system --shutdown.
2.
Allow the DR Series system to fully complete its power-down process.
When the power-down process has completed, the Power Supply status indicator is unlit.
3.
Disconnect the DR Series system power cables from the electrical power outlet.
4.
Wait an additional period of time (up to 10 minutes), and/or verify that all of the green and amber NVRAM LEDs on
the rear panel of the system chassis are unlit.
NOTE: If you do not allow the NVRAM super capacitor sufficient time to discharge, the NVRAM status will
report DATA LOSS when the DR Series system is subsequently powered up.
5.
Unlatch the latch release lock and slide the DR Series system cover back and away to gain entry to the appliance
internal components.
To gain entry to the interior of the DR Series system, remove the cover. For more information, see the procedures in
the
Dell DR Series System Owner’s Manual
.
6.
Remove and replace the system hardware components as needed.
7.
Replace the cover, reconnect the system power cables to the electrical power outlet.
8.
Power on the DR Series system by pressing the power-on indicator/power button.
DR Series System NVRAM
NVRAM is a field replaceable unit (FRU) in the DR Series system. The super capacitor that powers the NVRAM double-
data rate (DDR) memory must be able to move its contents to the solid-state drive (SSD) during a power loss.
This data transfer requires maintaining the power to run the system for 3 minutes of operation (normally, it only takes
approximately one minute). If a problem occurs during the data backup to the SSD, the subsequent system reboot
detects this. NVRAM can experience backup failure when the following occurs:
•
The NVRAM failed to backup the data during the power shutdown
•
The super capacitor did not maintain sufficient power to backup the DDR contents into the SSD.
•
The NVRAM/SSD encountered an end-of-line (EOL) or another error.
If any of these conditions occur, the NVRAM requires either a failure recovery or a replacement.
NOTE: Dell recommends the following supported method for flushing DR Series system data from the NVRAM to
the RAID6 before replacing the NVRAM by using either of the following DR Series system CLI commands: system --
shutdown or system --reboot.
NOTE: If you need to remove or replace the NVRAM in the DR Series system, see
Shutting Down the DR Series
System
and
NVRAM Field Replacement
.
NVRAM Backup Failure Recovery
After you have physically replaced the NVRAM card in a PCIe x4 (or x8) slot in the DR Series system chassis, you can
recover from an NVRAM backup failure by completing the following tasks:
125
Summary of Contents for PowerVault DX6112
Page 1: ...Dell DR Series System Administrator Guide ...
Page 32: ...32 ...
Page 70: ...70 ...
Page 86: ...86 ...
Page 100: ...For more information on Replication schedules see Creating a Replication Schedule 100 ...
Page 114: ...114 ...

