System Setup Utility
145
31
System Setup
Overview
Use the system setup to:
• get information about the hardware installed in your computer, such as the
amount of RAM, the size of the hard drive, and so on
• change the system configuration information
• set or change a user-selectable option, such as the user password, type of
hard drive installed, enabling or disabling base devices, and so on
NOTE:
Before you change system setup, it is recommended that you note the
system-setup screen information for future reference.
Entering System Setup
1
Turn on (or restart) your computer.
2
During POST, when the DELL logo is displayed, watch for the F2 prompt
to appear and then press <F2> immediately.
NOTE:
The F2 prompt indicates that the keyboard has initialized. This prompt
can appear very quickly, so you must watch for it, and then press <F2>. If you
press <F2> before the F2 prompt, this keystroke is lost. If you wait too long and
the operating system logo appears, continue to wait until you see the
Microsoft Windows desktop. Then, turn off your computer and try again. See
"Turn Off Your Computer and Connected Devices" on page 13.
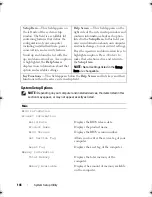
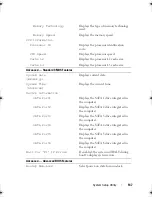
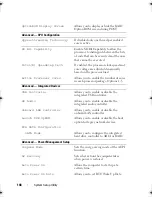
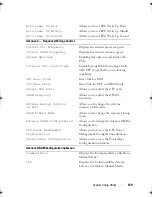
System Setup Screens
The system setup screen displays current or changeable configuration
information for your computer. Information on the screen is divided into
three areas: the
setup item
, active
help screen
, and
key functions
.
book.book Page 145 Wednesday, May 16, 2012 2:37 PM
Summary of Contents for Alienware Aurora R4
Page 16: ...16 Before you Begin ...
Page 24: ...24 Technical Overview ...
Page 28: ...28 Left Side Panel ...
Page 31: ...Hard Drive s 31 2 Follow the steps in After Working Inside Your Computer on page 15 ...
Page 32: ...32 Hard Drive s ...
Page 36: ...36 Hard Drive Fan Assembly ...
Page 39: ...Optical Drive s 39 2 Follow the steps in After Working Inside Your Computer on page 15 ...
Page 40: ...40 Optical Drive s ...
Page 56: ...56 PCI Fan Assembly ...
Page 62: ...62 Graphics Card ...
Page 69: ...Memory Fan 69 2 Follow the steps in After Working Inside Your Computer on page 15 ...
Page 70: ...70 Memory Fan ...
Page 74: ...74 Processor Liquid Cooling Assembly ...
Page 81: ...Processor 81 ...
Page 82: ...82 Processor ...
Page 88: ...88 Power Supply ...
Page 92: ...92 Coin Cell Battery ...
Page 98: ...98 System Board Assembly ...
Page 102: ...102 Master I O Board ...
Page 106: ...106 Top Lighting Board ...
Page 108: ...108 Right Side Top Panel 2 Remove the screw that secures the right side top panel ...
Page 112: ...112 Right Side Top Panel ...
Page 116: ...116 Right Side Middle Panel ...
Page 120: ...120 Right Lighting Board ...
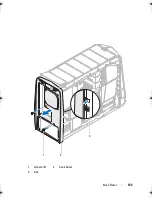
Page 135: ...Back Bezel 135 1 screws 2 2 back bezel 3 tabs 1 2 3 ...
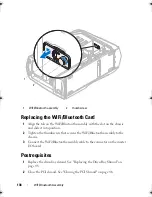
Page 140: ...140 WiFi Bluetooth Assembly ...
Page 144: ...144 Top I O Panel ...
Page 158: ...158 System Setup Utility ...
Page 162: ...162 Specifications ...

