8
SR200 & SR300 Printer User Guide
Load Supplies
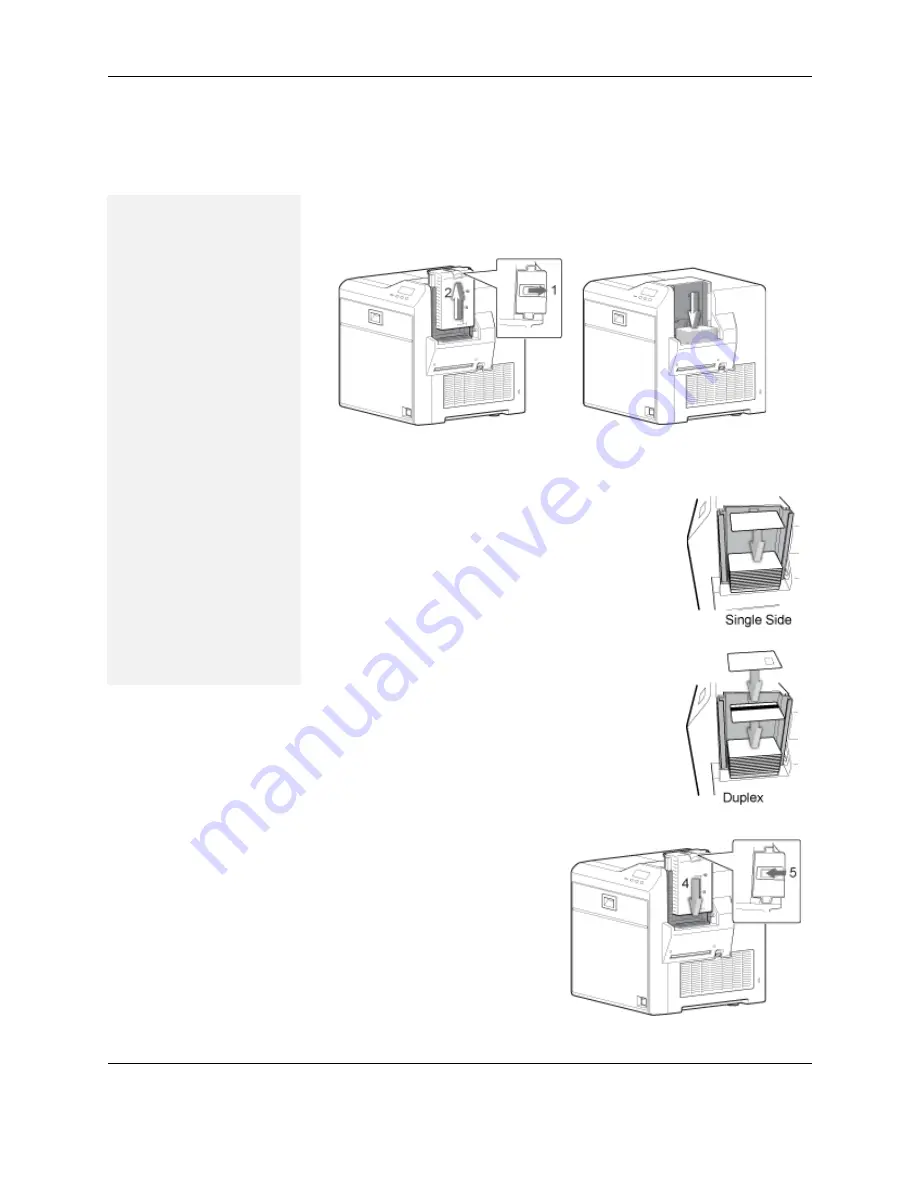
Load cards
The card hopper can hold up to 100, .030” (.75mm) cards. The cards are
held in position with a hopper cover. Make sure that magnetic stripe or smart
cards are loaded in the proper orientation for processing.
1
Slide the card hopper latch open (1).
2
Slide the card cover up (2).
3
Insert cards. See the illustrations for the correct
card orientation.
— For SR200 (single-side) printers, the top of
landscape-oriented cards is away from the
printer and the front of the card is down.
— For SR300 (duplex) printers:
— Load ISO-1 magnetic stripe cards with
the stripe up and toward you.
— For most applications, load contact chip
cards with the chip down and toward
the back of the printer.
— For custom applications, the card load
orientation may be different.
4
Slide the hopper cover over the cards (4).
5
Slide the card hopper latch
closed (5).
Tips: Handling cards
•
Do not touch the
surface of cards before
printing them. (Oils on
hands will reduce
printing quality.)
•
Handle cards by the
edges or wear supplied
cotton gloves.
•
Cards can stick
together. Slide or fan
cards to separate the
edges.
•
Orient all cards the
same way.
•
Load about 100 cards
at the most.
•
Do not use cards that
are bent or otherwise
damaged.
•
See
“Supplies” on
page 67
for specific
card information.


