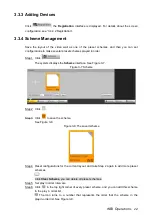
WEB Operations
15
3
WEB Operations
3.1 Network Connection
Step 1 Make sure that the Controller and PC are connected to the network correctly.
When any of the ports on the Controller motherboard is connected to the Ethernet port,
and the corresponding Ethernet port flickers with green light, the Controller is correctly
connected to the network.
Step 2 Set IP address, subnet mask, and gateway for the PC and Controller. For network
settings of the Controller, see “3.4.2 Network Setting”. (If there is no router in the
network, assign IP addresses in the same network segment; if there is router, set the
corresponding gateway and subnet mask.)
Step 3 Use ping ***.***.***.*** (IP address of the Controller) to check if the network is correctly
connected.
Step 4 Select
Tool > Internet Options > Custom Level
in the IE Browser, and then select
Enable
or
Prompt
for the ActiveX controls and Plug-in options.
Frequently used browsers like Firefox and chrome can be used.
Step 5 Open the IE Browser, enter the IP address of the Controller into the address bar.
Step 6 Install controls according to web page prompts.
3.2 Logging in the WEB
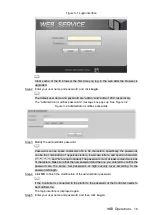
Step 1 Enter IP address (for example, the IP address might be 192.168.4.111) of the Controller
into the address bar. Specifically, enter http://192.168.4.111 into the address bar, and
then press
Enter
.
After the Controller is connected to the network, the web page is as follows. See Figure


