


25
PPoE Pass Through:
Check
Enable
to allow PPoE packets to pass through the router if there is a LAN PC using PPPoE for data communication with another
internet device.
Remote Upgrade:
Check
Enable
if you want to allow the authorized remote users to upgrade firmware from WAN side.
Reset Device:
Select “
Yes
” if you want to clear a connection, reboot, and re-initialize the unit without affecting any of your configuration setting.
Factory Defaults:
Select “
Yes
” if you want to return all the router’s current settings to their factory defaults. Note that you should not restore the factory defaults
unless it is absolutely necessary.
Click the “
Apply
” button after making any changes, or click the “Cancel” button to exit the screen without saving any changes.
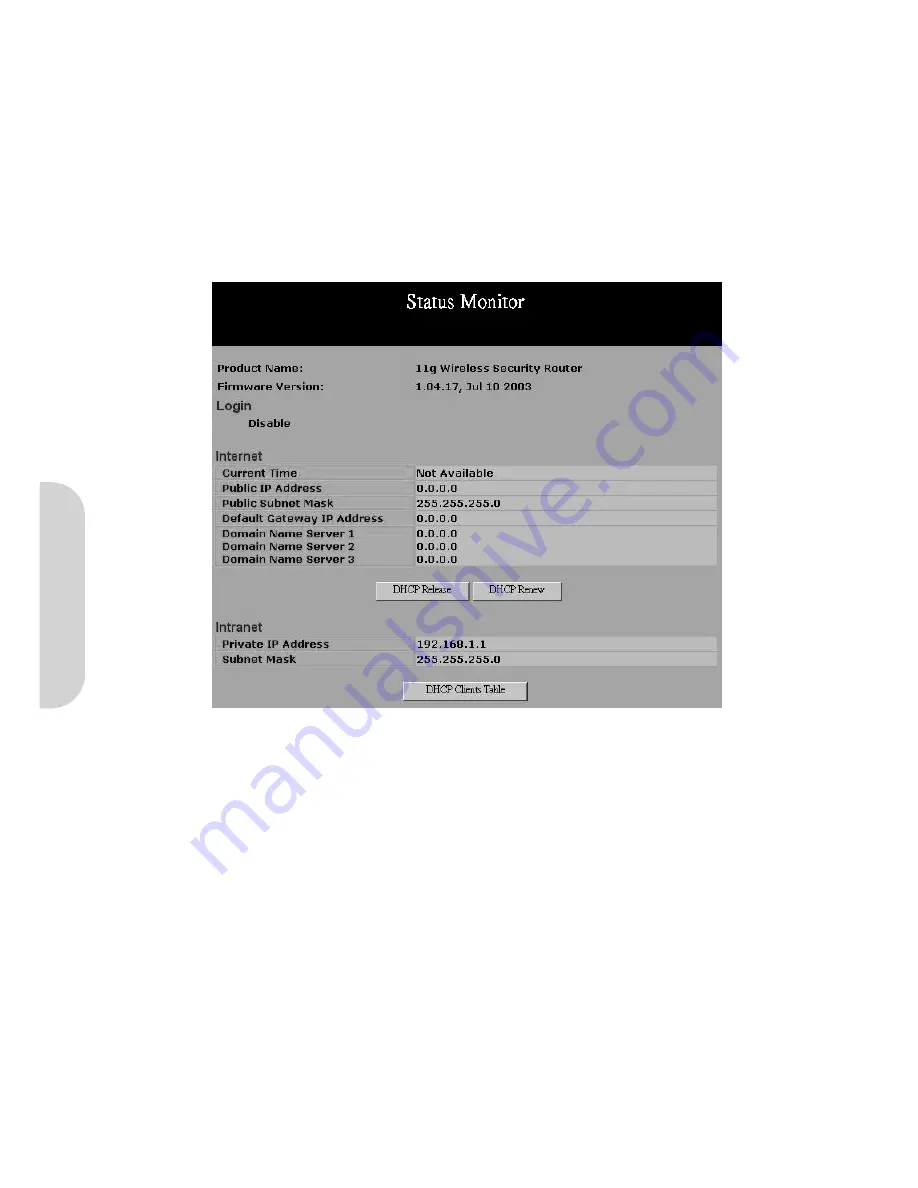
5-2 Status Monitor
This screen shows the router’s current status. All of the information provided is read-only.
Figure 43. Status Monitor
Firmware Version:
This field shows the installed version of the firmware.
Login:
This column shows the login information of PPPoE or PPTP. You can manually initiate the connection or make a disconnection by clicking the appropriate buttons.
Be aware that, if you make a disconnection here, “
Connect-on- demand
” will not function until the connection button is clicked. Note that “Login” won’t show any
information if you selected “
Obtain IP automatically
” or “
Static IP
” on the OnePage Setup page.
Device Status:
This section shows the connection information of the router. The “
Modem
” status shows Up or Down to indicate that the router is connected or
disconnected to the ISP. “
VPI
” and “
VCI
” show the respective values entered on the One Page Setup. “
Up Rate
” and “
Down Rate
” show the current outgoing
and incoming transmission speeds. “
DHCP server
” shows whether this function is enabled or disabled.
Internet:
This section shows the IP settings status of the router as seen by external users of the internet. The “
Domain Name Server
” (DNS) IP Address shows the
IP Address of the DNS currently being used. Multiple DNS IP settings are common. The first available DNS entry is used in most cases. “
DHCP Leased Time
” shows
the duration of time since the router was last dynamically assigned an IP Address from the ISP.
DHCP Release:
Click this button to eliminate the IP address obtained from DHCP server.
DHCP Renew:
Click this button to refresh the IP address from DHCP server. Note that the “DHCP Release” and “DHCP Renew” button only show up when you select
“
Get IP Address Automatically
” in the OnePage Setup.
Intranet:
This section displays the current “
Private IP Address
” and “
Subnet Mask
” of the router, as seen by users of your internal network.
Last Minute Traffic:
These fields show the sending “
TX
” and receiving “
RX
” traffic logs on both the WAN and LAN sides.
DHCP Clients Table:
If the router is setup to act as a DHCP server, the LAN side IP Address distribution table will appear by clicking this button.
ENGLISH


