


4-6 Access Control
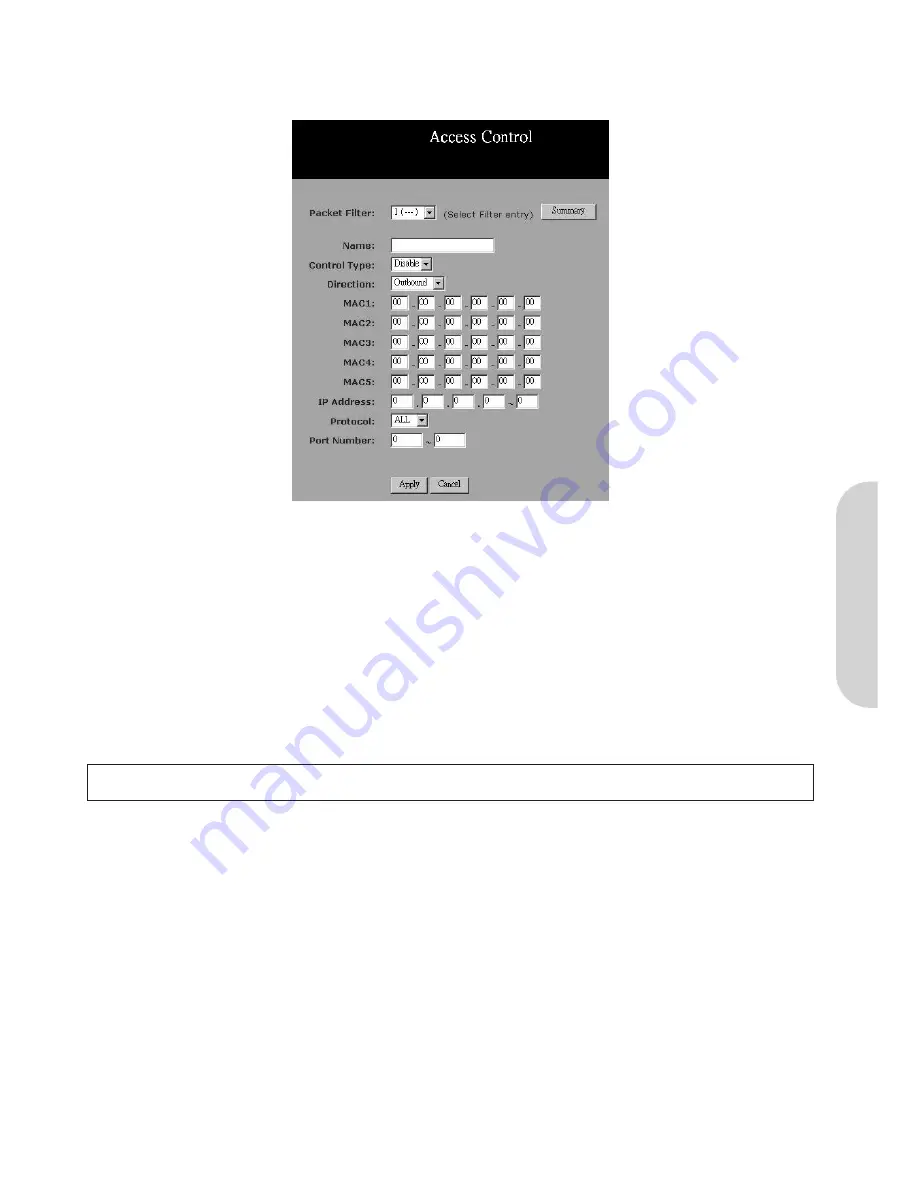
The Access Control feature allows administrators to set up to 10 access policies to block or allow certain users from accessing the Internet or specific applications. Before
using this function, the network PCs which you want to control the access limitation should be assigned fixed IP Addresses.
Figure 28. Access Control
•
Packet Filter:
Select the number of policy rules you want to configure. Up to 10 policies can be set. Note that these rules are performed in sequence, Rule 1 has
higher priority than Rule 2 etc.
•
Status:
Select “
Allow
” to limit users/computers access to specific applications you set on this rule. Select “
Deny
” to restrict the users/computers access to
specific applications you set on this rule.
•
Name:
For each rule, you can enter up to 15 characters to identify it.
•
Direction:
Choose the initial network data traffic direction you wish to block.
-
“
LAN
” to block/allow LAN side users/PCs set in the following “
MAC
” and “
Source IP
” fields to access certain applications on the internet.
-
“
WAN
” to block/allow WAN side users/PCs set in the following “
MAC
” and “
Source IP
” fields to access certain PCs on the LAN side.
•
MAC:
Define the MAC addresses of PCs that are defined in this policy.
•
IP Address:
Define the IP address or range of IP addresses of the PCs that are defined in this policy.
Note!
That if you set both the “MAC” and the “Source IP” in one rule, the PCs which have the MAC addresses matching in “MAC” field and their IP addresses
matching in the “Source IP” field will be allowed/blocked for certain applications.
•
Protocol:
Select the protocol type as “
TCP
” or “
UDP
” from the drop down list. If you are not sure which one to choose, select “
Both
”.
•
Port Number:
Enter the range of port numbers that are used by the applications you wish to be blocked. For example, port 80 is usually used as the destination
port number when you access a web page. Note that if you don’t enter any value in the “
MAC
” and “
Source IP
” column but enter the port number, for example
“80”, in “Destination Port”, it means all the users/PCs will be allowed/denied access to certain applications related to this port, for example “web browsing”.
•
Summary:
Click this button to display a summary page showing all the current rules you have set.
Here is a sample of Access Control Setting. There is a PC you wish to block in your LAN side with a MAC address like
00-01-36-02-B1-4F
, and an IP Address
192.168.1.101
. Enter the PC’s MAC address in the “
MAC
” field or the IP address included in the “
Source IP
” range that covers this PC’s IP address.
Enter the range of
20~80
in the “Destination Port” column, then click the “
Apply
” button. As a result, this PC with MAC address
00-01-36-02-B1-4F
and IP
Address
192.168.1.101
will not be able to use the applications which use port numbers from 20 to 80, such as FTP, Telnet and web browsing.
Click the “
Apply
” button after making any changes, or click the “
Cancel
” button to exit the screen without saving any changes.
ENGLISH
16


