


4-2 Virtual Private Network (VPN) Settings
A Virtual Private Network (VPN) allows users to use the internet to make the equivalent of a direct connection (private network) between two offices. Private networks
should be extremely secure, therefore when using the internet to make a VPN, data encryption must be used to ensure a high level of data security.
Figure 15. VPN Settings
•
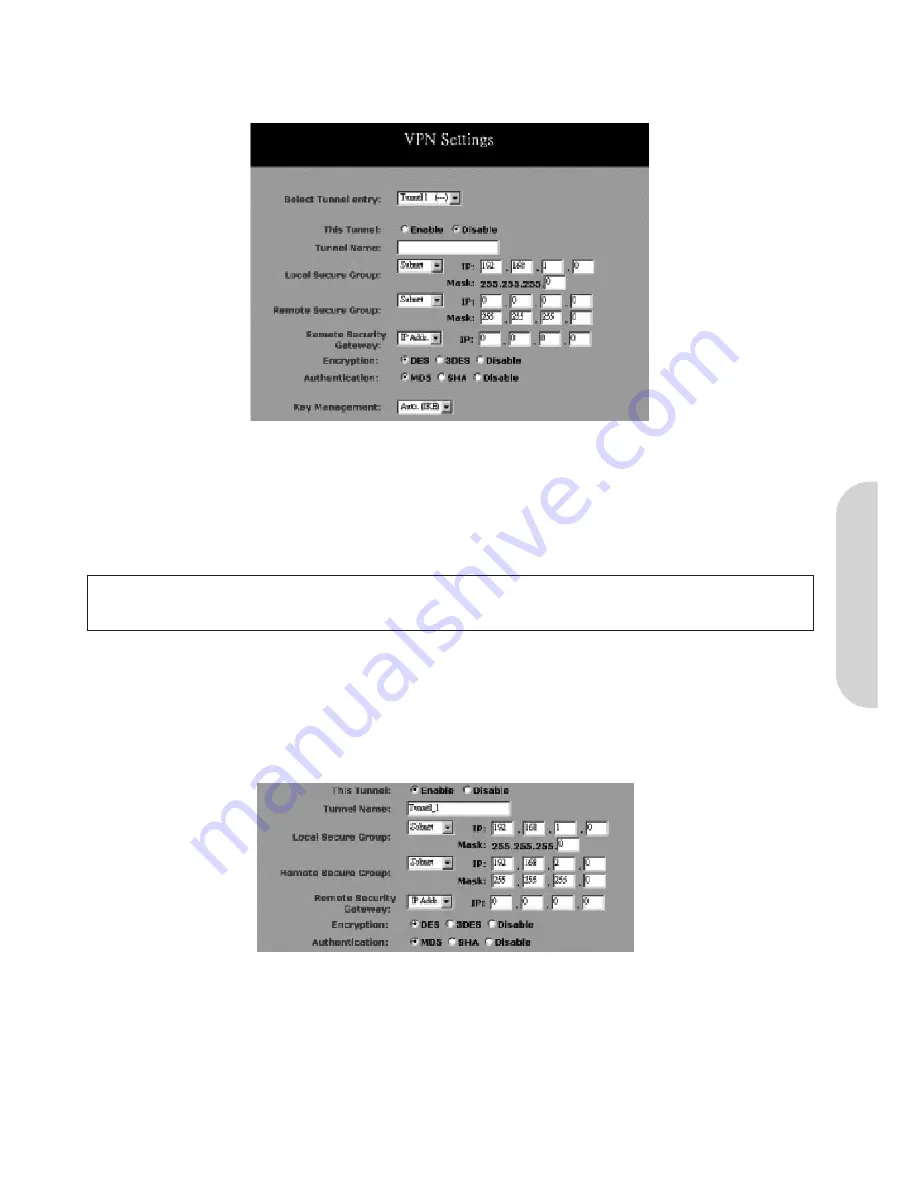
Select Tunnel Entry:
The router allows the user to set up multiple VPN configurations. Each configuration is called a Tunnel. Select any Tunnel from the drop-down
box.
• Check “
Enable
” to activate the tunnel.
•
Tunnel Name:
Once the Tunnel is enabled, enter a name of the Tunnel in the “Tunnel Name” field. This allows you to differentiate a new Tunnel from any others you
have created and gives a meaningful name to the Tunnel Entry Number.
Note!
The Tunnel name set here does not always have to match the name used at the other end of the Tunnel. However, certain VPN applications require a Tunnel to
have the same name at both ends of the Tunnel. If the other end point with which you want to establish the Tunnel does not use this router, it is important
that you give the other side precise set up instructions and ensure that these are followed.
• Local Secure Group and Remote Secure Group You can choose one of five options:
-
Subnet
-
IP Address
-
IP Range
-
Host
-
Any
1.
Subnet:
Select this item to allow all the PCs on the LAN side access to the Tunnel.
Figure 16. Subnet Settings
Refer to the above figure as an example. All
Local Secure Group
computers with IP Addresses 192.168.1.xxx will be able to access the Tunnel. All
Remote Secure
Group
computers with IP Addresses 192.168.2.xxx will be able to access the Tunnel. When the Subnet setting is selected, the default values of
0
should remain in the
IP
and
Mask
fields.
ENGLISH
10


