


Figure 24. Creating a Tunnel between a VPN router and a VPN client with a dynamic IP address
Once you are satisfied that your settings are correct, click the “
Apply
” button. Click the “
Cancel
” button to exit the screen without saving any changes.
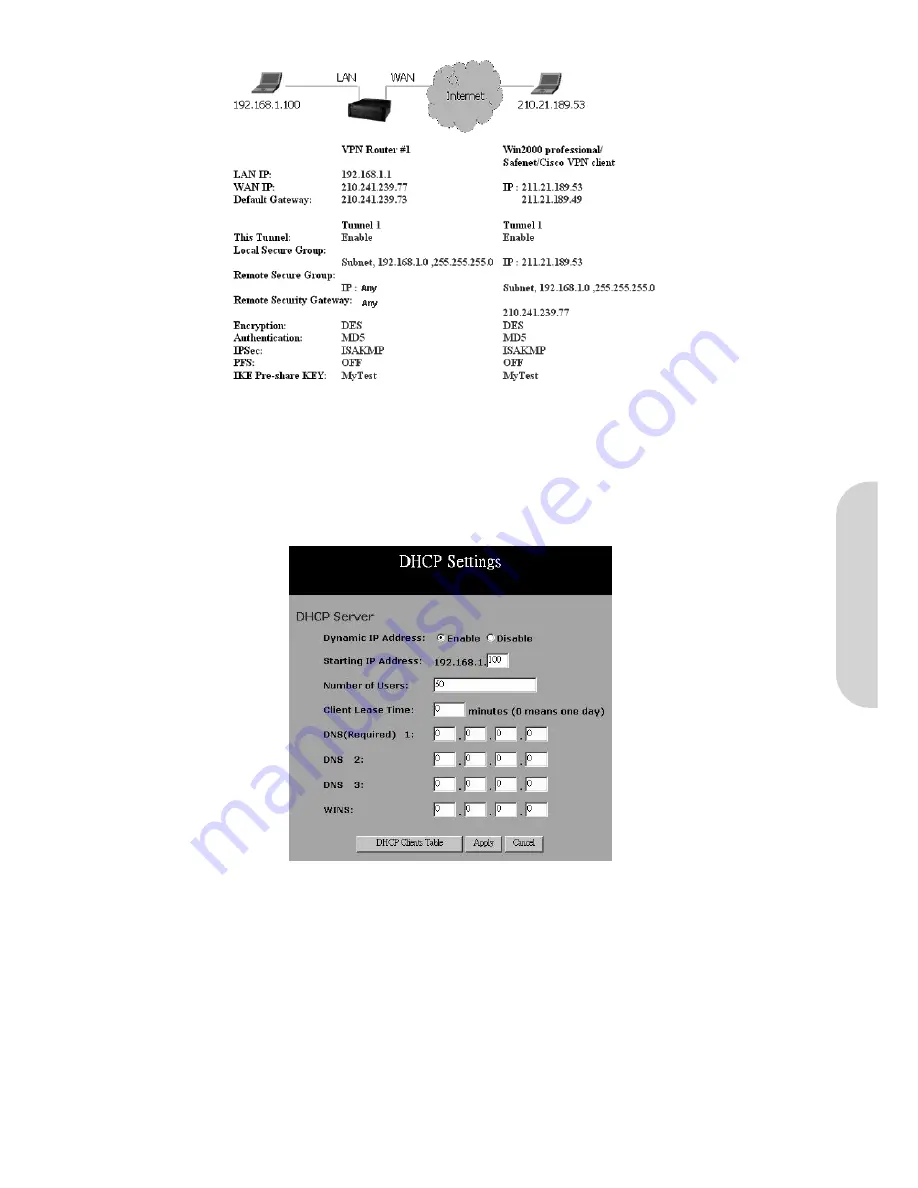
4-3 DHCP Configuration
A DHCP (Dynamic Host Configuration Protocol) Server can automatically assign IP Addresses to each computer in your network. Unless you already have one in your LAN,
it is highly recommended that you set your router to act as a DHCP server.
Figure 25. DHCP Settings
•
Dynamic IP Address:
Select “
Enable
” to use the DHCP server internal to the router. If you already have a DHCP server in your network, set the router's DHCP
option to “
Disable
”.
•
Starting IP Address:
Enter a numerical value, from 2 to 254, for the DHCP server to start at when assigning IP Addresses.
•
Number of Users:
Enter the maximum number of PCs that you want the DHCP server to assign IP Addresses to, with the absolute maximum being 253.
•
Client Lease Time:
Enter the amount of time that DHCP clients (the PCs on LAN side) can use the IP Addresses assigned by the router’s DHCP server. Before the
time is up, DHCP clients have to request to renew the DHCP information.
•
DNS:
The IP Address of the Domain Name Server, which is currently used. Multiple DNS IP settings are common. The first DNS entry will be used in most cases.
•
DHCP Clients Table:
Click the DHCP Clients Table button to show current DHCP client information.
Click the “
Apply
” button after making any changes, or click the “
Cancel
” button to exit the screen without saving any changes.
ENGLISH
14


