Storage Devices, Mouse, Audio & Printer
Optical Device 2 - 3
2
Optical Device
There is a bay for a 5.25" optical (CD/DVD) device (12.7mm height). The actual de-
vice will depend on the model you purchased (see
“Storage” on page D - 3
). The
optical device is usually labeled “
Drive
D:
” and may be used as a boot device if
properly set in the
BIOS
(
see
“Boot Menu” on page 5 - 15
).
Loading Discs
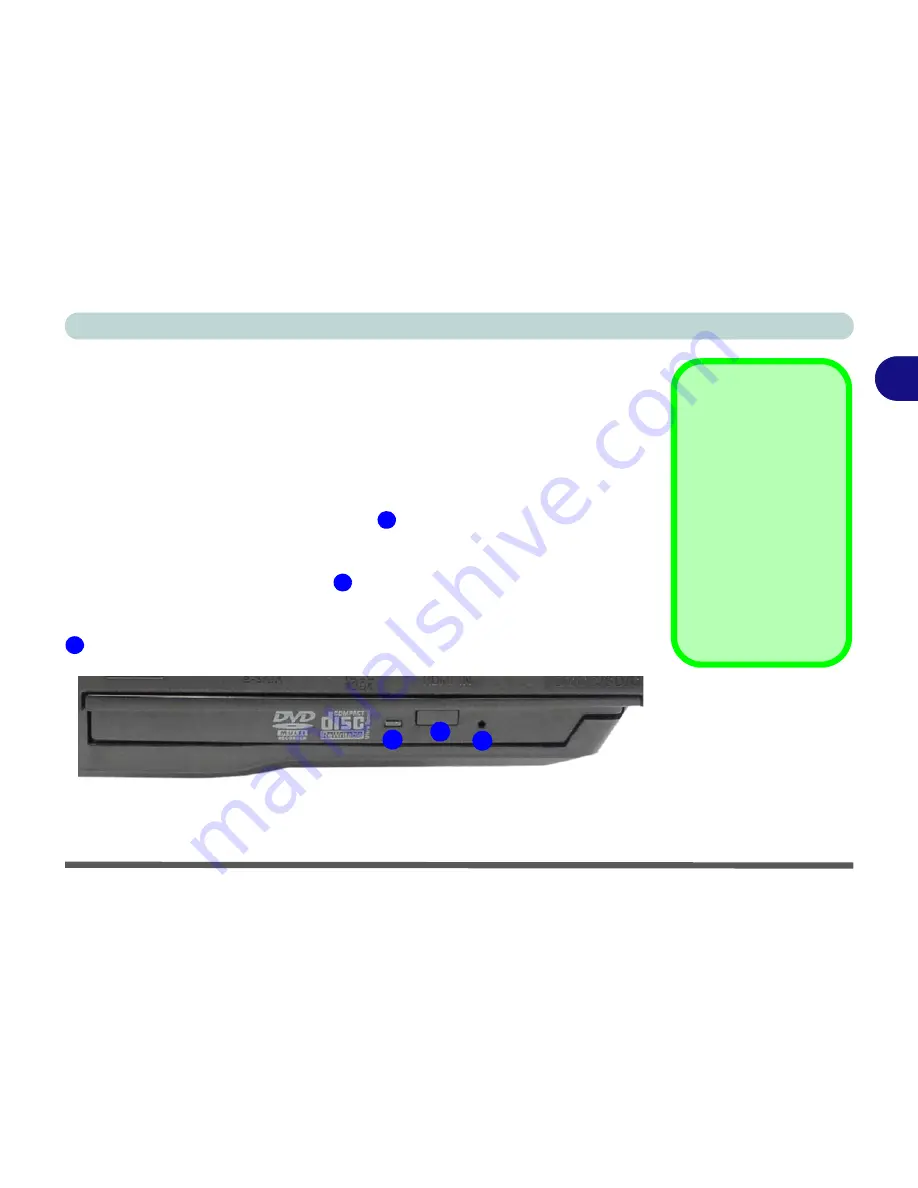
To insert a CD/DVD, press the open button
and carefully place a CD/DVD onto
the disc tray with label-side facing up (use just enough force for the disc to click onto
the tray’s spindle). Gently push the CD/DVD tray in until its lock “clicks” and you
are ready to start. The busy indicator
will light up while data is being accessed,
or while an audio/video CD, or DVD, is playing. If power is unexpectedly interrupt-
ed, insert an object such as a straightened paper clip into the emergency eject hole
to open the tray.
Sound Volume
Adjustment
How high the sound vol-
ume can be set depends
on the setting of the vol-
ume control within
Win-
dows
. Click the
Volume
icon on the taskbar to
check the setting.
Peripherals must be
connected before you
turn on the system.
Figure 2 - 2
Optical Device
1
2
3
1
2
3
Summary of Contents for X7200
Page 1: ...V11 5 21 ...
Page 2: ......
Page 46: ...Quick Start Guide 1 22 1 ...
Page 68: ...Storage Devices Mouse Audio Printer 2 22 2 ...
Page 86: ...Power Management 3 18 3 ...
Page 98: ...Drivers Utilities 4 12 4 ...
Page 169: ...Modules PC Camera Module 7 33 7 Figure 7 22 Audio Setup for PC Camera Right click ...
Page 216: ...Modules 7 80 7 ...
Page 236: ...Troubleshooting 8 20 8 ...
Page 242: ...Interface Ports Jacks A 6 A ...
Page 280: ...AMD Video Driver Controls C 20 C ...
Page 286: ...Specifications D 6 D ...


