Managing the Shares
Editing an Existing Share
Cisco Small Business NSS2000 Series Administration Guide
102
6
Editing an Existing Share
After a share is created, you can make changes to it, such as changing user or
group permissions, changing the share attributes, and adding a DFS shared folder
for shares set up to be a DFS root. There is a limit of 21 users and groups (the
combined total) that you can assign access privileges to a share. If you have a
number of users that exceeds the limitation, assign the applicable users to a group
or groups and then assign the group to the share. There is no limit to the number of
users that you can assign to an individual group.
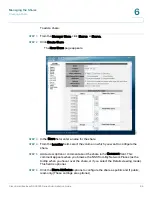
To edit a share:
STEP 1
From the Manager Menu, click Shares
Shares.
STEP 2
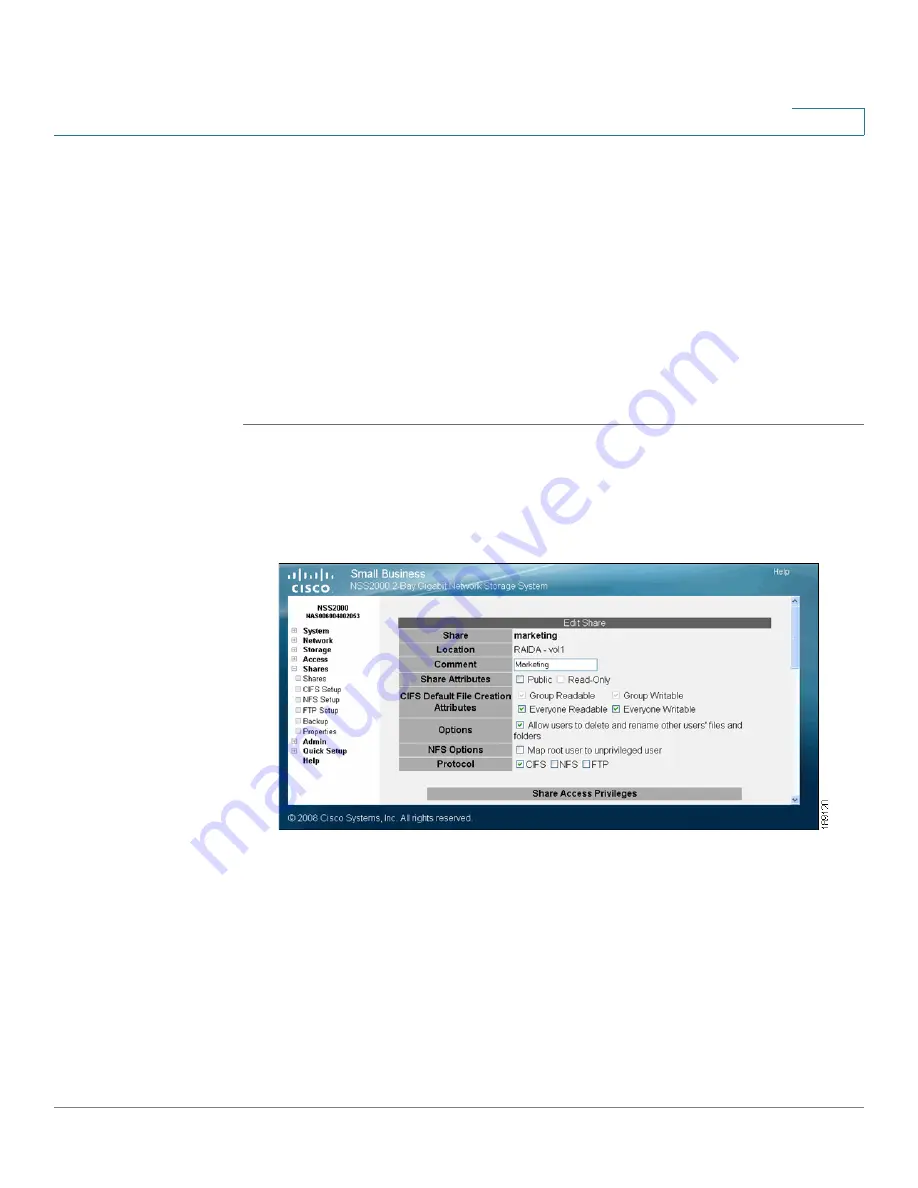
Click Edit for the share you want to change.
The Edit Share page appears.
STEP 3
You can change the comment from the Comment field as required. This comment
appears when you browse the NSS from My Network Places (as the tooltip when
you hover over the share, or if you select the Details viewing mode).
STEP 4
Change the setting for the Allow users to delete or rename other users’ files and
folders field as required. This field determines whether users who are assigned to
a share can delete or rename files or folders within that share that they do not own.
It is important to consider interoperability with applications such as MS Word
2007 and Photoshop. For example, if this field is not selected and you gave a user
write permissions to a file and that user tried to open, edit, and save the file, the
save would fail due to the fact that Word sets up a temporary file and then


