


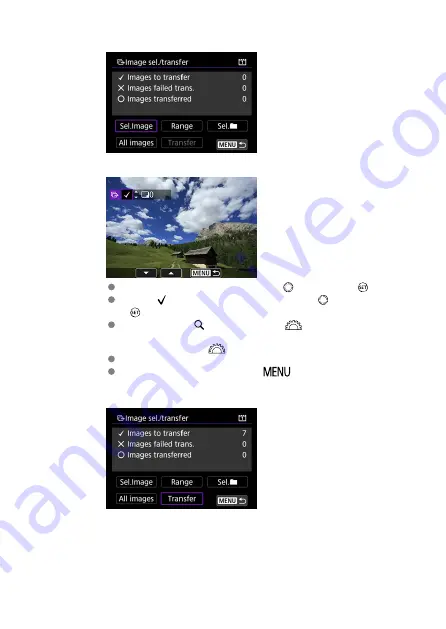
4.
Select [Sel.Image].
5.
Select the images to transfer.
Select the images to transfer by using <
>, then press <
>.
Display [ ] on the screen's upper left by using <
>, then press
<
>.
If you press the <
> button and turn <
>counterclockwise, you
can select an image from a three-image display. To return to the single-
image display, turn <
> clockwise.
To select other images to transfer, repeat step 5.
After selecting the images, press <
>.
6.
Select [Transfer].
90
Summary of Contents for WFT-E9
Page 12: ...Nomenclature 1 4 2 3 1 Attachment pin 2 Tightening screw 3 Terminal 4 Terminal cap 12 ...
Page 59: ...10 Select OK This is not displayed for offline settings 11 Select OK 59 ...
Page 71: ...6 Select Transfer 7 Select OK The selected images are transferred to the FTP server 71 ...
Page 74: ...When OK is selected the selected image is transferred to the FTP server 74 ...
Page 91: ...7 Select OK The selected images are transferred to the computer 91 ...
Page 94: ...When OK is selected the selected image is transferred to the PC 94 ...
Page 114: ...114 ...
Page 150: ...Terminating the Connection and Reconnecting Terminating the Connection Reconnecting 150 ...


