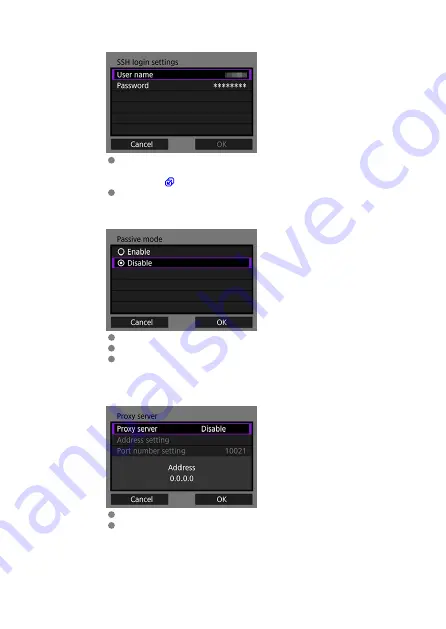
5.
Configure the SSH login authentication settings.
Select [
User name
] and [
Password
] and enter the user name and
password for SSH password authentication with the displayed virtual
keyboard (
).
Select [
OK
] to proceed to the next screen.
6.
Set the passive mode.
This is not displayed if you selected [
SFTP
] in step 1.
Select [
OK
] to proceed to the next screen.
If "Error 41:
Cannot connect to FTP server
" is displayed in step 9,
setting [
Passive mode
] to [
Enable
] may resolve the error.
7.
Set the proxy server.
This is not displayed if you selected [
FTPS
] or [
SFTP
] in step 1.
Select [
OK
] to proceed to the next screen.
57
Summary of Contents for WFT-E9
Page 12: ...Nomenclature 1 4 2 3 1 Attachment pin 2 Tightening screw 3 Terminal 4 Terminal cap 12 ...
Page 59: ...10 Select OK This is not displayed for offline settings 11 Select OK 59 ...
Page 71: ...6 Select Transfer 7 Select OK The selected images are transferred to the FTP server 71 ...
Page 74: ...When OK is selected the selected image is transferred to the FTP server 74 ...
Page 91: ...7 Select OK The selected images are transferred to the computer 91 ...
Page 94: ...When OK is selected the selected image is transferred to the PC 94 ...
Page 114: ...114 ...
Page 150: ...Terminating the Connection and Reconnecting Terminating the Connection Reconnecting 150 ...


