Attaching to the Camera
Set the camera's power switch to <
> before attaching the transmitter.
The transmitter is powered by the camera. Ensure the camera battery has sufficient
charge. If the battery level drops to 19% or less, you cannot transfer captured images.
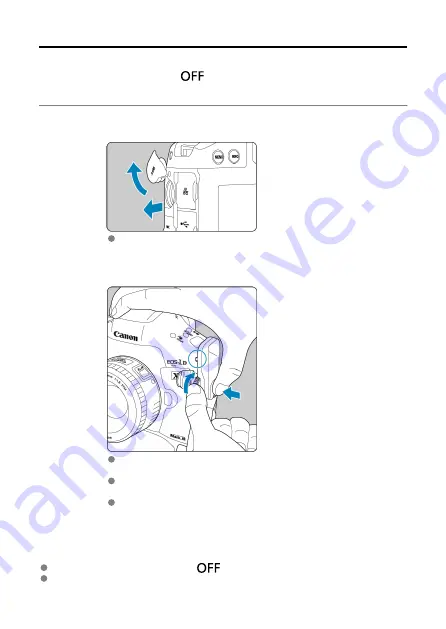
1.
Open the terminal cover on the camera.
Pull out the system extension terminal cover and rotate it toward the
front.
2.
Attach the transmitter.
Insert the transmitter terminal and attachment pin in the corresponding
camera system extension terminal and attachment hole.
Push the underside of the transmitter into the camera and turn the
tightening screw in the direction of the arrow.
Turn the tightening screw until it stops rotating to securely attach the
transmitter.
Removing the transmitter
Set the camera's power switch to <
>.
Loosen the tightening screw until the transmitter comes off.
14
Summary of Contents for WFT-E9
Page 12: ...Nomenclature 1 4 2 3 1 Attachment pin 2 Tightening screw 3 Terminal 4 Terminal cap 12 ...
Page 59: ...10 Select OK This is not displayed for offline settings 11 Select OK 59 ...
Page 71: ...6 Select Transfer 7 Select OK The selected images are transferred to the FTP server 71 ...
Page 74: ...When OK is selected the selected image is transferred to the FTP server 74 ...
Page 91: ...7 Select OK The selected images are transferred to the computer 91 ...
Page 94: ...When OK is selected the selected image is transferred to the PC 94 ...
Page 114: ...114 ...
Page 150: ...Terminating the Connection and Reconnecting Terminating the Connection Reconnecting 150 ...


