


Setting the IP Address
These instructions are continued from configuring the connection settings for using an
access point.
Select the IP address setting method and set the IP address to the camera. When using
IPv6, a connection can only be established using IPv6. A connection cannot be established
using IPv4.
Setting the IP Address Automatically
Setting the IP Address Manually
Setting the IP Address Automatically
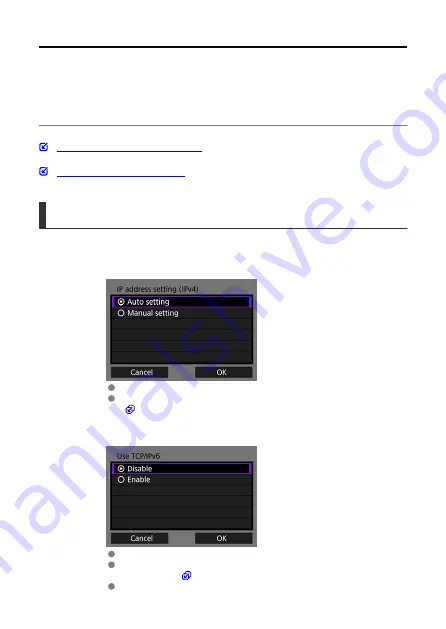
The IP address settings are configured automatically.
1.
Select [Auto setting].
Select [
OK
] to proceed to the next screen.
If [
Auto setting
] results in an error, configure the IP address manually
(
).
2.
Select the IPv6 setting.
Select an item and select [
OK
] to go to the next screen.
If you select [
Enable
], configure the IPv6 settings after completing all
).
When the settings are complete, the next screen is displayed.
47
Summary of Contents for WFT-E9
Page 12: ...Nomenclature 1 4 2 3 1 Attachment pin 2 Tightening screw 3 Terminal 4 Terminal cap 12 ...
Page 59: ...10 Select OK This is not displayed for offline settings 11 Select OK 59 ...
Page 71: ...6 Select Transfer 7 Select OK The selected images are transferred to the FTP server 71 ...
Page 74: ...When OK is selected the selected image is transferred to the FTP server 74 ...
Page 91: ...7 Select OK The selected images are transferred to the computer 91 ...
Page 94: ...When OK is selected the selected image is transferred to the PC 94 ...
Page 114: ...114 ...
Page 150: ...Terminating the Connection and Reconnecting Terminating the Connection Reconnecting 150 ...


