


Configure Normal Recording
64
Create, Edit and Delete Recording Schedule Items
To add or edit a schedule for a camera in a zone, you need to launch the
Add Schedule
Item
or
Edit Schedule Item
dialog respectively.
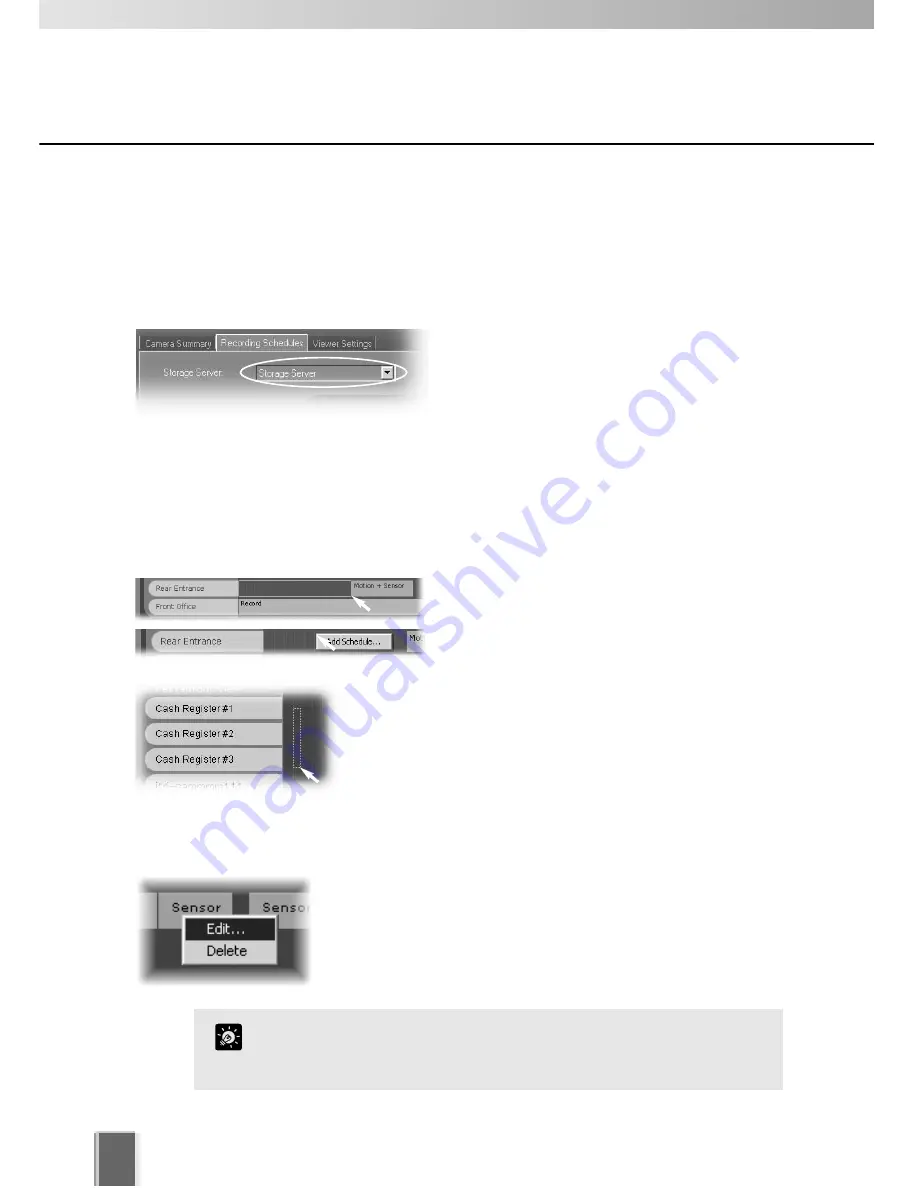
Step 1: Change Storage Server if necessary
If you wish to display another Storage Server’s
schedule, click the
Storage Server
menu,
otherwise proceed to Step 2.
The menu may list more assigned Storage Servers. If you select another Storage Server,
the Schedule Area will refresh and associated schedule zones will be shown.
Step 2: Click in the schedule area and drag out a time period
Click and drag a time period for a camera name and release the mouse button.
Alternatively, right-click anywhere in the
Schedule Area alongside a camera name and
click
Add Schedule
from the context menu.
The
Add Schedule Item
dialog appears as
shown on the following page.
You can also click and drag an area covering several
cameras to bring up the
Add Schedule Item - multiple
cameras
dialog. This allows you to easily set schedules for
multiple cameras. Once created, settings for each camera
can be customized.
To edit a recording schedule item:
Right-click an item and choose
Edit
from the context menu.
Alternatively, double-click an item. The
Edit Schedule Item
dialog appears.
Both the Add and Edit dialogs are identical as shown on the
following page.
To edit the time only, simply click an existing schedule item and
drag the right or left boundary to lengthen or shorten the time
respectively.
Tip


