Chapter 1
1-35
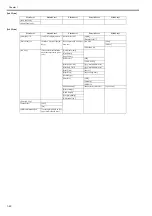
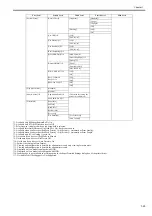
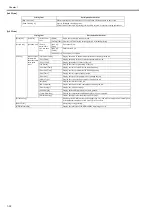
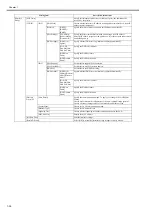
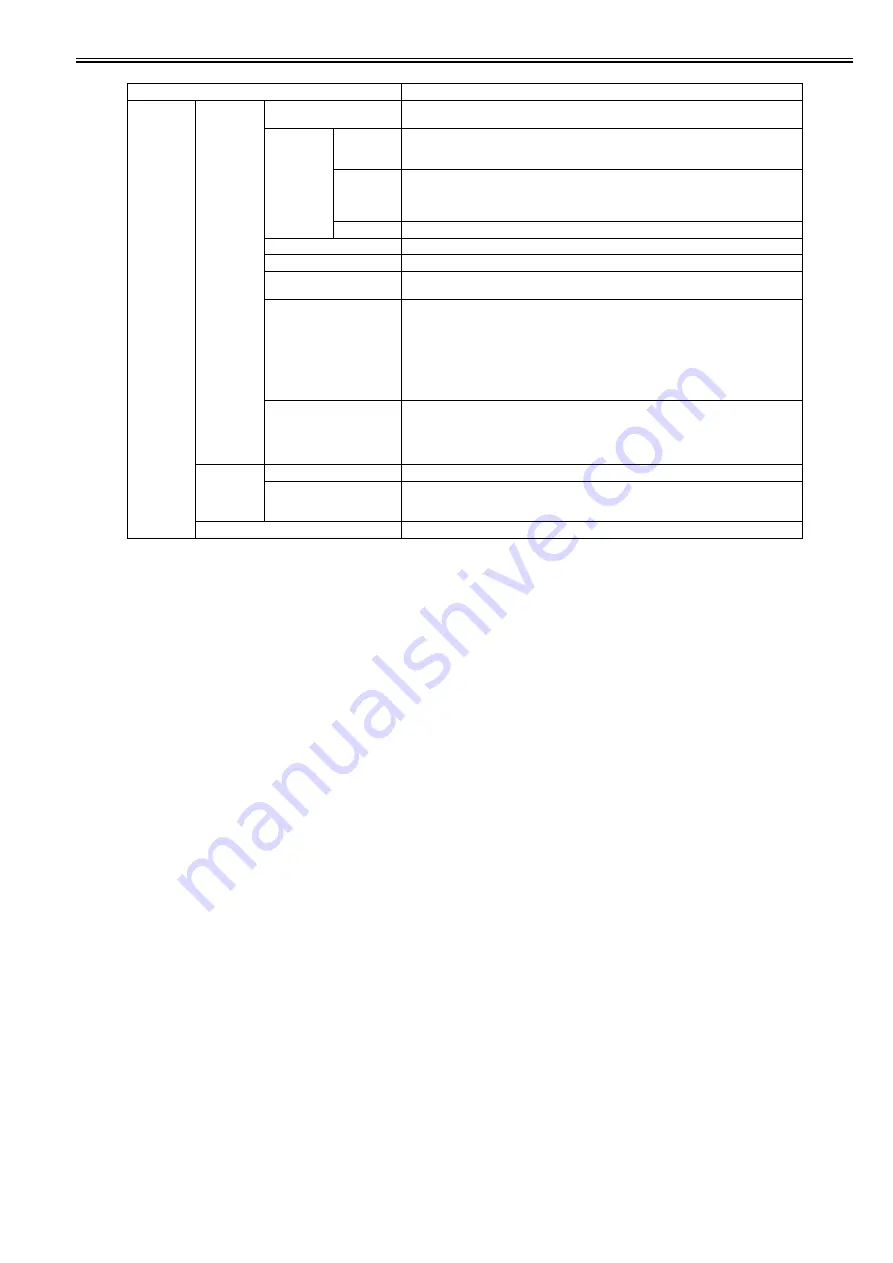
Setting Item
Description/Instructions
[GL2 Settings] [Line&Pen
Manager]
[Enable merge]
When lines overlap, set whether to merge or overwrite the colors of the overlapping lines.
Select [Off] to overwrite with the line printed later. Select [On] to merge all overlapping colors.
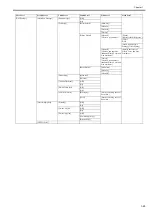
[Pen Setup]
[Select
Palette]
Select the value related to pen from [Software], [Palette A], [Palette B], or [Factory].
Select [Software] to print according to the application side instruction. Select [Palette A] or
[Palette B] to print with value set by [Define Palette].
[Define
Palette]
Set [Width], [Color], and [Line Attributes] for the palette's [Pen Number]. Select [Factory] to
check the value when [Factory] is selected for [Select Palette].
For [Line Attributes], select the shape of line end and joint between lines as [No Setting] or
[Circle Setting].
[Reset Palette] Return the [Define Palette] settings to factory settings.
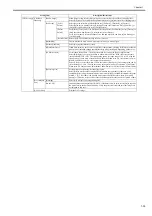
[Smoothing]
Choose whether to draw an arc with a smooth curve or with a polygon.
[ThickenFineLines]
Select [On] to print thin lines clearly.
[AdjustFaintLines]
If thin lines print in a tint of color varied from other patterns, selecting [Off] may provide the
print result as intended, though the thin lines may print, interrupted, depending on the color.
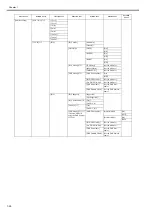
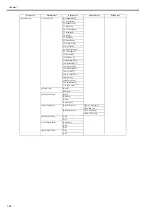
[Ln Wdth correct]
Correct the width of lines. (The basic line width is set using the [Pen Setup] funstion)
Select [Black/gray] to correct the width of lines whrere all of the RGB values are the same
(except when R=G=B=255). The setting value can be set in the range of -20 to +20, with the
setting value given in units of correction of 0.025mm. When set to -20, lines become 0.5mm
thinner, and when set to +20, lines become 0.5mm thicker.
Select [Color] to correct the width of lines that are not [Black/gray]. The setting value can be
set in the range of -20 to +20 with the setting value given in units of correction of 0.025mm.
When set to -20 lines become 0.5mm thinner, and when set to +20 lines become 0.5mm thicker
[Detect img size]
Set the method for selecting the rendering region.
Select [Off] to use the value from the PS command in the input data. If there are no PS
commands, prints using the maximum size (maximum roll paper width X (maximum roll paper
width X 1.5)). This reduces the printing time compared with the cases whrere [Command
priority] or [Detected size] are set because the data analysis finishes in a shorter period of time.
[ProcessingOp
tion]
[Warning]
Select [On] to display warnings during GL2.
[On-the-Fly]
In printing data consisting solely of HP RTL, if the data is slow to print, select [On] to expedite
the time at which the data starts printing. Verify the print result to make sure that images are
not chipped in this case.
[GL2 Set Print]
Print the GL2 settings.
Summary of Contents for image Prograf iPF780 Series
Page 1: ...Mar 27 2014 Service Manual iPF780 760 750 series iPF785...
Page 9: ...Chapter 1 PRODUCT DESCRIPTION...
Page 57: ...Chapter 2 TECHNICAL REFERENCE...
Page 117: ...Chapter 3 INSTALLATION...
Page 125: ...Chapter 4 DISASSEMBLY REASSEMBLY...
Page 175: ...Chapter 4 4 49 2 Shaft Cleaner 1 F 4 97 1 1...
Page 176: ...Chapter 4 4 50 3 Upper Cover Hinge Catch 1 Roll Cover Slide Guide 2 F 4 98 2 1...
Page 179: ...Chapter 5 MAINTENANCE...
Page 186: ...Chapter 6 TROUBLESHOOTING...
Page 212: ...Chapter 7 SERVICE MODE...
Page 267: ...Mar 19 2014 PARTS CATALOG iPF786 785 781 780 765 760 755 750...
Page 301: ...2 25 FIGURE 10 PLATEN GUIDE UNIT 1 3 6 2 8 4 5 10 10 10 9 9 11...
Page 326: ......


