Windows XP Information
D - 40 PC Camera Module
D
PC Camera Module
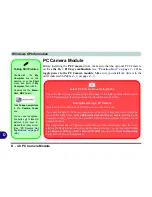
Before installing the
PC Camera
driver, make sure that the optional PC Camera is
on.
Use the Fn + F10 key combination
(see
“Function Keys” on page 1 - 10
)
to
toggle power to the PC Camera module
. Make sure you install the drivers in the
order indicated in
Table 4 - 1, on page 4 - 3
.
Taking Still Pictures
Double-click the
My
Computer
icon on the
desktop, or go the
Start
menu and point to
My
Computer
, then click it.
.
Double-click the
Bison-
Cam, NB Pro
icon.
Click
Take a new picture
in the
Camera Tasks
box.
You can use the applica-
tion button
to take still
pictures if you have in-
stalled the hot key driver.
(See
“PC Camera Hot
Key Buttons” on page D
- 46
.)
Latest PC Camera Driver Information
Check the
CD
, and any accompanying insert pages for the latest updated information on
the PC Camera driver, that may override the information provided here.
Adding/Removing a PC Camera
Note that the Quick Button and PC Camera drivers cannot co-exist.
If you wish to
add
a PC Camera module to your computer at a later date, then uninstall the
Quick Button Utility Driver (entitled
Multimedia Keyboard Driver
)
before
installing the PC
Camera and driver. Drivers can be uninstalled from the Add or Remove Programs control
panel in Windows.
If you wish to
remove
a PC Camera module from your computer at a later date, then unin-
stall the PC Camera Driver after removing the camera module. You can then insert the
De-
vice Drivers & Uti User’s Manual CD-ROM
and install the
Quick Button Utility
driver from the Drivers Installer menu.
Summary of Contents for M665S
Page 1: ......
Page 2: ......
Page 20: ...XVIII Preface ...
Page 37: ...Video Features 1 17 Quick Start Guide 1 Figure 1 9 Display Settings 1 2 3 ...
Page 68: ...Power Management 3 16 3 ...
Page 88: ...BIOS Utilities 5 12 5 ...
Page 110: ...Modules Options 7 12 PC Camera Module 7 Right click Figure 7 8 Audio Setup for PC Camera ...
Page 114: ...Modules Options 7 16 7 ...
Page 126: ...Troubleshooting 8 12 8 ...
Page 130: ...Interface Ports Jacks A 4 A ...
Page 144: ...Specifications C 6 C ...
Page 152: ...Windows XP Information D 8 Recording Audio D Figure D 5 Audio Setup for Recording Windows XP ...
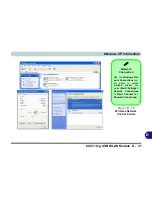
Page 187: ...Windows XP Information PC Camera Module D 43 D Figure D 20 Audio Setup Windows XP ...


