


2-48
2002 Buell P3: Chassis
HOME
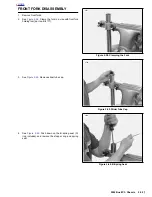
23. See
Figure 2-85.
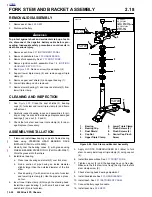
Install slider tube cap.
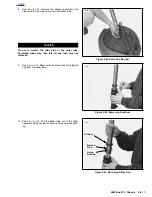
FRONT FORK INSTALLATION
1.
See
Figure 2-86.
Install fork tubes through upper and
lower triple clamps.
NOTE
When installing the front forks, use a screwdriver to pry apart
the triple clamps.
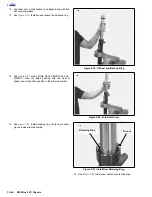
2.
See
Figure 2-87.
Apply LOCTITE ANTI-SEIZE to the
threads of triple clamp pinch screws.
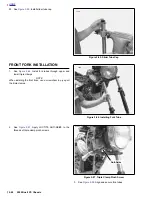
3.
See
Figure 2-88.
Align and secure fork tubes.
Figure 2-85. Slider Tube Cap
Figure 2-86. Installing Fork Tube
Figure 2-87. Triple Clamp Pinch Screw
3768
3766
3777
Anti-Seize
Summary of Contents for 2002 P3
Page 2: ......
Page 17: ...A 15 Appendix A Tools HOME ...
Page 32: ...C 3 Appendix C Metric Conversions HOME ...
Page 41: ...1 8 2002 Buell P3 Maintenance HOME NOTES ...
Page 75: ......
Page 111: ...2 36 2002 Buell P3 Chassis HOME NOTES ...
Page 143: ...2 68 2002 Buell P3 Chassis HOME NOTES ...
Page 144: ...2002 Buell P3 Chassis 2 69 HOME ...
Page 146: ......
Page 147: ......
Page 223: ...3 76 2002 Buell P3 Engine HOME NOTES ...
Page 225: ......
Page 256: ...2002 Buell P3 Fuel System 4 31 HOME ...
Page 258: ......
Page 259: ......
Page 279: ...5 20 2002 Buell P3 Electric Starter HOME NOTES ...
Page 281: ......
Page 327: ......
Page 398: ...2002 Buell P3 Electrical 7 71 HOME ...
Page 400: ...Product 1 2 ...


