


238
Creating Custom Fonts (Font Creator)
→
A
File Open
dialog box similar to the one
shown below appears.
2.
Select the drive and the folder.
3.
To open a file, select it, and then click
Open
,
or double-click the file’s icon.
→
If the current work area has already been
saved or has not been edited, the
contents of the selected file immediately
appear in the work area.
→
If the current work area has not been
saved, you will be asked whether you
want to save the changes.
c
“Creating a new font” on page 237,
“Overwriting” on page 253 and “Saving
with a new name” on page 253
Opening an image in the
background
First, we will prepare a background image to create
the custom font character.
You can open an existing image file in the work area
to be used as a background image. There are many
different types of files that can be imported:
Windows bitmap (.bmp)
Exif (.tif, .jpg)
ZSoftPCX (.pcx)
Windows Meta File (.wmf)
Portable Network Graphics (.png)
Encapsulated PostScript (.eps)
Kodak PhotoCD (.pcd)
FlashPix (.fpx)
JPEG2000 (.j2k)
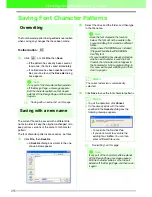
1.
Click
File
, then
Template Open
.
→
An
Open an image file
dialog box similar
to the one shown below appears.
2.
Select the drive, the folder and the desired file.
3.
Click
Open
to open the file.
b
Memo:
To quit the operation and close the dialog box,
click
Cancel
.
b
Memo:
• To save the work area, click
Yes
.
• To abandon the work area, click
No
.
• To return to the work area, for example, to
modify it or save it with another file name,
click
Cancel
.
b
Memo:
If the
Preview
check box is selected, the
contents of the selected file will appear in the
Preview
box.


