


162
Arranging Embroidery Designs (Layout & Editing)
Creating a gradation
The density of one or two colors can be adjusted at
various locations to create a custom gradation
pattern.
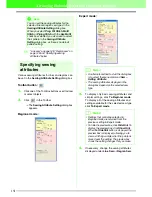
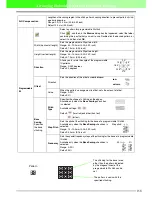
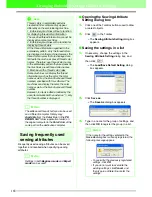
1.
In Expert mode of the
Sewing Attribute
Setting
dialog box, select the
Gradation
check box under
Region sew
.
2.
Click
Pattern
.
→
The
Gradation Pattern Setting
dialog
box appears.
3.
To change the thread color, click
. Select
a color in the
Thread Color
dialog box that
appeared, and then click
OK
.
4.
To select a preset gradation pattern, click the
desired pattern under
Select pattern
.
5.
Move the sliders to adjust the density of the
gradation pattern.
6.
To blend two colors, select the
Use additional
color
check box, click
under
Use
additional color
. Select a color in the
Thread
Color
dialog box that appeared, and then click
OK
.
7.
Click
OK
.
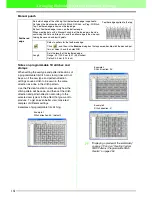
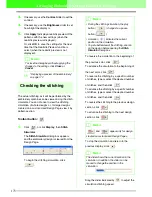
Editing User Thread Color
Lists
User thread charts can be created and edited to
contain a list of threads that are used most often or
a list of all threads that you have. Thread data from
system thread charts can be included or new thread
data can be added.
1.
Click
Option
, then
Edit User Thread Chart
.
→
The Edit User Thread Chart dialog box
appears.
■
Creating a new thread chart
1.
Click
New Chart
.
→
The
New Thread Chart
dialog box
appears.
2.
Type in the name of the chart, and then click
OK
to save the chart with the entered name.
b
Memo:
The preview area shows the setting changes
that you make.
b
Memo:
• If the
Use additional color
check box is
cleared, the gradation settings are applied
to the remaining color.
• To close the dialog box without applying the
changes to the gradation pattern, click
Cancel
.
b
Memo:
A saved chart can be selected from the
User
Thread Chart
selector, then edited.


