


203
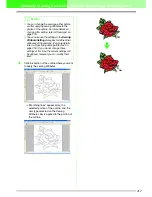
Manually Creating Embroidery Patterns From Images (Design Center)
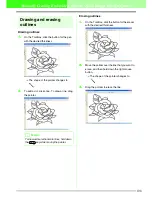
2.
Move the pointer over one of the handles of a
selected outline or group of outlines.
→
The shape of the pointer changes to
, ,
or ,
depending
on the handle that the pointer is over.
3.
Drag the handle to adjust the selected
outline(s) to the desired size.
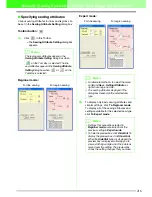
Scaling numerically:
1.
Select the outline that you want to resize.
2.
Click
Edit
, then
Numerical Setting
, then
Size
.
→
The
Size
dialog box appears.
3.
To change the width and height proportionally,
select the
aspect
check box.
4.
Select the whether the width and height will be
set as a percentage (%) or a dimension
(millimeters or inches).
5.
Type or select the desired width and height.
6.
Click
OK
.
c
“Changing the measurement units” on
page 236
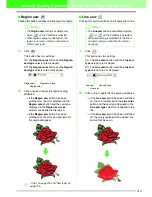
■
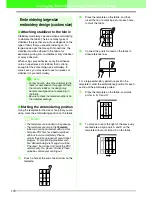
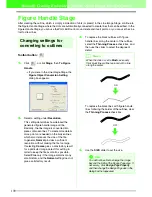
Flipping outlines horizontally or
vertically
1.
Select the outline that you want to flip
horizontally (up/down) or vertically (left/right).
2.
To flip the outline horizontally, click
Edit
, then
Mirror
, then
Horizontal
, or click
on the
Toolbar.
To flip the outline vertically, click
Edit
, then
Mirror
, then
Vertical
, or click
on the
Toolbar.
■
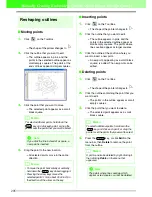
Rotating outlines
Rotating manually:
1.
Select the outline that you want to rotate.
2.
Click
Edit
, then
Rotate
, or click
on the
Toolbar.
→
The handles around the selected outline
are replaced by small squares at the four
corners of the selected outline.
3.
Move the pointer over one of the four rotation
handles.
→
When the pointer is moved over a rotation
handle, the shape of the pointer changes
to .
4.
Drag the rotation handle clockwise or
counterclockwise to rotate the outline in 1°
increments.
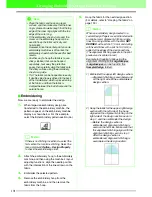
b
Memo:
•
is for scaling the width.
•
is for scaling the height.
•
and
are for scaling both
dimensions at the same time. (The height-
to-width proportion is maintained.)
• If the
key is held down while a handle
is dragged, the outline is enlarged or
reduced from the center of the outline.
b
Memo:
• Select
100%
to leave the outline
unchanged.
• If the
aspect
check box is selected,
changing one dimension automatically
changes the other so that the proportion of
the width and height remains unchanged.
Shift
b
Memo:
• To preview the outline at the new size in the
Design Page, click
Preview
.
• To close the dialog box without applying the
changes to the settings, click
Cancel
.
a
Note:
• You cannot enter a size that will cause the
outline to exceed the size of the Design
Page.
• The minimum value is 1.0 mm (0.04 inch).


