Using your Edger...
Special cases
3-75
3.5.2 A
PPLYING
AN
OVERSIZE
3.5.2.1 W
HY
?
If you find that the overthickness applied to the job by default is not suitable, you can decide to apply an oversize
which will be applied to the lens to be edged.
3.5.2.2 H
OW
?
3.5.2.2.1 P
RELIMINARY
CONDITION
>
You must enter the oversize value BEFORE edging the lens.
3.5.2.2.2 P
ROCEDURE
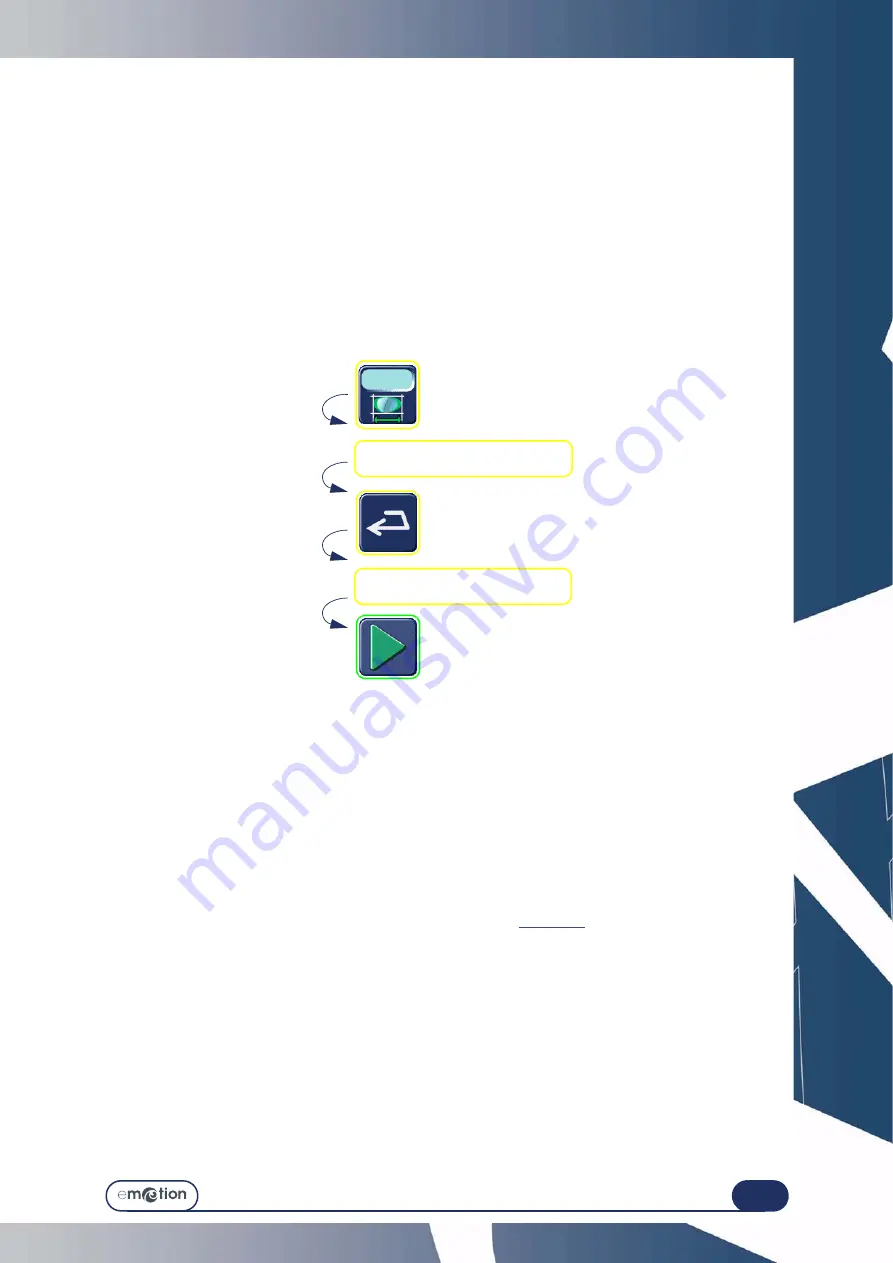
From the main application screen (Edging tab), after selecting all the job characteristics, proceed as follows.
Note: Using the touch screen, press the zones or buttons shown.
Flow chart 3-6: Entering an oversize value
3.5.2.2.3 R
ESULT
:
=
The lens is edged and the initial dimension has been increased or decreased by the entered value.
>
You may check the lens diameter with a digital caliper and retouch it if necessary.
3.5.2.3 H
INTS
Always check that the type of oversize displayed is indeed that which you wish to apply.
3.5.2.4 I
MPORTANT
NOTES
>
The retouch is applied to the width of the lens. The height of the lens is recalculated to retain the proportions
of the initial shape.
>
For the same job, the oversizing applied to the right lens is not automatically applied to the left lens.
>
In the case of a new edging cycle for the same lens (also called «
re-edging
»), the oversizing applied to the
first lens will be automatically applied to the second.
3.5.2.5 L
IMITS
>
+/- 0.5 mm to boxing width
Enter the correction value.
Check the entered value.
Summary of Contents for emotion
Page 1: ...Operation manual...
Page 3: ......
Page 9: ...Table of contents...
Page 10: ...REVISION FOLLOW UP Revision 01 Page New Modified Item New document...
Page 11: ...3 10...
Page 12: ...1 INSTALLATION...
Page 15: ...Installation Unpacking the machine 1 14...
Page 17: ...Installation Removing the shipping rails 1 16...
Page 23: ...Installation Water connections 1 22...
Page 25: ...Installation Electrical connections 1 24 1 3 2...
Page 28: ...2 SAFETY PRECAUTIONS...
Page 29: ...2 28...
Page 31: ...Safety precautions Safety 2 30...
Page 33: ...2 32 Safety precautions Recommendations...
Page 34: ...3 USING YOUR EDGER...
Page 35: ...3 34...
Page 41: ...3 40...
Page 45: ...Using your Edger General principles of use 3 44 Pin 1 2 3 5 Blocker head Blocker arm 4...
Page 51: ...Using your Edger General principles of use 3 50...
Page 75: ...Using your Edger Special cases 3 74...
Page 87: ...Using your Edger Special cases 3 86...
Page 94: ...4 CONFIGURATION...
Page 95: ...4 94...
Page 102: ...Configuration Configuration of finishing parameters default values 4 101...
Page 107: ...Configuration Correction of frame and lens values 4 106...
Page 112: ...5 MAINTENANCE...
Page 113: ...5 112...
Page 117: ...Maintenance Visualising the components 5 116...
Page 119: ...Maintenance Task list 5 118...
Page 121: ...Maintenance Maintenance of the touch screen unit 5 120 Illustration 5 1 Scanform...
Page 124: ...Maintenance Maintenance of the Scanform unit 5 123...
Page 125: ...Maintenance Maintenance of the Scanform unit 5 124 Illustration 5 1 Centering blocking system...
Page 131: ...Maintenance Regular maintenance of the edger 5 130...
Page 135: ...Maintenance Regular maintenance of the edger 5 134...
Page 147: ...Maintenance Regular maintenance of the edger 5 146...
Page 149: ...Maintenance Handling the covers 5 148...
Page 151: ...Maintenance Preventive maintenance 5 150...
Page 156: ...Maintenance Adjustments 5 155...
Page 157: ...Maintenance Adjustments 5 156 Screen 5 4 Feeling adjustment...
Page 159: ...Maintenance Adjustments 5 158 Screen 5 5 Adjusting the sizes Screen 1...
Page 163: ...Maintenance Adjustments 5 162 Screen 5 6 Adjustment of the flush of the mill bit...
Page 165: ...Maintenance Adjustments 5 164 Screen 5 7 Adjustment of the touch screen...
Page 167: ...Maintenance Adjustments 5 166 Screen 5 8 Example of a setting values display screen...
Page 169: ...Maintenance Adjustments 5 168...
Page 173: ...Maintenance Consulting the statistics 5 172...
Page 196: ...6 TESTS...
Page 197: ...6 196...
Page 203: ...Tests Operating principle 6 202...
Page 204: ...7 TECHNICAL SPECIFICATIONS...
Page 205: ...7 212...
Page 209: ...Technical specifications Technical specifications 7 216...
Page 210: ...2 rue Roger Bonnet 27340 PONT DE L ARCHE FRANCE Tel 33 02 32 98 91 32 Fax 33 02 35 02 02 94...


