EN
| 33
Bosch Security Systems | 02 April 2004
LTC 8850 |
Instruction Manual
|
Allegiant Server
3.2.6 Configuration Tables
When the Allegiant Server is first started, all tables are
set to default values.
NOTE: If changes are to be made in the GUI package
which will be used to update the settings in an
operating system, it is generally recommended that the
appropriate tables be uploaded from the system first.
Refer to the section on Data Transfers. Once the
appropriate changes have been made, the data can be
saved on disk (if desired) and then downloaded into
the system. Following this procedure will insure that
any changes that may have been made via a system
keyboard are not lost when the data is edited using the
Allegiant Server.
After editing, be sure to save the revised tables to disk.
NOTE: When a table file is saved to disk, it includes
all of the ID tables, Lockout tables, Time Event Data,
Alarm tables, Sequence tables, and System Parameters.
If you exit the GUI without saving the tables, the
updates will be lost.
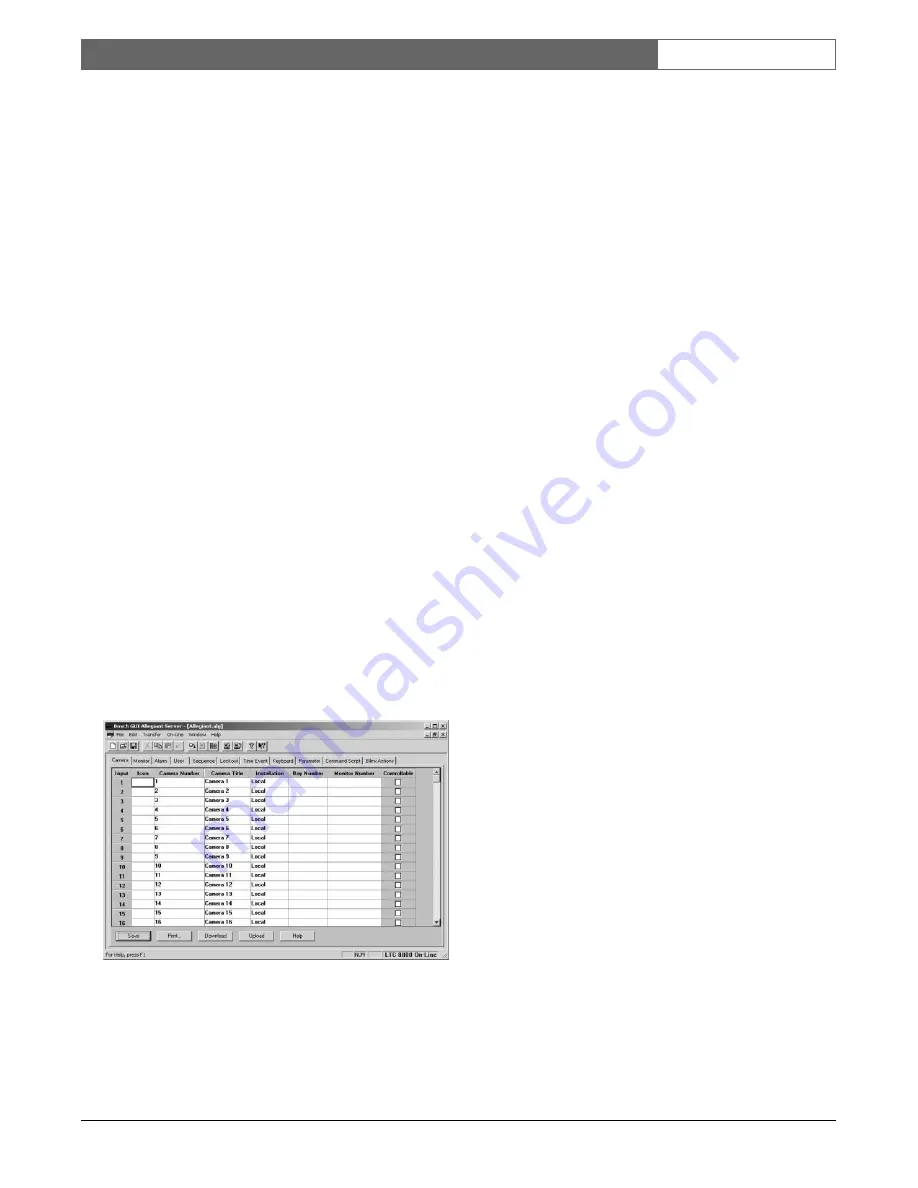
3.2.6.1 Camera Table
The Camera table allows the user to change the
camera number, choose the camera title that will
appear on the Allegiant monitor’s on-screen overlay,
and change the camera installation parameters. The
Input column on the left of the table provides an index
to simplify tracking of the camera designations.
Figure 69 Camera Configuration Table
Icon
This column is not shown when the Allegiant server
runs in the stand alone mode. When the Allegiant
server is accessed within the GUI, this column
provides a description of the icon representing this
device in the map. Right-clicking in this column will
bring up the icon customization dialog and will allow
the user to jump to its location in the map. This cell is
blank for devices that do not have icons in the map.
Camera Number
The Camera Number column may be used to change
the number that is used to call up or display a
particular camera. This is known as a logical camera
number. Duplicate camera numbers are not allowed. If
you attempt to redundantly assign a camera number to
a second input, you will be warned that the number is
already in use and be given the option to abort the
assignment or continue. If you choose to continue, the
camera number will be redesignated, and the camera
originally assigned to that number will become
unconfigured.
If the camera numbers are going to be redesignated, it
is recommended to first complete the camera table to
ensure that the same ID# is used for the same camera
throughout the system. These numbers are the camera
numbers used in sequence editing, lockout tables, and
alarm tables.
Title
The Title column is a 16 character field. To enter the
characters, position the cursor over the cell to be
changed and type in the characters. To enter special
characters, right click with the mouse in the cell, and a
text entry dialog box will appear. The character codes
for the special characters can be entered in this dialog
box. See your Allegiant System Installation and
Operations Manual for a list of the character codes.
Installation
When an Installation cell is selected, a pull down
menu appears with Local, Remote with Local Overlay,
Remote with Remote Overlay, and Trunk.
Local
- This is the simplest type of camera. If a
camera is local, it means that an actual camera (or
other video source) is connected to the corresponding
BNC input on the back of the main Allegiant bay.


