background image

EN

| 29

Bosch Security Systems | November 17, 2004

DÉSA

XL

Instruction Manual

System Setup Options

8.5.2.7

Record Modes

Continuous 

The 

Continuous

record mode records the selected cameras continuously (nonstop).  

Motion 

The 

Motion

record mode records based on any changes made in the camera view. There may be large

gaps in the recording time if no motion is detected.

Sensor

(alarm) 

Sensor record

mode activates recording based on alarm input activation, for the duration set forth in the 

Hardware Setup

Tab for Alarm Setup.  

Sensor 

Sensor

records based on activation from 

Motion

and/or an alarm triggered input.

Prealarm 

Recording based on Motion, adding an additional five (5) seconds of video prior to the Motion trigger. 
The five (5) seconds is global and cannot be adjusted.  

Prealarm 

Recording based on Sensor input activation, adding an additional five (5) seconds of video prior to the
Sensor. The five (5) seconds is global and cannot be adjusted.  

Prealarm 

Combines the recording capabilities based on 

Motion

or 

Sensor

activation, adding the five seconds of

video prior to the 

Motion

or 

Sensor

recording triggers. The five (5) seconds is global and cannot be

adjusted.  

None 

If no record mode is selected, the specified camera will
not record. This could be used during down times when
recording is not necessary, to conserve storage capacity.

8.5.2.8

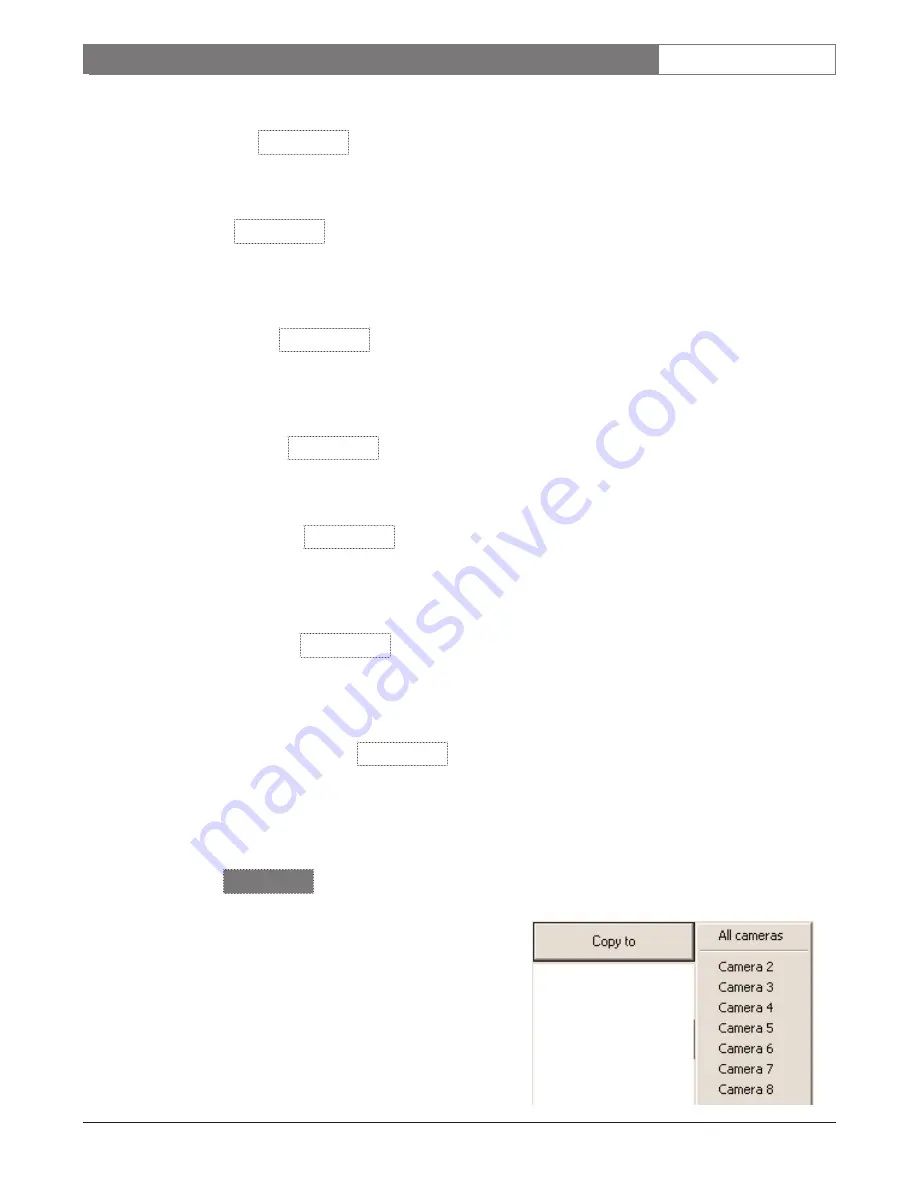
Copy To
Copy to

is designed to speed the setup process of

the schedule. If you set up the schedule for one
camera, and want to copy it to either another
camera, or all cameras, click 

Copy to

and select

the appropriate camera option to copy to.

NONE

M:S:P

S:P

M:P

M:S

S

M

C

Summary of Contents for DESAXL

Page 1: ...Instruction Manual EN Digital Video Recorders DESAXL ...

Page 2: ... shock or other hazards 9 Safety Check Upon completion of servicing or repairs to the unit ask the service technician to perform safety checks to ensure proper operating condition 10 Power Sources Operate the unit only from the type of power source indicated on the label If unsure of the type of power supply to use contact your dealer or local power company For units intended to operate from batte...

Page 3: ...on or rack unless proper ventilation is provided or the manufacturer s instructions have been adhered to The equipment must not exceed its maximum operating temperature requirements 2 Mechanical Loading Mounting of the equipment in a rack shall be such that a hazardous condition is not achieved due to uneven mechanical loading Safety Precautions Attention Installation should be performed by qualif...

Page 4: ...o sin interruptores de encendido apagado reciben alimentación eléctrica siempre que el cable de alimentación esté conectado a la fuente de alimentación Sin embargo la unidad sólo funciona cuando el interruptor está en la posición de encendido El cable de alimentación es la principal fuente de desconexión de todas las unidades PRECAUCIÓN PARA DISMINUIR EL RIESGO DE DESCARGA ELÉCTRICA NO RETIRE LA C...

Page 5: ... funzione solo quando l interruttore ON OFF si trova nella posizione ON Il cavo di alimentazione costituisce il dispositivo di scollegamento dell alimentazione principale per tutte le unità ATTENZIONE PER RIDURRE IL RISCHIO DI SCOSSE ELETTRICHE NON RIMUOVERE LA COPERTURA O IL PANNELLO POSTERIORE L UNITÀ NON CONTIENE COMPONENTI INTERNI RIPARABILI DALL UTENTE PER QUALSIASI INTERVENTO RIVOLGERSI A PE...

Page 6: ... 2 Front Panel 10 5 3 Rear Panel 11 5 4 Basic Connections 12 5 5 Connecting Bosch AutoDomes 12 5 6 Connecting Other Manufacturer s Domes 12 5 7 Connecting Sensor Inputs 12 5 8 Connecting Control Outputs 12 5 9 Connecting the Watchdog Cable 13 6 INITIAL DÉSAXL POWER UP 14 6 1 DÉSAXL Launch Screen 15 6 2 First Time Login 15 6 3 Initial Power up Administrative Access 15 7 MAIN SCREEN 16 7 1 Live Disp...

Page 7: ...ords Tab 43 8 15 E Mail Setup Tab 45 8 16 Smart Shield 46 8 17 Video Measure Tab 48 9 SEARCH 49 9 1 Search Button 49 9 2 Calendar 49 9 3 IntelliSearch Graphical Display 50 9 4 Selecting Information Playback 50 9 5 Screen Divisions Icons 51 9 6 Backup Screen 52 9 7 Bookmark 55 9 8 Audio 55 9 9 Image Enhancement 56 9 10 Index Search 56 9 11 Index Search Panel 57 9 12 Skip and Delay Sliders 57 9 13 S...

Page 8: ...y the video cable1 Recording can be continuous or activated in a variety of setting combinations Activity detection is by motion physical alarm input or both All cameras can be individually masked from viewing recording or from scheduled recording 1 NOTE Bosch LTC 8786 60 RS 232 to Biphase converter is required 1 4 DÉSAXL Cautions Isolate all connections to the DÉSAXL from outside environments by ...

Page 9: ...roduct contains components that can be damaged if the power source has a sudden surge brown out or black out The use of UPS and Surge Suppression devices can greatly reduce this factor If you have any questions in regards to the type of UPS or surge device contact Technical Support 3 4 PTZ Adapters Bosch LTC 8786 RS 232 and Analog Keyboard Input to 16 Biphase Outputs 3 5 Analog Keyboards Bosch LTC...

Page 10: ...ed dry location 5 1 2 Ensure that the power source is the proper stable operating voltage Refer to APPENDIX A for technical specifications 5 1 3 Ensure that all external equipment and connections to the DÉSAXL are made 5 2 Front Panel Inside the DÉSAXL door 1 System HDD LED 2 Run LED 3 System Power LED 4 Secondary Power Switch 5 USB Port 6 Floppy Disk Drive 7 Removable OS Drive 8 DVD writer 8 6 4 ...

Page 11: ...d Control Connector Blocks 6 Printer Port Pink DB 25 7 IEEE 1394 Port 8 Ethernet Port 9 Audio In Light Blue 10 Primary Power Disconnect Switch 11 Power Cord Receptacle 12 Mouse Port Green 13 Keyboard Port Purple 14 COM 1 15 USB Ports 16 Audio Out Light Green 17 PC Monitor Port Blue 18 Microphone In Pink 19 LTC 8508 01 Looping Cable 20 Grounding Shield Lug NOTE Twisted shielded cable is required fo...

Page 12: ...iphase wire from the AutoDomes to the biphase output on the LTC 8786 The connections are polarity sensitive positive negative S shield Use 18 2 twisted shielded Belden 8760 or equivalent 5 5 4 The LTC 8786 is recommended for use in most cases and supports 16 biphase outputs Control of AutoDomes should only be done from an LTC 5136 or the GUI interface at a time not to be used simultaneously NOTE T...

Page 13: ... Monitoring Functions Remote Event Status NOTE The Watchdog cable must always be used so the system functions properly 5 9 1 Locate the supplied cable with the two DB 9 connectors and one DIN connector end 5 9 2 Connect the DB 9 connector end that has two cables going into it to COM 1 5 9 3 Connect the DIN barrel connector to the receiver on the Watchdog Card 5 9 4 Connect the DB 9 connector with ...

Page 14: ...reen The DÉSAXL will immediately start and launch the DÉSAXL application The following screens appear while the DÉSAXL application is loading 6 2 First Time Login 6 2 1 Once the DÉSAXL application has launched login to operate the system 6 2 2 Click Login 6 2 3 The default User Name and Password for Administrator is desa desa lowercase letters 6 2 4 The DÉSAXL application login button now displays...

Page 15: ... 2 Exit the DÉSA Application as follows Push and hold CTRL ALT SHIFT and then F4 to exit the DÉSA Application only if you are the Administrator 6 3 3 Click START and logoff When promted if you are sure click logoff and IMMEDIATELY hold down the left SHIFT key 6 3 4 The logon to Windows dialog appears 6 3 5 The Username and Password are as follows a Username administrator b Password desa 6 3 6 Wind...

Page 16: ... Free is the amount of free space available before the video starts to Recycle Overwrite 7 3 Time and Date Display Displays the current time and date of the Server NOTE Do not change the time and date of the server while the DÉSAXL application is running Close the DÉSAXL application before making any changes Refer to SECTION 6 3 1 Quad 2 Five Plus One 3 Three By Three 4 Eight Plus Two 5 Twelve Plu...

Page 17: ...Button This button restricts access to the system functions requiring a user name and password to access the system When logged out of the system the functionality of the system is restricted to the configuration of the Logout User 7 10 Quit Button Quit can only be used if the system user has been given permission in the Password Setup menu SECTION 8 9 to exit the system 7 11 Item Description In C...

Page 18: ...ions and troubleshooting 7 15 Location The Location is found in the top center of the DÉSAXL s main screen and displays information about the unit 7 16 Server Code The Server Code is found in the top center of the DÉSAXL s main screen and is used by the remote software to identify each DÉSAXL System This code must be seven 7 characters long and unique for every unit ...

Page 19: ...s open while moving between tabs When finished the Integrated Keyboard must be closed NOTE At times a keyboard may need to be reconnected to the system so be sure the supplied keyboard is available for advanced system configuration 8 2 Save and Close Buttons 8 2 1 Save is used to retain any changes made in each of the Setup menu tabs 8 2 2 To save your changes press Save before moving between tabs...

Page 20: ...NOT automatically re enable these settings The settings need to be manually restored 8 3 1 2 Cam ID enables logical numbering of every camera in the system typically used when multiple DÉSAXL comprise a large system Cam ID directly relates to AutoDomes connected to the DÉSAXL system for control The Cam ID must match the address of the connected AutoDome 8 3 1 3 Name allows a camera description to ...

Page 21: ...en normally closed or normally open alarm input 8 3 2 3 Sound File Any wav file can be loaded into the Wave folder in the following directory C DESA Wav This wav file provides audible indication that an alarm input has been triggered example greeting wav 8 3 2 4 Recording Time By Sensor Motion sets 1 to 60 seconds of global post alarm recording once an alarm has been triggered 8 3 3 Control Setup ...

Page 22: ...d press this button to reset the sequencing 8 3 5 PTZ Camera Alarm Preset Setup 8 3 5 1 This option can only be used if there is a camera with PTZ selected in Camera Setup 8 3 5 2 Press Alarm Preset to display the Setup screen 8 3 5 3 Cameras with PTZ selected appear on the left side of the chart and across the top are the sensors alarm inputs 8 3 5 4 Click the box intersecting the desired camera ...

Page 23: ... 4 Motion Setup Tab 8 4 1 Camera Selection Select the camera number to be set for motion detection sensitivity and individual camera adjustment 8 4 2 Motion Detection Area Use the mouse to draw the area in which activity is to be detected Up to five detection areas can be defined for each camera ...

Page 24: ...le for each camera These options affect the way the video is displayed and recorded Click Default to set Brightness Hue and Contrast back to zero and the camera type to Color 8 4 7 Setup for All Cameras Area Clear Area Draw are the same as the previously mentioned Area Clear Area Draw but affect ALL enabled cameras in the system 8 4 8 Resolution Options of recording resolution are 160x120 320x240 ...

Page 25: ...ose cameras to display full screen when motion is detected Set the Dwell Time for the video to remain full screen Once the motion has stopped and the dwell time has expired the video reverts to the previous multiscreen display Click No Full Screen to clear the selected cameras from being displayed full screen 8 4 13Set Quad Dwell Time On the main monitor display there is a button that allows seque...

Page 26: ...tions 8 5 Schedule Setup Tab 8 5 1 Simple Mode Scheduling Simple Mode provides one 24 hour period to schedule all days of the week All time slots can be adjusted down to the second or up to an hour by clicking the desired time frame and moving the slide bar up or down to the desired time ...

Page 27: ...ndependent scheduling of that camera and it s own 24 hour time period 8 5 2 2 Weekday 24 blocks are available for selection of recording type for that time frame Each block can have a different type of recording set In Advanced Mode Weekday can have it s own times to record or not record 8 5 2 3 Saturday 24 blocks are available for selection of desired recording type for the time frame Each block ...

Page 28: ...or rotate on a Monthly or Yearly basis Setup the Sunday Custom record schedule and click Set Custom Select the Month via the or arrows click the day of the month and select Rotate If Rotate is left as None it will occur on that day only never again Once the Month Day and Rotate are set click Add to add it to the Custom List NOTE Once the Custom Schedule has been set you must change the schedule ba...

Page 29: ...on trigger The five 5 seconds is global and cannot be adjusted Sensor Prealarm Recording based on Sensor input activation adding an additional five 5 seconds of video prior to the Sensor The five 5 seconds is global and cannot be adjusted Motion Sensor Prealarm Combines the recording capabilities based on Motion or Sensor activation adding the five seconds of video prior to the Motion or Sensor re...

Page 30: ...ach screen division The darkened buttons are the currently selected cameras lighter buttons are unselected Large Screen Camera Selection On screen divisions with the option of a Large Screen display choose the camera to show in that display Choose one of the selected camera buttons darkened otherwise the chosen camera will not display Default and Default All Default sets the selected screen divisi...

Page 31: ...TN ISDN Leased Circuit Router all means of communications or No connection If selected Remote Clients will not be able to connect to the local server 8 7 1 2 Live Video Stream Bandwidth There are five 5 bandwidth settings per connection 256Kbps 512Kbps 768Kbps 1 5Mbps 2 0Mbps 8 7 2 Frequency of Call Out The number of calls in a 24 hour period for the system to communicate to a remote location ...

Page 32: ...is option cannot be used if emergency notification is via IP Address LAN Two 2 phone numbers may be entered Emergency IP Address may be via the Internet LAN or WAN Two 2 IP addresses may be entered for remote notification Transfer Time is the time allowed for remote notification If the transmission is not completed within the designated time the DÉSAXL will stop transmission in minutes NOTES 1 A t...

Page 33: ...rance of the main screen Select from three Clock Display Formats available for time date display 8 8 2 DÉSAXL Server Information 8 8 2 1 DÉSAXL Server Version is shown in the following format x xx 8 8 2 2 User Name displays the Windows Operating System logon name Computer Name indicates the current PC name Disk Drive indicates the current PC configuration and hard drive space Computer indicates th...

Page 34: ...cified drive It is recommended to specify a removable media type i e CD floppy etc Assign a meaningful name to associate to the current setup i e date unit location and click OK Click Import to import a system setup This may require insertion of removable media i e CD floppy etc Select the file to import and click OK Restart the PC or close and restart the DÉSAXL application 8 9 Password Setup ...

Page 35: ...trator and has all privileges 8 9 2 Adding and Deleting Users Clicking Add User grays out all options until the User Name Password and Confirm Password are entered Users can be deleted by selecting the user and clicking Delete You must have access to the Password Setup tab to delete passwords 8 9 3 Setup List and Enable Camera The Setup List shows all functions available to select or deselect per ...

Page 36: ... Audio save enabled checkbox allows disallows single channel recording of audio with associated video The Audio playback enabled checkbox allows disallows playback of the audio Audio playback must be enabled in order to review audio with associated video 8 10 2Camera Select the Camera that is to have the audio recording associated with it ...

Page 37: ... 11 1 System restart time It is recommended although not required that the system be restarted on a regular basis to free up resources This will occur weekly 8 11 2 Watermark Check or uncheck the checkbox to use Watermark or not Check Display Watermark protect image for visual indication that watermarking is enabled ...

Page 38: ... 17 2004 DÉSAXL Instruction Manual System Setup Options 8 11 3 Backup Click Backup settings to open the Setup Backup schedule screen Use this function to set a schedule for the system to backup on a one time weekly monthly or yearly basis ...

Page 39: ...e media is full and backup will not be completed If Scheduled Backup stops because storage media is full to resume the Scheduled Backup you must 1 Delete contents of the storage media 2 Delete the Scheduled Backups that were stopped and 3 Reconfigure all Schedules 3 The Rotate option is used to schedule a backup on a regular basis Options are None one time Weekly Monthly and Yearly 4 Backup start ...

Page 40: ...schedule to be deleted from the list and click Delete 8 11 3 3 Setup Once backup schedule setup is complete click Setup to enable the backup schedule 8 11 4 Video Loss Alarm Video Loss Alarm can be enabled to trigger a control output and or an audible sound It can also be enabled during certain times of the day NOTE Controls must be enabled in the Hardware Setup tab to be selected 8 11 5 Hardware ...

Page 41: ...deo that is already stored on the allocated hard drives Allocate new storage space for video storage Example To add a DVAD JBOD Array once connected to the unit the drive space must be allocated for video storage NOTES Arrays can be added without deleting any of the existing stored video Only Allocation buttons for the unallocated space can be modified The system must be shut down and rebooted to ...

Page 42: ...sition for the E Map NOTE The E Map can be set up in one division and then copied to another division in any cameo location The E Map will take up the camera position in the screen division 8 13 3Import Image Click Find which opens the Windows dialogue box to allow search of any drive or media present on the system Once the directory is specified click Go to load the image NOTES The image must be ...

Page 43: ... camera Repeat for Control and Sensor To delete an item from the E Map check the Delete Camera Control Sensor radio button and click on the items to be removed Check the Delete Image check box to delete the loaded image when Save is pressed 8 14 View Log Records Tab The system logs all activity by the user that is logged in Click Export on the View Log Records screen to store events to disk or rem...

Page 44: ...E mail 1 This checkbox should be checked to enable E mail NOTE E mail Setup is required to be set up for this option to be used in Intelliguard 2 Sending E mail for Sensor Select any or all sensors to send an E mail to if the input is triggered 3 Video Loss Notification via email when any camera displays Video Loss 1 2 3 4 5 6 7 ...

Page 45: ...y in seconds to delay E mail transmission Threshold The time after the delay to allow the transmission to go through 6 Send From Name optional This option describes the system that the e mail is coming from ie DESA 01 E mail Address The sending E mail address 7 SMTP Server IP Can be either the IP address of the SMTP Server or the account ie mail comcast net Port Typically 25 but can be changed to ...

Page 46: ... 46 Bosch Security Systems November 17 2004 DÉSAXL Instruction Manual System Setup Options 8 16 Smart Shield Smart Shield functions are Surveillance without POS installed and Count only installed with POS ...

Page 47: ...mote PC with the DESA remote running 6 Never Update Background Background of the detection area does not refresh 7 Name Assign a name to the detection area 8 Background Refresh Time Seconds of time to refresh the image being captured 9 Detection Size The number of pixels used for detection of an object 10 Detection Sensitivity Sensitivity of the pixel area of the Detection Size 11 Sound Wave File ...

Page 48: ...Measure is a line of measurement for the height or length of an object The line should be drawn in the direction of the starting lowest measurement Then select the Degrees and Units If the ruler is to be displayed in Live Mode select the color of the line to be displayed and recorded on the video whether it is displayed or not ...

Page 49: ... Days of the month are shaded three colors if the system has been recording for one day or more 9 2 1 Gray represents that there s no recorded video for that day 9 2 2 Red represents that there has been some type of recording for that day 9 2 3 Yellow represents that there is recording for that day which is the current day but another day is selected 9 2 4 White represents that it s the current da...

Page 50: ...n a 24 hour period and can be zoomed in by clicking on the hours at the top of the graph 9 3 1 The color bars depict the type of recording that occurred Pink Continuous Recording Blue Motion Recording Red Alarm Recording Green Pre alarm Recording None Nothing has been recorded 9 4 Selecting Information Playback To playback video select the year month day and cameras to view Click on the approximat...

Page 51: ...of icon During playback when a camera is left clicked on it enlarges to full screen By right clicking the image and holding the button while moving you can digitally zoom in by using zoom out using or move around inside the screen using Full Screen Playback Click the Full Screen Playback icon to view video currently being played back in full screen without the GUI interface Single camera or multis...

Page 52: ...st left click on the cameo to be backed up to pull it full screen then click OK NOTE This option only allows backup of images not clips Encrypted Select Encrypted to archive clips to some type of media This option backs up all cameras for the selected time AVI AVI backup offloads video clips per camera in a format readable on most computers 1 2 3 4 5 6 7 8 9 ...

Page 53: ... Select the date and time for the video clips that are to be offloaded 3 Backup Media Click Select Media to open a drive selection box for selection of local or remote drives Available drives are listed NOTE Remote drive backup requires the remote software to be loaded and running minimized ...

Page 54: ...ion is selectable from the Backup screen Once Format CD is selected Roxio Drag to Disc utility launches This utility will format the CD for use as backup media ready for video clips Insert a CD or DVD and click ALT F to start the format process or click the menu icon and select Format Disc When prompted for a label a maximum of 12 characters including spaces can be entered ...

Page 55: ... and Left Top to appear 9 OK when satisfied with selection Cancel to exit without saving 9 7 Bookmark Click the Bookmark icon on the Search screen to set a bookmark for a certain point in the playback screen The starting point must be selected before pressing the icon The following screen will appear Click Add to import the starting date and time providing for a description of the bookmark NOTE If...

Page 56: ...nd white shading Smoothness Sharpness Smooths out the roughness blurriness in the stored video image Noise Reduction Eliminates noise stored in the video image De skew Corrects twisted or skewed video images by flattening or rotating the images for better viewing Gamma Adjusts the value between brightness and contrast for correction of the color of stored video when abnormal Rotation Consecutive s...

Page 57: ...corded or slower 9 13 Smart Motion Search Smart Motion Search allows search for activity in a designated area of the selected camera Click Smart Motion Search to open the Smart Search window Icon Description Opens the Smart Motion Search window Click this button to toggle the Smart Motion Search On and Off Starts searching the selected area for motion activity Toggles the Smart Motion Search resul...

Page 58: ...otions as text click the Text icon 9 14 Remote Web Viewer The Remote Web Viewer provides live video viewing from any DESA with Internet Explorer 5 5 or higher Connecting To connect enter the IP Address of the DESA recorder into the URL line of Internet Explorer The following screen appears for entry of Site Code Username and Password ...

Page 59: ...Warning screen click Yes to load additional components Once connected the following screen appears Select the camera s for viewing by clicking the appropriate numbered button s at the bottom of the screen and click Live NOTE All available cameras will be automatically selected and displayed LIVE ...

Page 60: ...pting to Version 5 2 or greater Versions below 5 2 cause installation issues 10 2 Loading the DESAXL Remote Client The software is located on the DESAXL Client Software CD contained in the two CD package supplied with the unit Insert the CD If Autorun is enabled on your PC the install application will automatically launch If not click Start Run and browse to the CD drive containing the disk Select...

Page 61: ...ore connection searches video backup on the remote computer or CD DVD After connection searches video on the local DÉSAXL SETUP see SECTION 10 3 1 for further information Before connection configures Remote Client software After connection allows modification of a subset of the DÉSAXL Server settings CONNECT DISCONNECT to the active DÉSA Server s live feed MULTI SITE is only applicable when the re...

Page 62: ...o on the Remote Client 4 Remote Video Recording Live video storage designation on the remote PC for later search and review or streamed from the server A Record live video If checked video displayed during a remote connection is also written to the local hard drive storage specified by the Select Drive setting NOTE This consumes disk space at a fairly rapid rate and may fill up local hard disk sto...

Page 63: ...on is made using whichever Local Area Network is active per Windows This setting is also used for DSL or cable modem connections Regarding networks The DÉSAXL is a network device Some form of network is required between the Remote Client and the DÉSAXL Server When both are on the same Local Area Network LAN simply set the name and IP address and click Connect on the main screen Firewall Network Ad...

Page 64: ... Remote Controlled Backup 8090 Center 10 3 1 4 Other Tab Clock display format Use this dropdown box to select a clock display YYYY MM DD Year Month Day MM DD YYYY Month Day Year DD MM YYYY Day Month Year Date and Time Display The date and time display on the Remote Client reflects that of the PC same as displayed in the lower right hand corner of the desktop NOTE If the DÉSAXL Server is located in...

Page 65: ...selected Cameras selected 10 3 3 Two Way Audio Feature This feature allows the operator at the DÉSAXL Local Server to communicate verbally with an operator at a connected Remote Client Both sites must have a microphone and speakers connected via Audio Connections see Audio Connections on the DÉSAXL Local The best communication is via PC headset providing both microphone and speakers hands free to ...

Page 66: ...list under the group named and appears on the Main Screen in the window titled Server Info To connect in the future double click Server Id in the Server Info window 10 4 2 To connect open the group by clicking the plus sign at the top left of the screen select the desired DÉSAXL Server and click Connect The Connecting to Local window displays the progress of the connection If successful the window...

Page 67: ...lling the list cameos for the stream associated with each DÉSA show timestamps in red characters Other connected DÉSAXLs have timestamps in white characters 10 4 4 Connected Display 10 4 4 1 Connected Locals Display To view video select the desired cameras by clicking on each Camera indicator Once the cameras have been selected click Live to begin video display To add cameras first Stop the video ...

Page 68: ...ded if the system has been recording for one day or more 1 Gray No recorded video for that day 2 Red Some type of recording is present for this day 3 Yellow There is recording for this day which is the current day but another day is selected 4 White The current day is selected and recording 4 Select Camera to search by clicking the camera buttons Camera buttons indent when selected 5 Click the PLA...

Page 69: ...ck on the Floppy Disk icon 4 Select the Start Date Time and End Date Time 5 Select the Backup Media then click OK 6 After a few seconds a small VCR tape symbol should appear at the top right hand side of the monitor Double click this symbol to check the backup progress AVI backup requires the following steps 1 Save a full backup clip as above 2 Disconnect from the local DÉSAXL then click SEARCH Se...

Page 70: ...rchived video Options are as follows 1 Backup Data is used for video that was saved from the server to the internal HDD or removable media on the Remote Client 2 Removable HDD Drive Data is used for video the has been stored on a HDD that has been removed from the server 3 Server NowScreen is used for searching video that was recorded on the Remote Client when the Record Live Video option is selec...

Page 71: ...a Draw Individual Camera adjustment Setup for all cameras A Area Clear Draw B Screen Size resolution C Quality D Transfer Quality E Color of Motion areas Full Screen when motion Dwell Time and No Full Screen Set Quad Rotation Time Now Screen captures current camera image and stores on Remote Client PC Schedule tab all functions Server Information Tab Server information only Server System Tab Syste...

Page 72: ...l Outputs and Recording Emergency Monitor The Emergency Monitor screen displays realtime events from the Servers Remote notification must be configured to enable this function IntelliUpgrader The IntelliUpgrader allows the Remote Client to upgrade any of the DESA Servers Click Package Select and select the location of the latest software then click OK Click Start Update to connect to the selected ...

Page 73: ...on of the Pocket PC to be installed Once the software is installed on the Pocket PC configure it like the Remote Client Software 1 To launch the DESA Pocket PC application for the first time select Start Programs File Explorer Program Files Desa Desa 2 Select Remote Connect and click ADD 3 A default Group is created or create a new group 4 Enter Server ID 5 Enter the Name of the Remote location Se...

Page 74: ...ck One 1 RJ 45 Ethernet Port 10 100 1000 Base T Standard One 1 SCSI 2 Port HD50 Standard One 1 IEEE 1394 Input Five 5 USB 2 0 Ports 4 Rear 1 Front One 1 LPT Port One 1 RS 232 COM Port One 1 RS 422 Connector via Watchdog Card Removable HDD 80 GB Operating System Only Standard DVD CD writer Standard Formats IR IRW One 1 Keyboard Port PS 2 One 1 Mouse Port PS 2 Electrical Power Supply Pentium 4 Power...

Page 75: ...oncondensing Product Regulatory Compliance Electromagnetic Compatibility EMC Complies with FCC Part 15 and ICES 003 Product Safety Complies with UL and CSA Standards Warranty 3 years Bosch Accessories Optional LTC 8786 60 RS 232 to biphase converter S1363 BNC RCA Converter DVAS DVAD Approved Accessories Third Party Manufacturers StarTech com Starview KVMs Any UPS Uninterruptable Power Supply rated...

Page 76: ...Tel 800 326 3270 Fax 1 717 735 6560 www boschsecurity com Bosch Security Systems B V P O Box 80002 5600 JB Eindhoven The Netherlands Tele 31 40 27 87113 Bosch Security Systems Pte Ltd 38C Jalan Pemimpin Singapore 577180 Republic of Singapore Tel 65 6 319 3486 DESAXL is registered by Bosch Security Systems Inc in the US Patent Trademark Office Roxio is a registered trademark of Roxio Inc ...

Reviews: