


R5906852 /09
F80
84
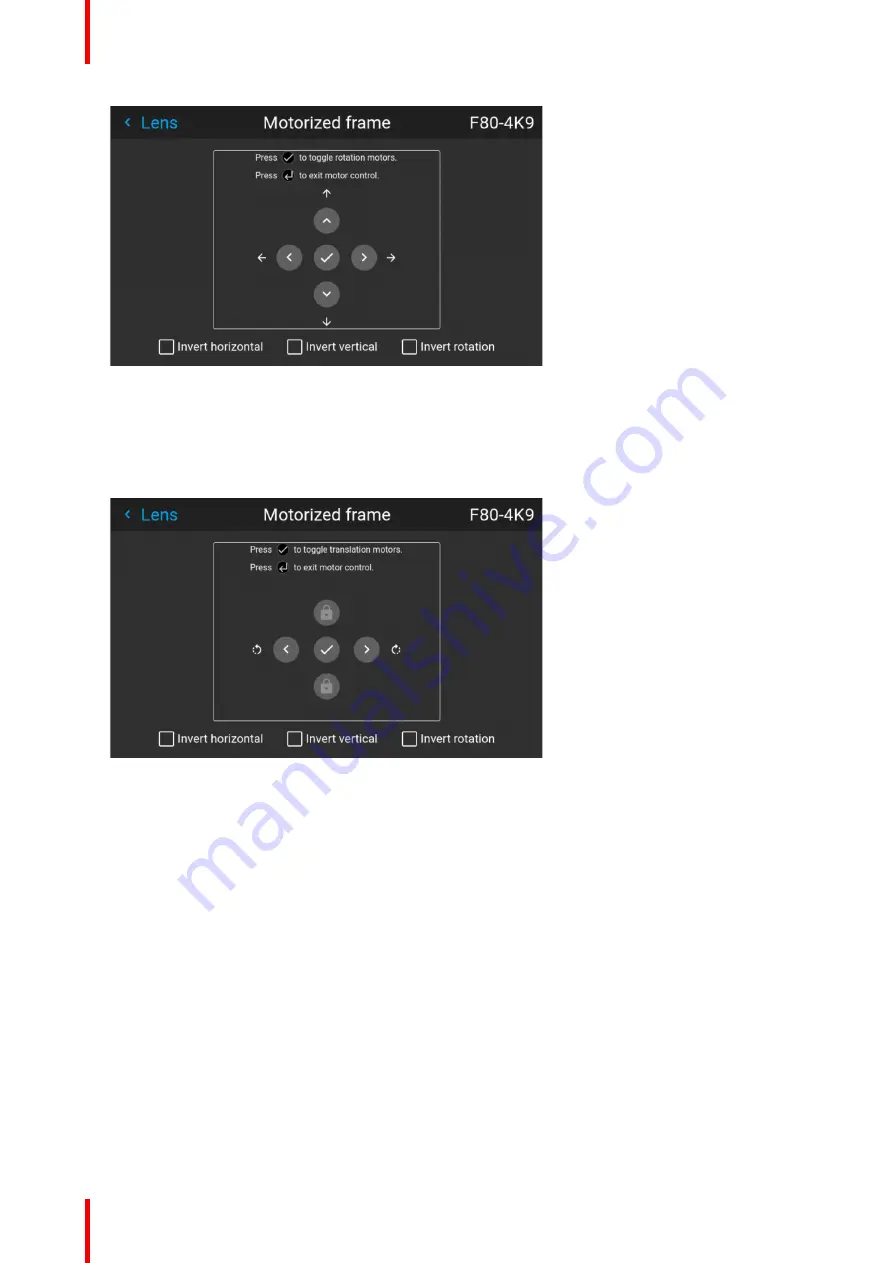
Image 8–11 Example of horizontal and vertical frame shift
3.
Use the ▲ or ▼ button to shift the rigging frame (image) in vertical direction.
Use the
◄
or
►
button to shift the rigging frame (image) in horizontal direction.
4.
Confirm with the OK button.
The frame rotation menu is displayed.
Image 8–12 Example of frame rotation
5.
Use the
◄
or
►
button to rotate the rigging frame (image) either clockwise or counterclockwise.
6.
Confirm with the OK button to return to the frame shift menu, or use the Menu back button to return to the
Lens menu.
8.6 Manipulating the rigging frame, center position
What can be done?
The motorized frame can be forced back to the center position by selecting
Center motorized frame
.
How to reset the motorized frame?
1.
In the main menu, select
Installation
→
Lens
→
Center motorized frame
.
Summary of Contents for F80-Q12
Page 1: ...ENABLING BRIGHT OUTCOMES User Manual F80 ...
Page 22: ...R5906852 09 F80 22 Safety ...
Page 34: ...R5906852 09 F80 34 Getting Started ...
Page 44: ...R5906852 09 F80 44 Remote Control Unit ...
Page 56: ...R5906852 09 F80 56 GUI Introduction ...
Page 62: ...R5906852 09 F80 62 GUI Source ...
Page 78: ...R5906852 09 F80 78 GUI Image ...
Page 146: ...R5906852 09 F80 146 GUI System Settings ...
Page 156: ...R5906852 09 F80 156 Advanced Settings ...
Page 160: ...R5906852 09 F80 160 GUI Status menu ...
Page 176: ...R5906852 09 F80 176 Specifications ...
Page 181: ...181 R5906852 09 F80 Image B 1 HDCP revision information Connector specifications ...
Page 182: ...R5906852 09 F80 182 Connector specifications ...
Page 186: ...R5906852 09 F80 186 Control interface specifications ...
Page 194: ...R5906852 09 F80 194 Regulatory information ...
Page 205: ...205 R5906852 09 F80 DMX chart F ...
Page 209: ......


