


109
R5906852 /09
F80
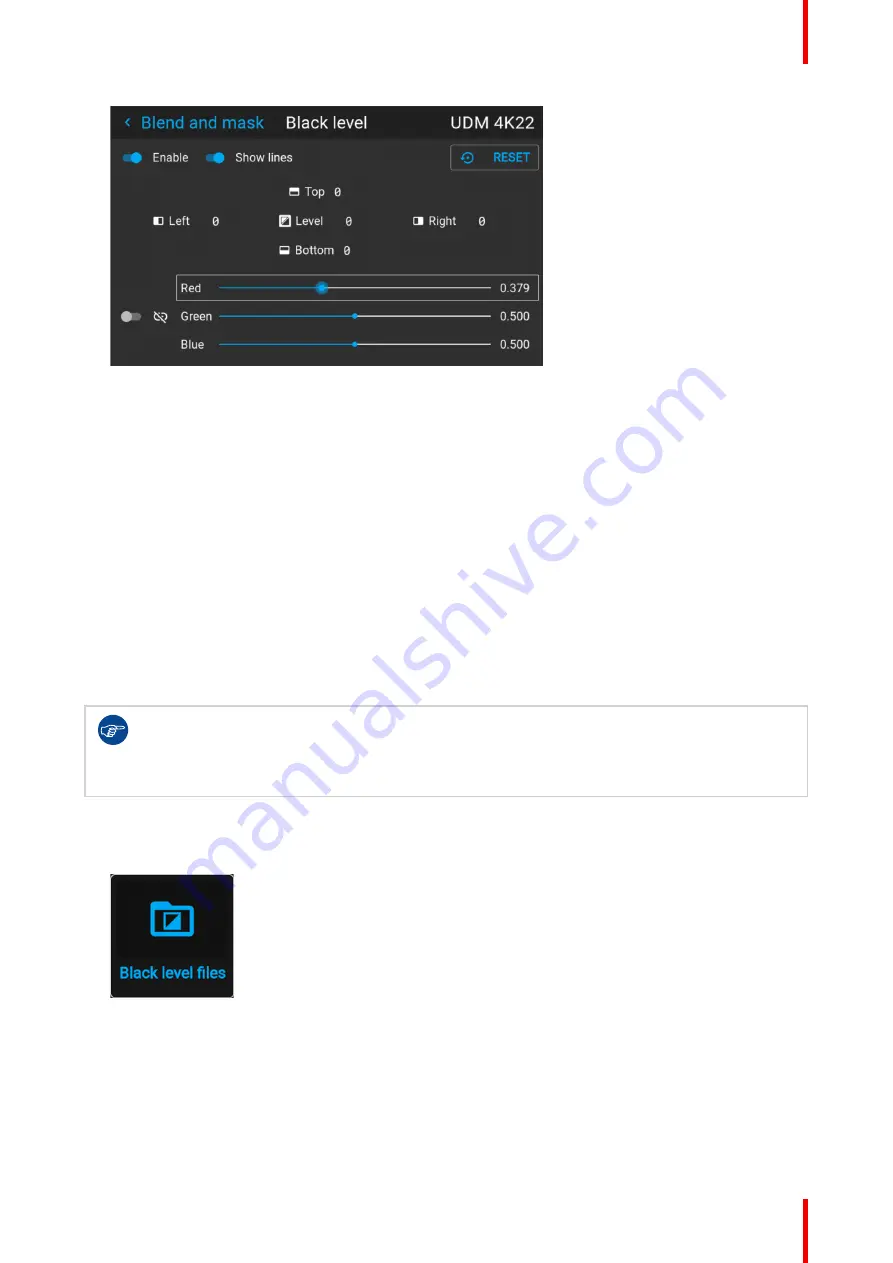
Image 8–72 Example of the default black level menu
2.
Select one of the three sliders on the bottom of the menu (Red, Green or Blue).
3.
Use the left and right arrow keys to modify the gain of the chosen color.
4.
Repeat for every slider until the desired result is achieved on screen.
8.10.6 Black level files
About custom black level files
Next to setting your specific black level adjustment in the GUI, you can also upload or download a custom
black level adjustment file in png, jpeg or tiff format to/from the projector.
To upload or download black Level adjustment files you can use Projector Toolset or upload/download the
black level adjustment file in the format of an XML file. Alternatively, you can contact the “file endpoint” directly
via the curl program or some other tool that supports HTTPS upload.
For more information on uploading/downloading black level files using the Projector Toolset, refer to the
Projector Toolset user manual. For more information on uploading/downloading black level files using curl or
other tools that supports HTTPS upload, refer to the Pulse API Reference Guide.
When uploading custom black level files onto multiple projectors, make sure that the resolution of
the file is supported by the projector you are uploading it to. A mismatch of projector resolution and
black level file resolution will result in a sub-optimal image performance. Verify the supported
resolutions for the specific projector model via the Introspection tool [Introspection – image –
resolution – alpha]. For more info on the introspection tool, consult the Pulse API reference guide.
How to activate an uploaded Black Level adjustment file?
1.
In the main menu, select
Installation
→
Blend and mask → Black level
→
Black level files
.
Image 8–73 Blend and mask menu, Black level files
The
Black level files
menu is displayed.
Summary of Contents for F80-Q12
Page 1: ...ENABLING BRIGHT OUTCOMES User Manual F80 ...
Page 22: ...R5906852 09 F80 22 Safety ...
Page 34: ...R5906852 09 F80 34 Getting Started ...
Page 44: ...R5906852 09 F80 44 Remote Control Unit ...
Page 56: ...R5906852 09 F80 56 GUI Introduction ...
Page 62: ...R5906852 09 F80 62 GUI Source ...
Page 78: ...R5906852 09 F80 78 GUI Image ...
Page 146: ...R5906852 09 F80 146 GUI System Settings ...
Page 156: ...R5906852 09 F80 156 Advanced Settings ...
Page 160: ...R5906852 09 F80 160 GUI Status menu ...
Page 176: ...R5906852 09 F80 176 Specifications ...
Page 181: ...181 R5906852 09 F80 Image B 1 HDCP revision information Connector specifications ...
Page 182: ...R5906852 09 F80 182 Connector specifications ...
Page 186: ...R5906852 09 F80 186 Control interface specifications ...
Page 194: ...R5906852 09 F80 194 Regulatory information ...
Page 205: ...205 R5906852 09 F80 DMX chart F ...
Page 209: ......


