


BEFORE EMBROIDERING
34
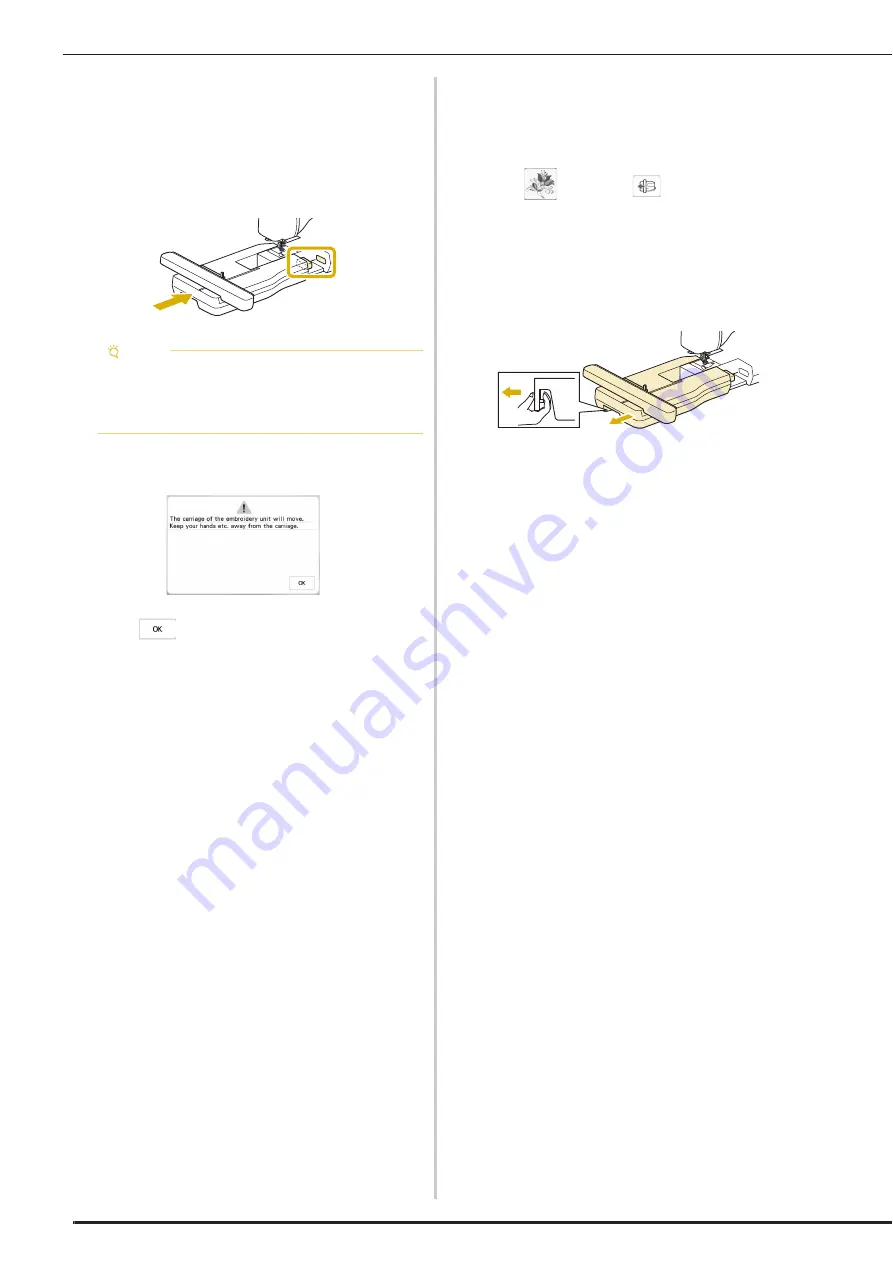
Attaching the Embroidery Unit
a
Turn the main power to OFF.
b
Insert the embroidery unit connection into the
connection port of the machine until it snaps into
place.
c
Turn the main power to ON.
The following message will appear.
d
Touch .
The carriage will move to the initialization position.
Removing the Embroidery Unit
a
Remove the embroidery frame.
• For details on removing the embroidery frame, refer
to “Removing the Embroidery Frame” on page 59.
b
Touch
, then touch
.
The carriage will move to the removal position.
c
Turn the main power to OFF.
d
Press the release button, and pull the embroidery unit
away from the machine.
Note
• Be sure there is no gap between the embroidery
unit and the machine. If there is a gap, the
embroidery patterns will not embroider with the
correct registration.
Summary of Contents for Meridian 2
Page 1: ......
Page 2: ......
Page 10: ...CONTENTS 8...
Page 74: ...ADJUSTMENTS DURING THE EMBROIDERY PROCESS 72...
Page 112: ...IQ INTUITION POSITIONING APP 110...
Page 129: ......
Page 130: ......
Page 131: ......
Page 132: ...D02M4U 001 English 882 W84...


