Appendix II: Air Assist Options
A-Series Dobby Loom Assembly Manual
Page | 158
Installing an Air Shuttle
5)
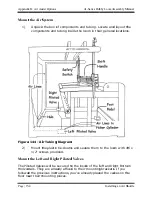
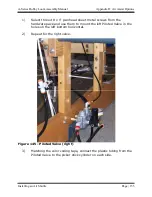
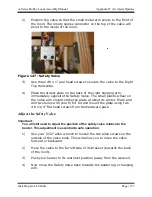
You want to locate the valve so that the plastic wheel on the valve
arm contacts the strike plate.
6)
Continue to move the valve until the small plunger in the valve
body is fully depressed.
7)
Hold the valve in this position and retighten the allen screws. You
may need to move the beater forward to relieve tension on the
valve while you secure it.
8)
Move the beater back again and see that the valve is still correctly
positioned.
9)
If the Safety Valve is working properly, the shuttles will only fire
when the beater is pushed all the way back. Test with the beater in
both positions.
Note:
DO NOT USE YOUR SYSTEM UNLESS THIS DEVICE IS IN PLACE AND
OPERATING.
Binder Clip Tensioning
The wooden binder blocks, in the sides of your drop boxes, act to brake your
shuttle and keep it properly positioned. These blocks are kept under tension
by thin strips of spring steel, two per block. If the binders are properly ad-
justed, the shuttle will come into the box and will not rebound. If a block is
under too much tension, it will impede the travel of the shuttle so that it
doesn't cover the full length of the race.
Much depends on the speed of the shuttle which in turn depends on the
amount of air pressure in your system. Make adjustments to air pressure
before adjusting the binder clips. You'll need to make a few shots in order to
assess the behavior of each binder. If you need to adjust the binder clips,
follow these instructions.

