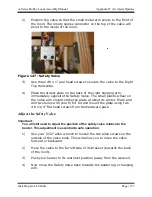
Appendix II: Air Assist Options
Page | 154
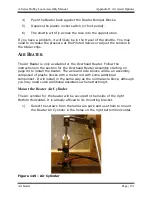
Mount the Air System
1)
Figure
2)
Mount the Left and Right Piloted Valves
The Piloted Valves will be secured to the inside of the left and right Bottom
Horizontals. They are already affixed to their mounting brackets. If you
followed the previous instructions, you've already placed the valves on the
floor near their mounting places
Appendix II: Air Assist Options
154
Mount the Air System
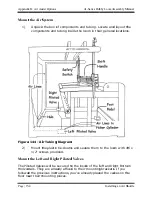
Unpack the box of components and tubing. Locate and layout the
components and tubing inside the loom in their general locations.
Figure 144 - Air Tubing Diagram
Mount the plastic tie
1/2" screws provided.
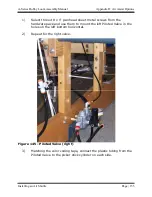
Mount the Left and Right Piloted Valves
Piloted Valves will be secured to the inside of the left and right Bottom
Horizontals. They are already affixed to their mounting brackets. If you
followed the previous instructions, you've already placed the valves on the
floor near their mounting places
Appendix II: Air Assist Options
Mount the Air System
Unpack the box of components and tubing. Locate and layout the
components and tubing inside the loom in their general locations.
Air Tubing Diagram
Mount the plastic tie
1/2" screws provided.
Mount the Left and Right Piloted Valves
Piloted Valves will be secured to the inside of the left and right Bottom
Horizontals. They are already affixed to their mounting brackets. If you
followed the previous instructions, you've already placed the valves on the
floor near their mounting places
Unpack the box of components and tubing. Locate and layout the
components and tubing inside the loom in their general locations.
Air Tubing Diagram
Mount the plastic tie-downs and secure them to the loom with #6 x
1/2" screws provided.
Mount the Left and Right Piloted Valves
Piloted Valves will be secured to the inside of the left and right Bottom
Horizontals. They are already affixed to their mounting brackets. If you
followed the previous instructions, you've already placed the valves on the
floor near their mounting places.
A
Unpack the box of components and tubing. Locate and layout the
components and tubing inside the loom in their general locations.
Air Tubing Diagram
downs and secure them to the loom with #6 x
Mount the Left and Right Piloted Valves
Piloted Valves will be secured to the inside of the left and right Bottom
Horizontals. They are already affixed to their mounting brackets. If you
followed the previous instructions, you've already placed the valves on the
A-Series Dobby Loom Assembly Manual
Unpack the box of components and tubing. Locate and layout the
components and tubing inside the loom in their general locations.
downs and secure them to the loom with #6 x
Piloted Valves will be secured to the inside of the left and right Bottom
Horizontals. They are already affixed to their mounting brackets. If you
followed the previous instructions, you've already placed the valves on the
Series Dobby Loom Assembly Manual
Installing an Air Shuttle
Unpack the box of components and tubing. Locate and layout the
components and tubing inside the loom in their general locations.
downs and secure them to the loom with #6 x
Piloted Valves will be secured to the inside of the left and right Bottom
followed the previous instructions, you've already placed the valves on the


