


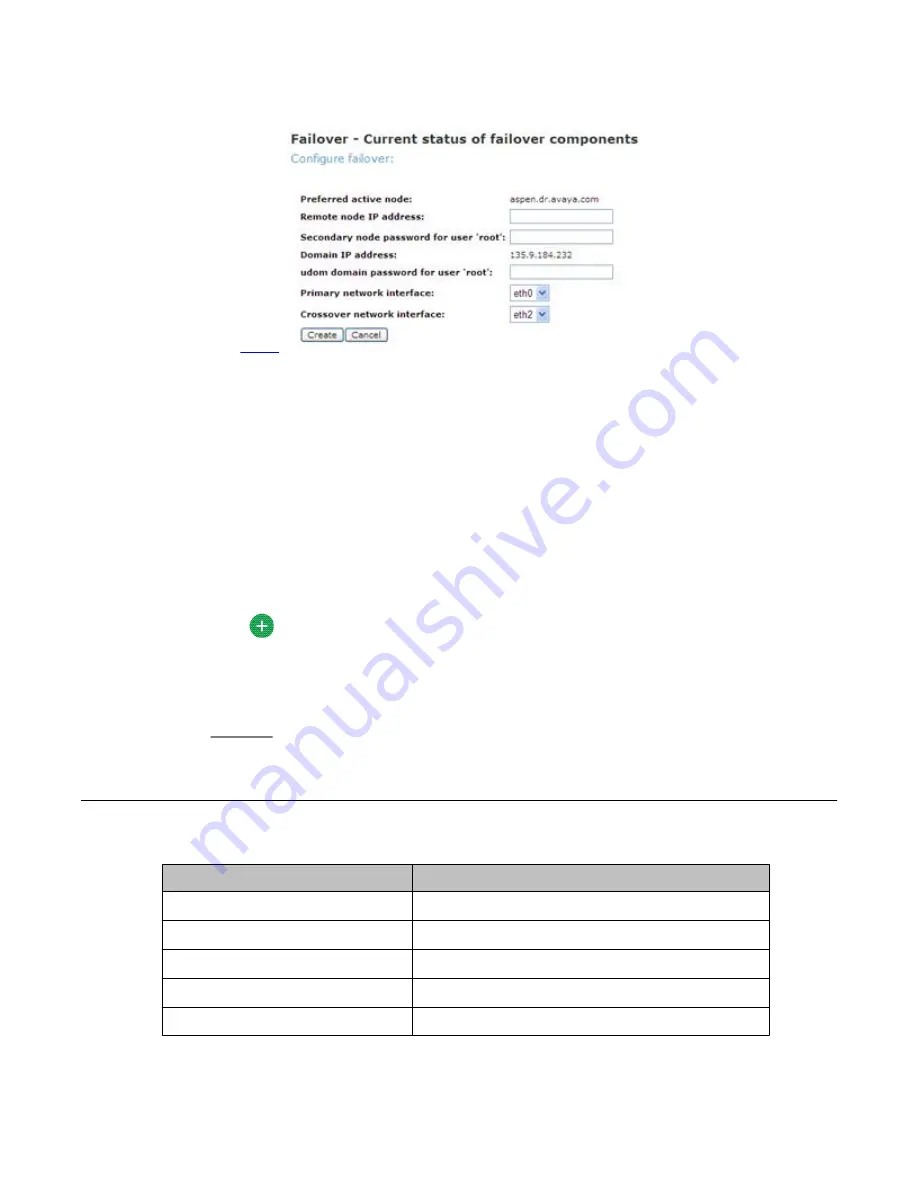
3. On the Failover – Current status of failover components page, fill up the fields. See
4. Click
Create
.
5. Click
Start Failover
only after the system completes the failover creation operation.
The start failover operation blocks all the connections to the System Platform
Management Console, and so you must log in again after the start failover operation
is complete.
6. Log on to System Platform Management Console
7. Click
Server Management
>
Failover
.
You can check the status of the failover components in the Failover – Current status
of failover components page and ensure that DRDB (Distributed Redundant Block
Device) is synchronizing the hard disks of the two servers.
Tip:
When the system finishes the disk synchronization process, you can increase or
decrease the speed of the sync with a slider bar provided on the console. The
default value of this rate is 30 MB. If you set the value too high, it may affect the
performance of the virtual machines running on the active server.
Configure Failover field descriptions
Name
Description
Remote cdom IP address
The secondary Console Domain IP address.
Remote cdom user name
User name for Console Domain.
Remote cdom password
The password for Console Domain.
Primary network interface
The required Ethernet NIC.
Crossover network interface
The required Ethernet NIC.
System Platform High Availability Failover
86 Installing and Configuring Avaya Aura
™
System Platform
April 2010
Summary of Contents for Aura System Platform
Page 1: ...Installing and Configuring Avaya Aura System Platform Release 1 1 1 April 2010...
Page 4: ...4 Installing and Configuring Avaya Aura System Platform April 2010...
Page 8: ...8 Installing and Configuring Avaya Aura System Platform April 2010...
Page 104: ...104 Installing and Configuring Avaya Aura System Platform April 2010...