


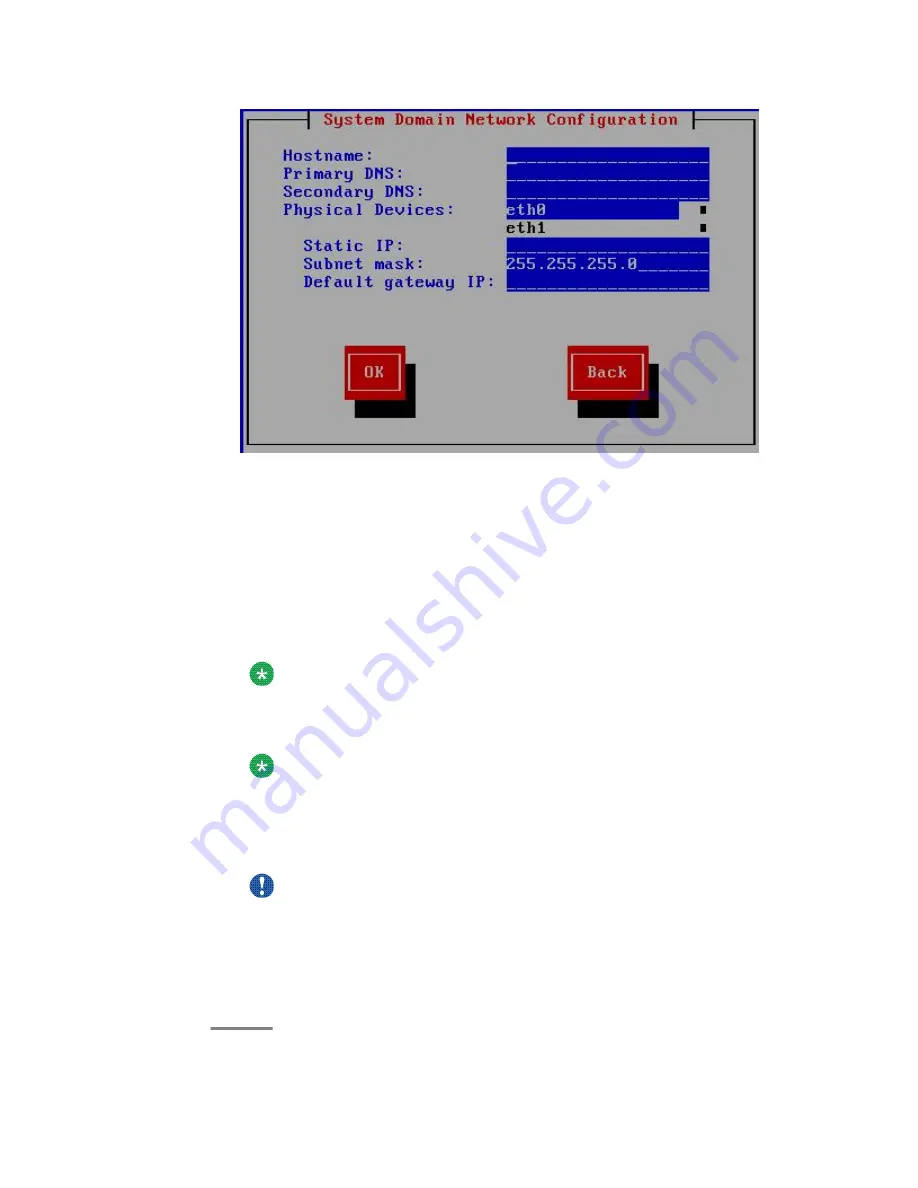
2. To configure eth0 or eth1 or both, perform the following tasks:
• Use the Tab key to highlight the
Physical Devices
field.
• Use the down arrow or the up arrow key to highlight
eth0
or
eth1
in the
Physical Devices
field.
• Complete the
Static IP
field.
The server displays a default value for the
Subnet mask
field. You can modify
this field.
Note:
Avaya recommends that you use the default value of 192.11.13.6 for eth1.
3. Complete the
Default gateway IP
field.
Note:
Although you can enter default gateway for each interface, you should specify
only one default gateway. Specifying more than one default gateway may result
in an unusable internal networking configuration. Specifying one valid default
gateway is mandatory for the System Platform installation.
Important:
Be careful not to use the Tab key on other ethernet interfaces. Set eth0 to the
customer IP address and set eth1 to the services IP address. Do not configure
eth2 and eth3.
4. Use the Tab key to highlight
OK
and press Enter to accept the configuration and
display the System Platform Console Domain Network Configuration screen.
Installing System Platform software
Installing and Configuring Avaya Aura
™
System Platform
April 2010 51
Summary of Contents for Aura System Platform
Page 1: ...Installing and Configuring Avaya Aura System Platform Release 1 1 1 April 2010...
Page 4: ...4 Installing and Configuring Avaya Aura System Platform April 2010...
Page 8: ...8 Installing and Configuring Avaya Aura System Platform April 2010...
Page 104: ...104 Installing and Configuring Avaya Aura System Platform April 2010...