AX-4030
3-7
AUTION MAX AX-4030 OPERATING MANUAL
[Initial settings] Menu
3.4
3.4.1
Setting the System Clock
The internal system clock may not keep the right time after initially installing the instrument or a
long period of disuse. Set the system clock to the exact time. The date and time that appear on the
display and printed reports follow the system clock.
REFERENCE: The instrument supports three date formats: “year-month-day (default)”, “day-
month-year”, and “month-day-year”. This section explains the procedure based on the “year-
month-day” format. If you are using another format, set a new date accordingly. To have the
date format parameter setting changed, contact your distributor.
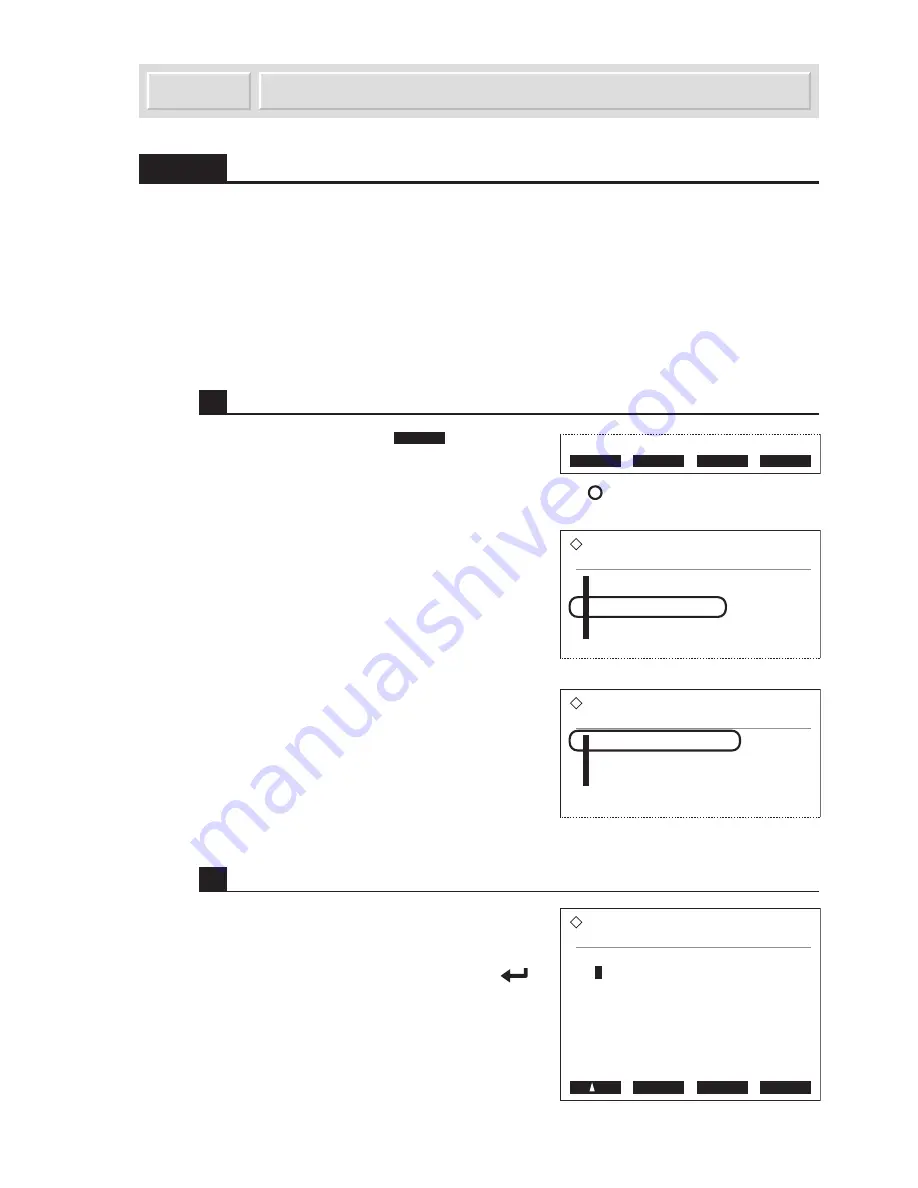
1
Access the setup screen.
1
On the standby screen, press
Menu
to go to the
[Main menu]
screen.
2
Press
3
to go to the
[Initial settings]
screen.
3
Press
1
to go to the
[System clock setup]
screen.
2
Adjust the date and time.
1
Below
[Date]
, enter the date of today.
•
To move through the year, month, and day entry
fields, press the
hyphen
key.
•
To move down to the
[Time]
entry field, press
.
2
Below
[Time]
, enter the current time.
•
To move between the hour and minute entry fields,
press the
hyphen
key.
Menu Meas No. Strip S.G. Cal
Main menu
(0000) 2006-01-09 11:00
1
Parameter settings
2
Results
3
Initial settings
4
5
Maintenance
Go back
Initial settings
(3000) 2006-01-09 11:00
1
System clock setup
2
Printer setup
3
External output setup
4
Beeper volume setting
System clock setup
(3100) 2006-01-09 11:00
Date
<0
5
-10-11>(YY-MM-DD)
Time
<19:25>
BS OK Cancel
Summary of Contents for AUTION MAX AX-4030
Page 1: ......
Page 57: ...1 46 AX 4030 AUTION MAX AX 4030 OPERATING MANUAL ...
Page 115: ...2 58 AX 4030 AUTION MAX AX 4030 OPERATING MANUAL ...
Page 181: ...4 38 AX 4030 AUTION MAX AX 4030 OPERATING MANUAL ...
Page 205: ......
Page 206: ......


